18 Chrome Nails Ideas That’ll Steal the Spotlight
Ever tried chrome nails at home and ended up with a streaky mess instead of a mirror finish? You’re not alone. Almost every failed attempt comes down to one skipped step, not a lack of skill.
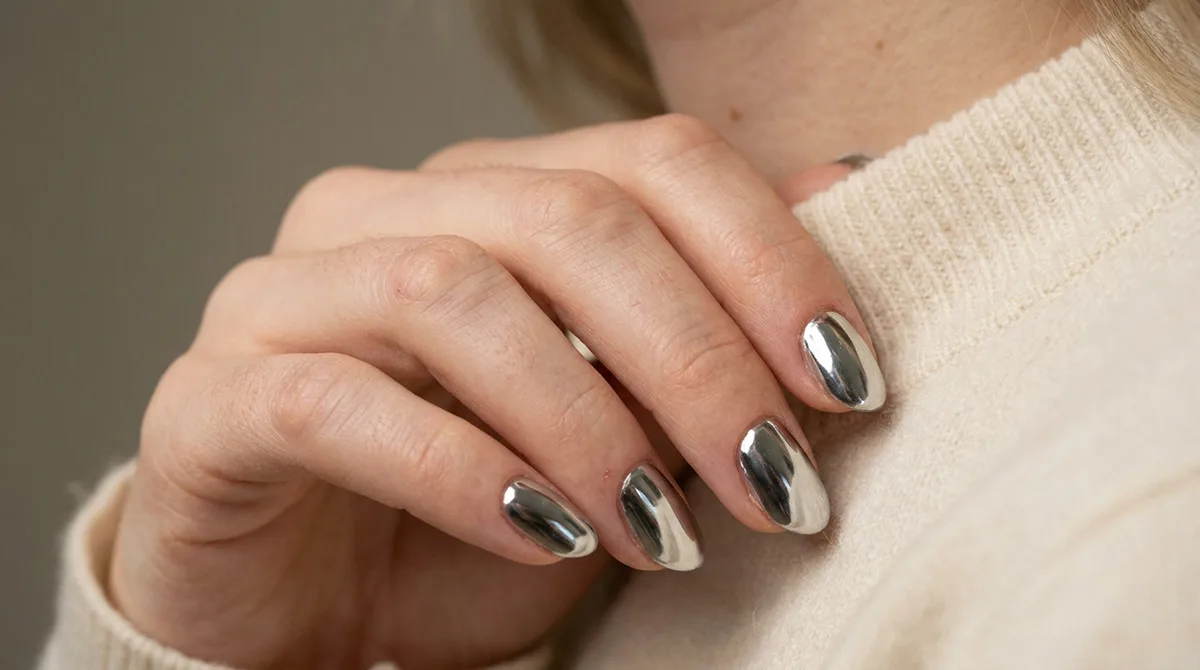
Chrome nails turn your fingertips into tiny mirrors that catch light from every angle, which is exactly why the look keeps stealing the spotlight on TikTok and in salons everywhere. The metallic finish photographs better than almost any other manicure style, and once you see it in person, it’s easy to understand the hype.
This guide fixes the guesswork. You’ll find the DIY method, the salon method, and 18 designs that go past plain silver, each one paired with the exact technique that makes it work instead of just a photo to admire.
What Are Chrome Nails?
Chrome nails get their mirror finish from a fine metallic pigment called chrome powder. You (or your nail tech) rub this powder over a cured, sticky top coat until it turns reflective. The result looks like liquid metal frozen mid-shine. Some people search for this look as mirror nails or a metallic manicure.
The trend started in Korea and Japan. It spread worldwide through K-beauty influence, and now it’s everywhere. Chrome isn’t glitter, and it isn’t foil either. Colors range from classic silver to rose gold, blue, and black.
Most chrome pigments need a gel base to stick well. Regular polish works too. But without a gel top coat sealing things in, the shine fades faster.
How Chrome Differs From Glitter and Foil
Glitter scatters light in tiny flecks. Chrome does something different. It bounces light back as one smooth reflection, closer to an actual mirror than a sparkly polish. That’s also why people call this style mirror nails.
Foil works differently still. Foil transfers a printed sheet onto wet adhesive, so you get patterns and texture. Chrome powder buffs directly onto a cured top coat instead, so you get a flat, continuous metallic surface with pure shine and no pattern at all. That’s why chrome photographs so well under daylight or a phone flash. It also tends to outlast foil, since foil pieces can lift at the edges over time while a buffed chrome surface stays even until the top coat itself wears down.
How to Get Chrome Nails at Home
You don’t need a salon budget for this. A basic chrome nail kit costs between $10 and $25 online. One jar of pigment lasts for dozens of manicures, so it’s a solid investment either way.
Tools You’ll Need
Grab these before you start:
- A base coat and your chosen gel or long-wear polish
- A non-wipe top coat
- Chrome nail powder in your color of choice
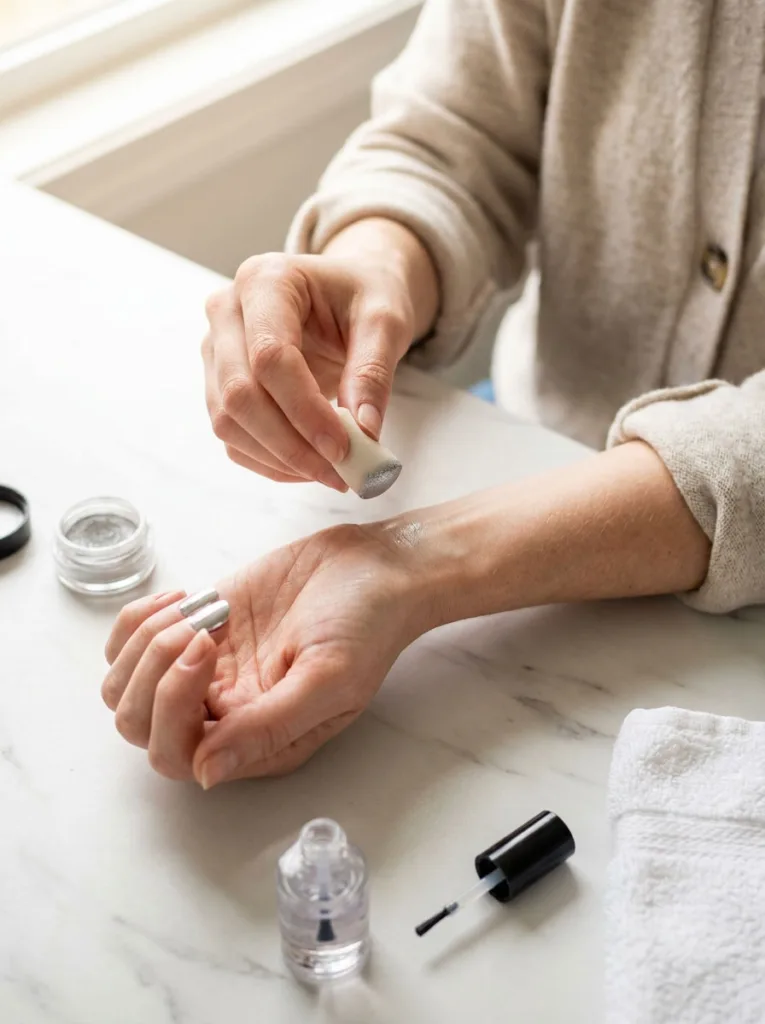
- A sponge or silicone applicator
- A UV or LED lamp if you’re using gel
Step-by-Step DIY Application
Start with clean, shaped nails. Push back your cuticles first. Buff the surface lightly so polish grips better.
- Apply a base coat and let it dry completely.
- Paint two thin coats of polish, curing or drying between layers.
- Apply a non-wipe top coat and cure under your lamp.
- Rub chrome powder over the nail in small circular motions.
- Buff gently until the surface turns fully reflective.
- Seal everything with one more layer of top coat.
Common Mistakes to Avoid
The biggest mistake? Skipping the non-wipe top coat. Regular top coats leave a sticky layer that repels the powder, so chrome never bonds evenly. Can’t find chrome nail powder locally? Amazon and Walmart both stock starter kits with everything included.
A few small habits fix most streaking problems fast:
- Work in a well-lit space so you can spot patchy areas as you buff.
- Use a silicone-tipped applicator. It picks up powder more evenly than a sponge, and it only costs a couple of dollars.
- Streaky first attempt? Add another thin top coat layer, cure it, then reapply the powder while it’s still sticky.
Most beginners need two or three tries before it looks fully even. That’s normal, so don’t get discouraged.
How to Get Chrome Nails at a Salon
A professional set typically runs $45 to $80. Price depends on your city and whether you add extensions. The whole process takes about 60 to 90 minutes.
What to Expect During Your Appointment
Salons use professional-grade gel systems paired with chrome pigments in shades like cobalt, pearl, and mirror silver. The layered approach gives a longer-lasting, more even finish than most at-home attempts manage.
- Technicians buff the nail plate first.
- Then they apply a bonding base.
- Gel color gets built up in thin layers.
- Everything gets sealed with a glow top coat.
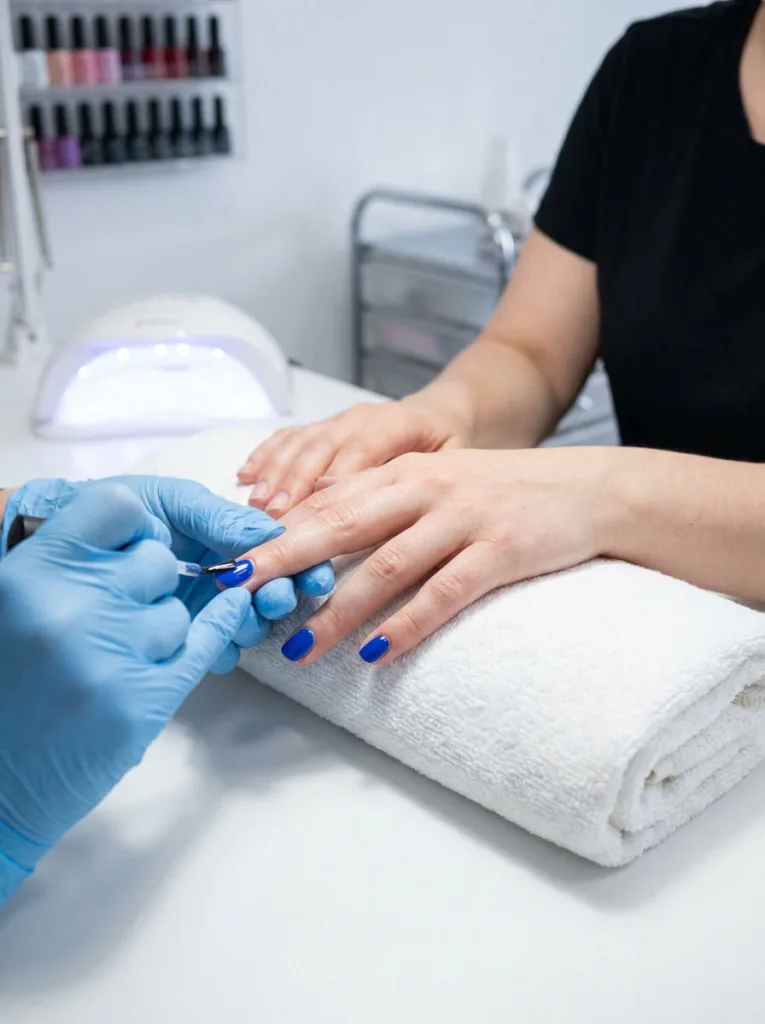
One tip worth asking for: have your tech cap the free edge of each nail with top coat. This single step stops the metallic layer from lifting or chipping at the tips. Tip-chipping is the most common failure point on chrome sets, so it’s worth the extra thirty seconds.
Salon Perks You Can’t Get at Home
A salon visit also gets you shades that are hard to find in drugstore kits, like true cobalt chrome or pearl chrome. Techs mix and layer colors underneath the powder, creating custom tones you can’t buy pre-made anywhere. Found a look you love in a photo? Bring it to your appointment. Chrome pigment reads differently over dark bases versus light ones. Your tech needs your target shade before they start mixing.
DIY vs. Salon: Quick Comparison
| DIY at Home | Salon Visit | |
| Cost | $10-$25 for a full kit | $45-$80 per set |
| Time | 30-45 minutes | 60-90 minutes |
| Shade range | Limited to what your kit includes | Custom-mixed, salon-exclusive tones |
| Best for | First-timers, budget manicures | Longer wear, hard-to-find shades |
18 Chrome Nail Designs That’ll Steal the Spotlight
Chrome works on almost any base color. That’s why the design options run so far past plain silver. Here are 18 looks that mix classic appeal with fresh 2026 energy. Pick one based on your skin tone, the season, or how bold you’re feeling today.
1. Classic Silver Mirror
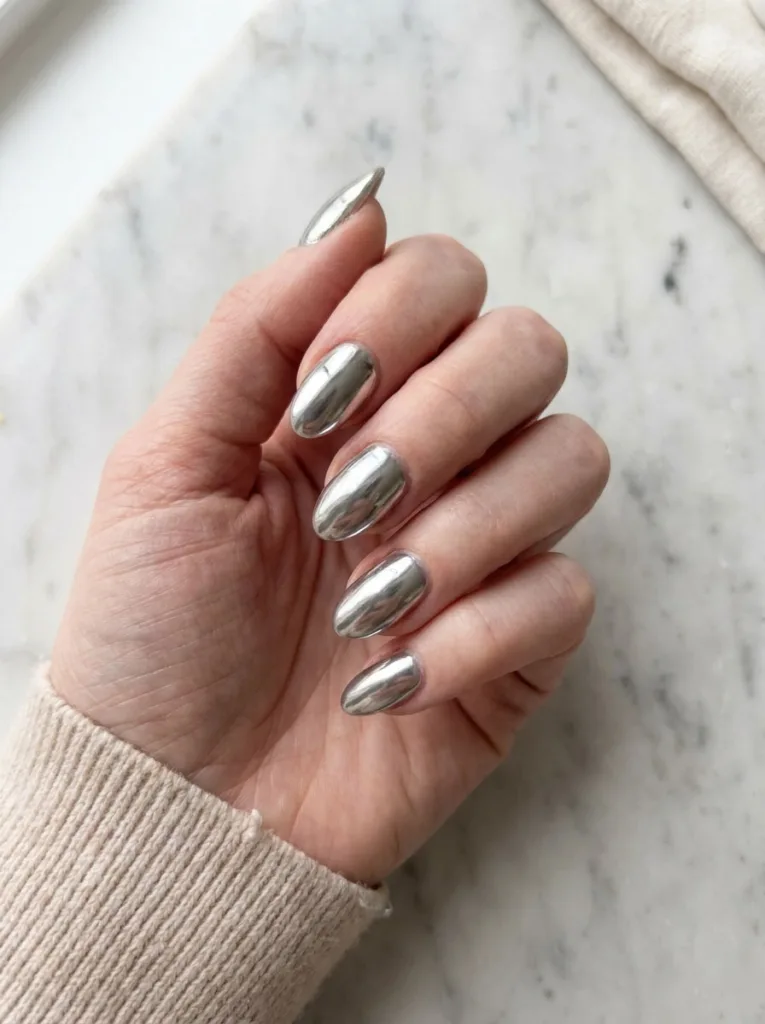
Use pure silver pigment straight from the base method above. You don’t need any color underneath it. Silver is the least forgiving of streaks, so buff in one direction instead of circles for your final pass. Circular buffing on silver tends to leave faint swirl marks that show under bright light. If this is your first attempt at chrome, start here anyway. Any streaking is easier to catch and fix on silver than on a darker color.
2. Rose Gold Chrome

Paint a warm nude gel underneath, not white or clear. A cool-toned base pulls the pink out of the pigment and leaves it looking closer to plain silver. Buff the powder in small circles until the nude disappears completely under the shine. Pair this one with a square shape. The flat, wide surface holds the warm tone more evenly than a tapered or almond tip does.
3. Black Chrome
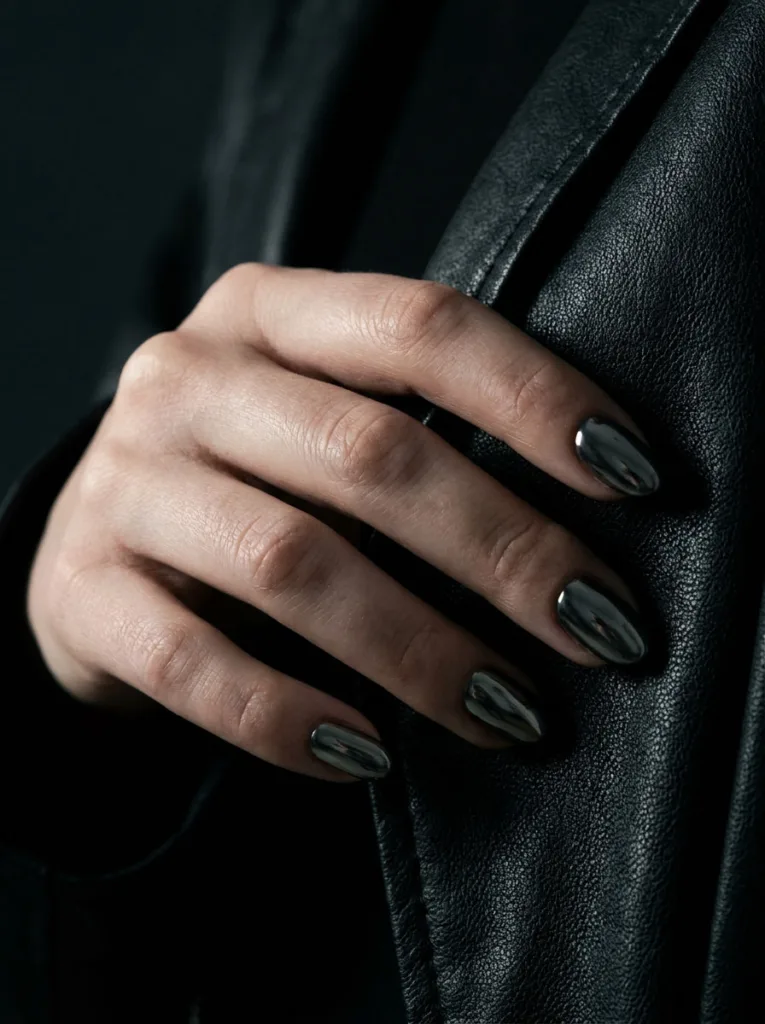
Apply two full coats of opaque black gel before you touch the chrome powder. One coat alone reads as dark grey once the pigment goes on, not true black. Cure each layer fully before moving to the next step. Because dark bases show fingerprints fast, wipe the surface with a lint-free pad right before your final top coat seals it in.
4. Distressed Black Chrome
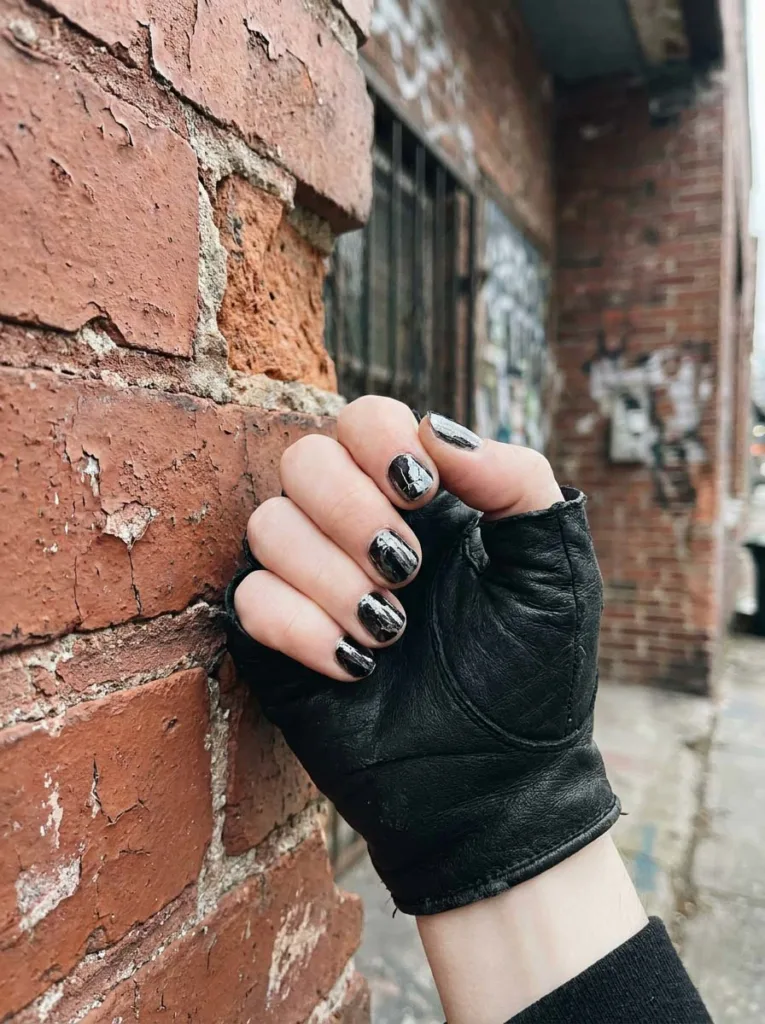
Build the black base the same way as above, then apply chrome powder as usual. Before it fully sets, press a small piece of crumpled plastic wrap into the wet pigment and lift it straight up. Pressing too hard smudges the whole effect, so use light, even pressure. Seal with top coat within a minute or the texture starts to flatten out on its own.
5. Chrome French Tips
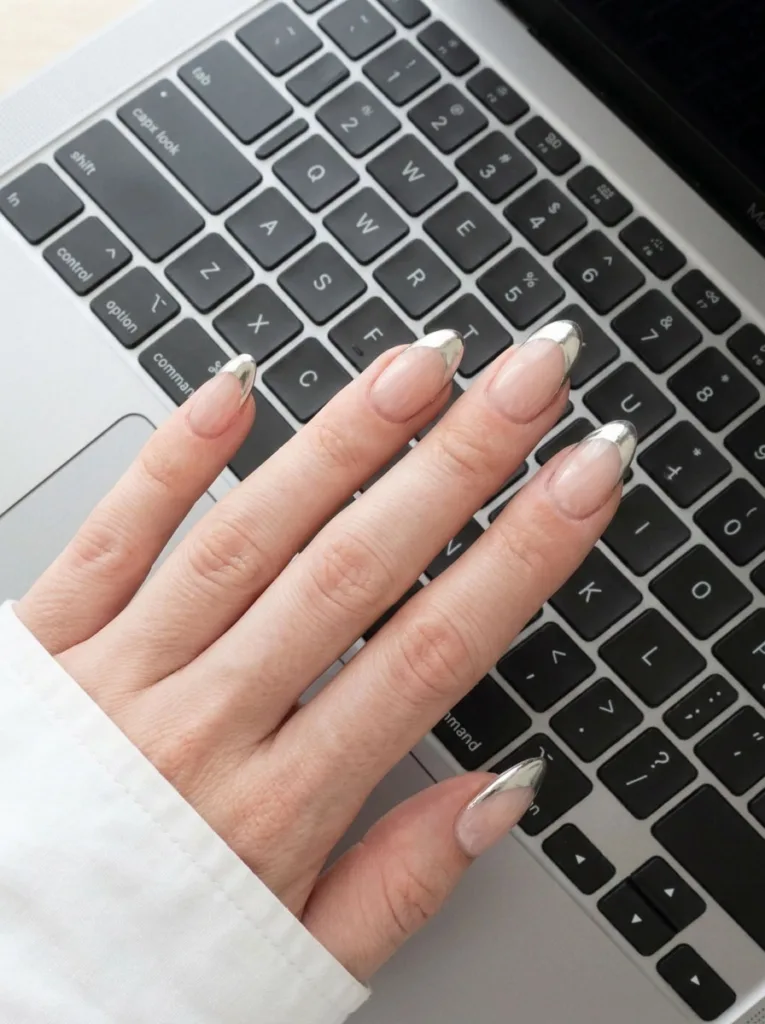
Apply nail vinyl tape just below where you want your tip line to start. Rub chrome powder only above the tape, then peel it off before it cures. This keeps the line sharp in a way that freehand powder application can’t match. Skip the tape and your tip edge will look feathered instead of crisp, since chrome makes any wobble more visible than regular polish.
6. Chrome Ombre
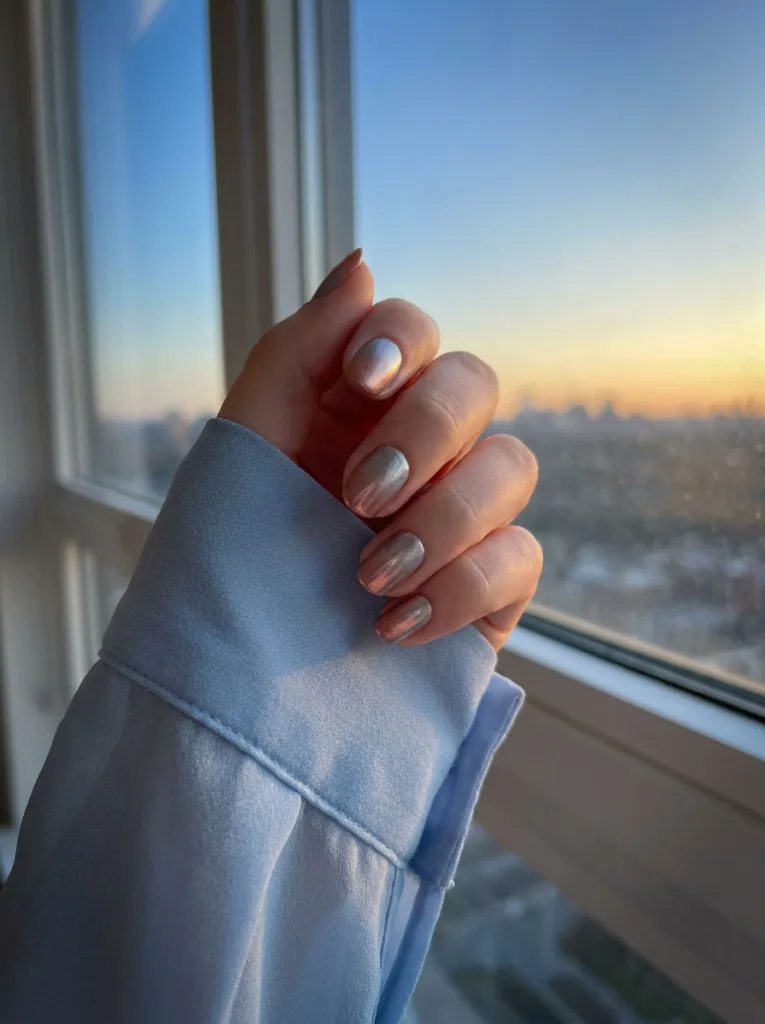
Load one powder on your applicator and rub it from the cuticle toward the middle of the nail. Load a second color and work from the tip inward, overlapping in the center while the top coat is still tacky. You have about 60 seconds before the tack fades, so work fast. Silver-to-rose-gold blends the most smoothly since the tones sit close together.
7. Cobalt Blue Chrome
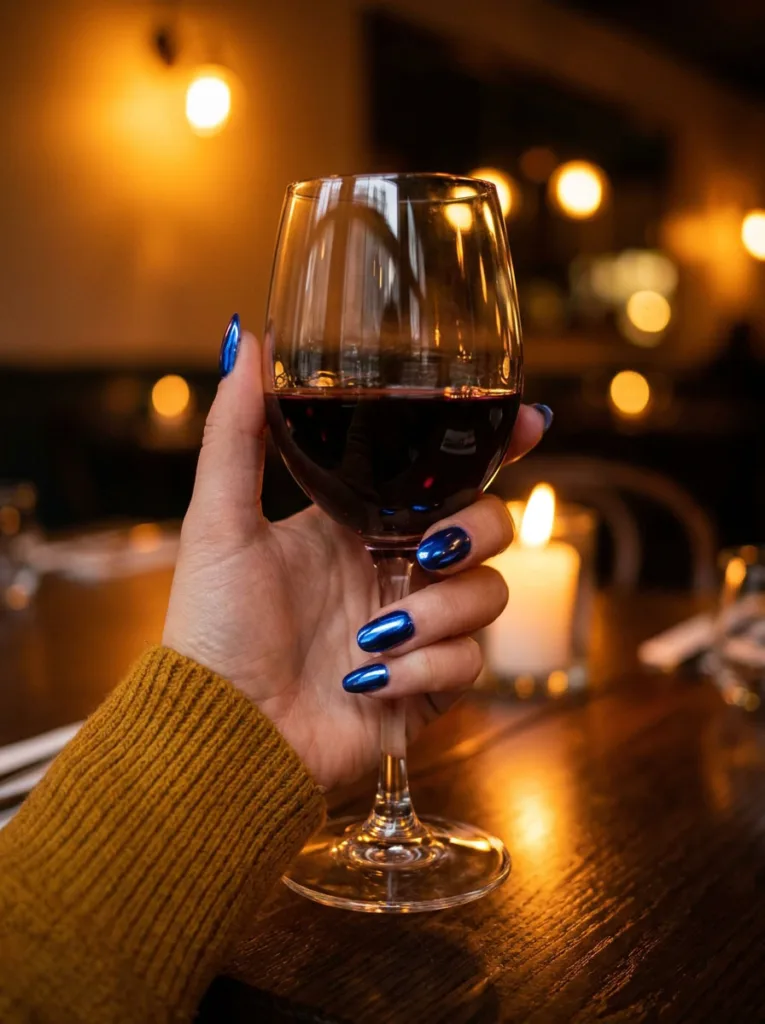
This shade needs two coats of a saturated blue gel, not one. A single thin coat lets the chrome pigment read as a dull grey-blue instead of true cobalt. Cure each coat separately under your lamp before applying the top coat and powder. The extra coat adds a few minutes, but it’s the difference between a vivid finish and a washed-out one.
8. Pink Chrome
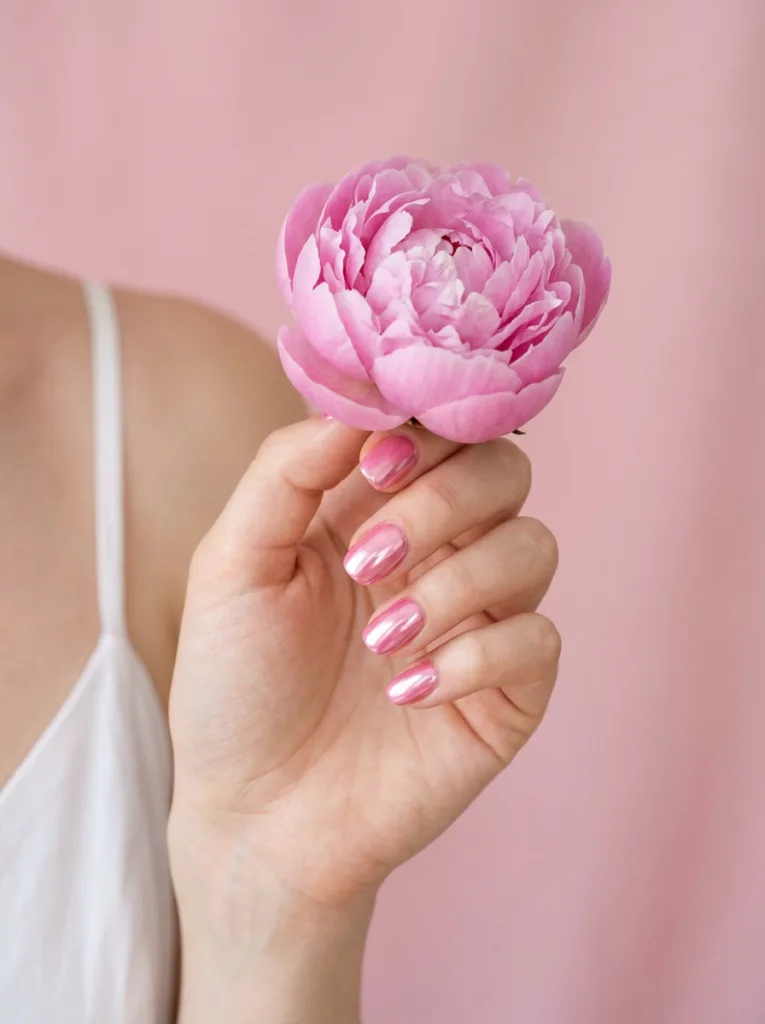
Use an opaque light pink gel, not a sheer or jelly formula. Sheer bases let patches of nail show through once you buff, which breaks the mirror effect in spots. Two coats of pink gel, both fully cured, give the powder an even surface to grip. This shade shows streaking fastest of any color here, so buff slowly and check your work under a lamp.
9. Gold Chrome
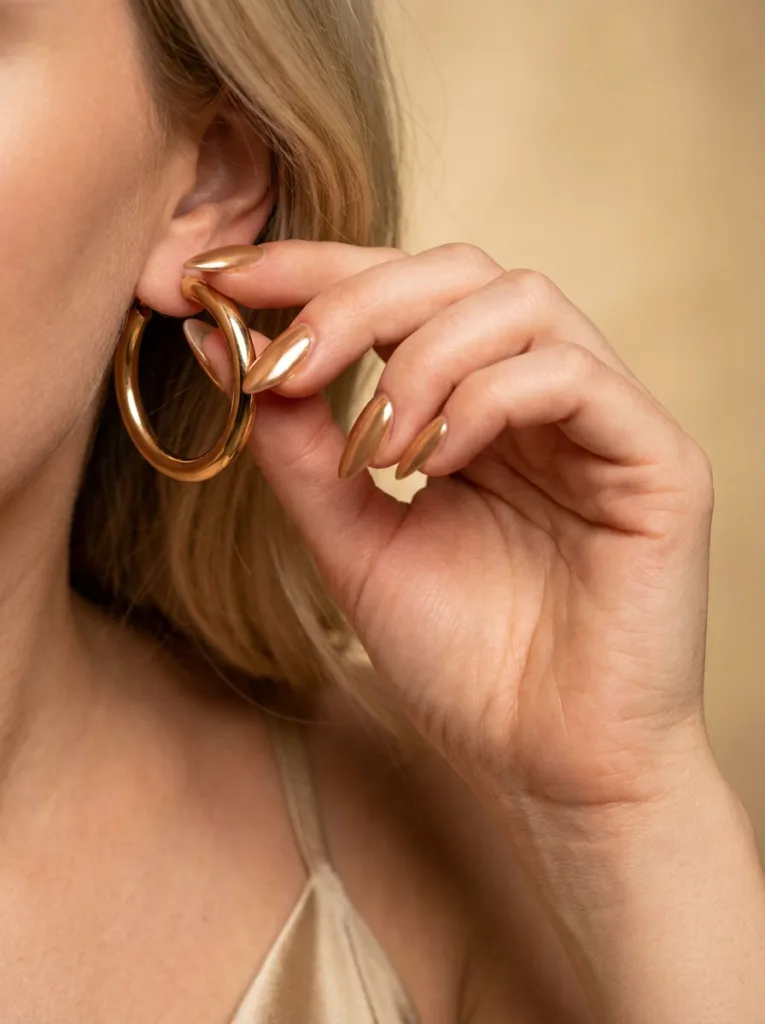
Buff gold pigment in one steady direction across the whole nail instead of circular motions. Gold’s warm tone makes uneven buffing lines more visible than cooler shades do. Almond-shaped nails work best with this color, since the longer curve gives the powder more surface area to catch and reflect light evenly.
10. Holographic Chrome

Apply this powder in a thinner layer than you would for a solid color. Overworking holographic pigment during buffing flattens the rainbow flecks and dulls the shift effect. Do a light, quick buff, then stop. Tilt your hand at different angles as you check your work. This shade only shows its full color change in motion, not under flat light.
11. Chrome Accent Nail
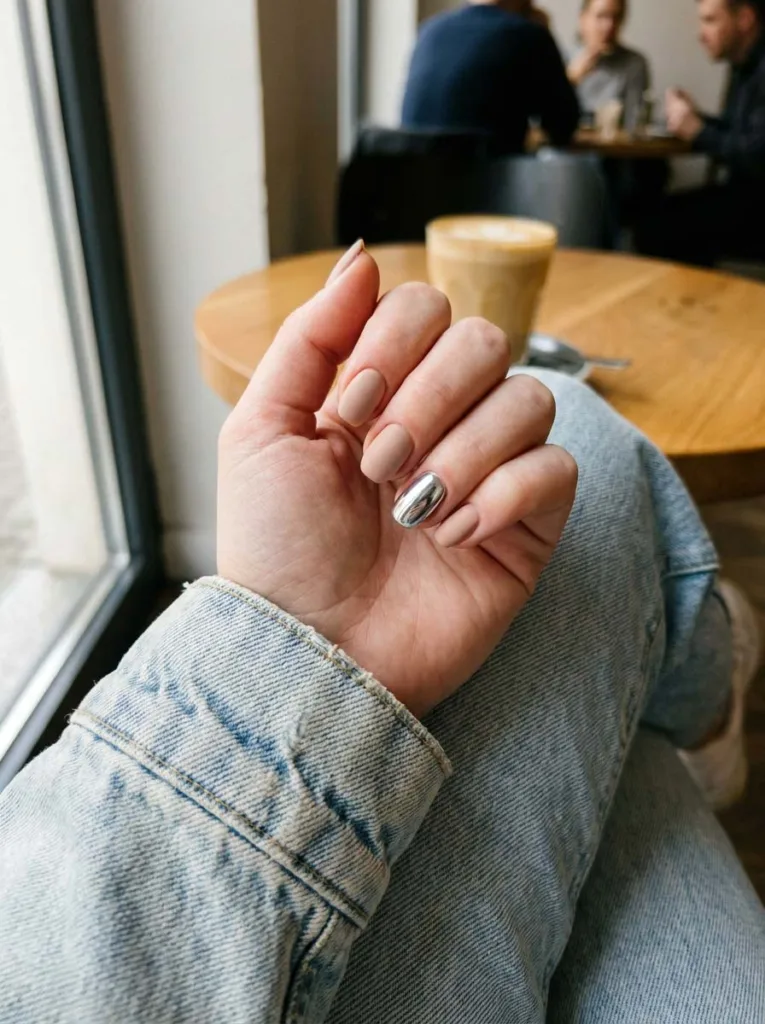
Pick one nail, usually the ring finger, and keep the rest matte or a solid gel color. Apply painter’s tape around the cuticle of the accent nail before you start. Stray powder wipes away clean instead of dusting onto skin. One mirror nail against a matte set draws the eye faster than a full chrome set does, and it’s easy to redo at your next fill.
12. Chrome Swirl
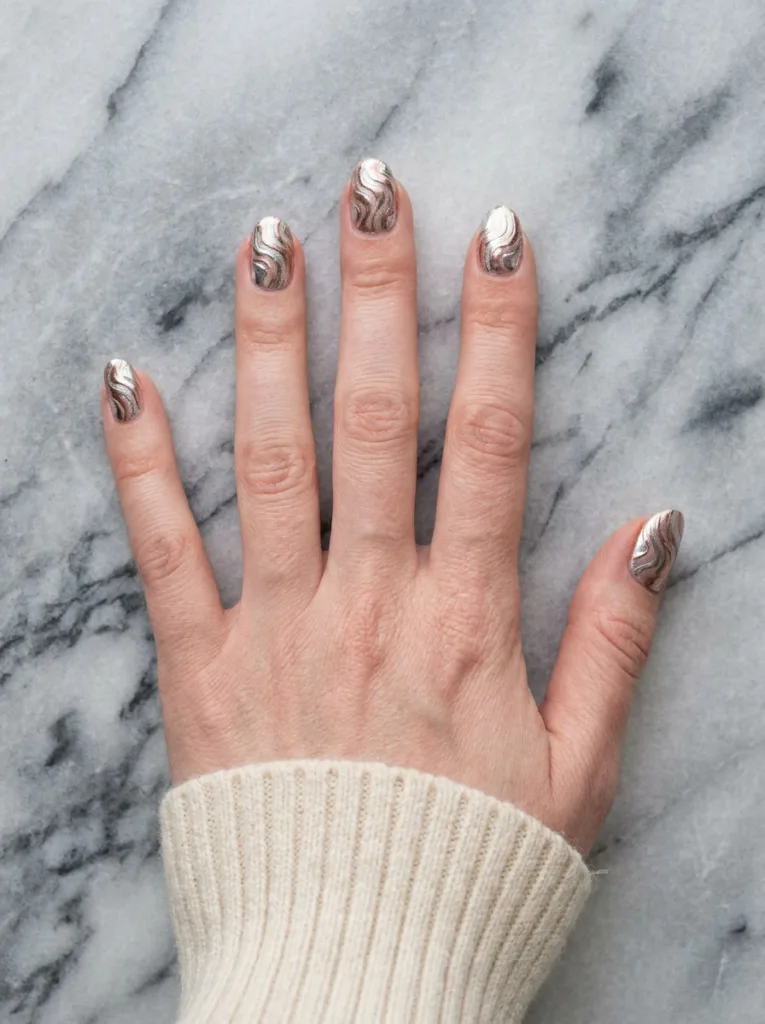
Dip your applicator into two powders at once. Work them onto the nail in a loose figure-eight motion, without a full buff first. Buffing too soon blends the colors flat instead of leaving a marbled pattern. Once the swirl looks the way you want, buff lightly just to bring up the shine, not to mix the colors further.
13. Purple Lilac Chrome

This shade needs a very light lilac or white-based gel underneath. A darker base muddies the pastel tone and turns it grey instead of soft purple. Two thin coats work better than one thick one, since thick gel can pool near the cuticle and throw off your buffing surface. This color reads well on most undertones, cool or warm.
14. Emerald Chrome
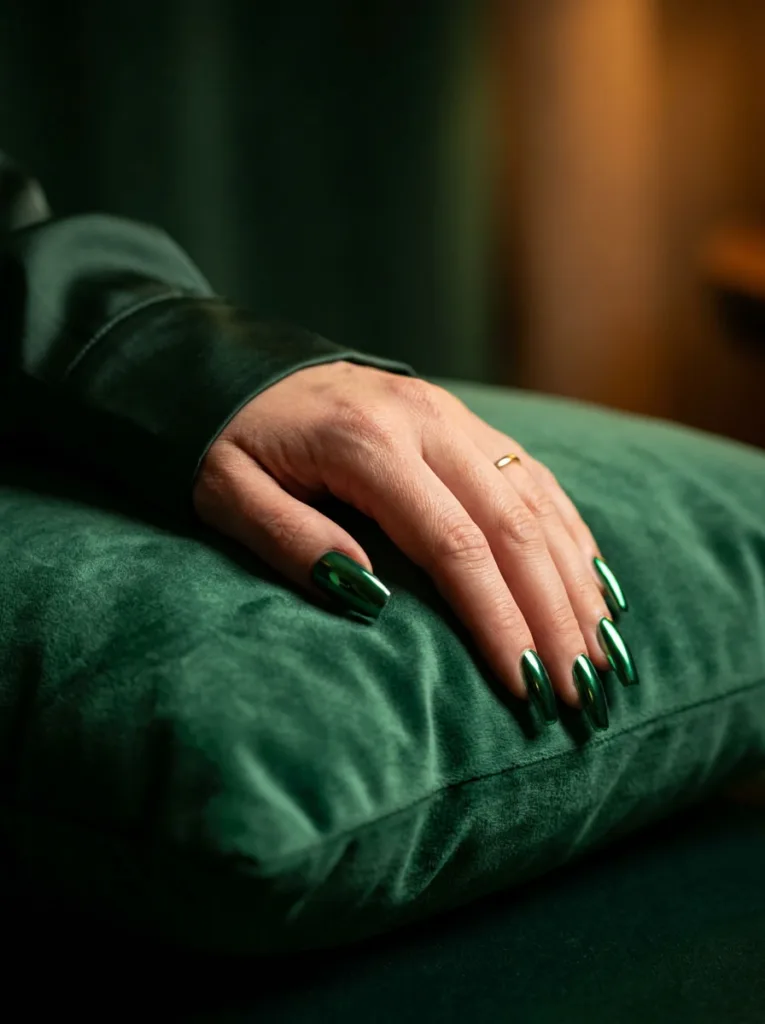
Apply two coats of a deep, opaque green gel before adding chrome powder. A single coat lets too much of the nail bed show through, which mutes the jewel-tone effect this shade is known for. Pair it with gold jewelry rather than silver. The warm gold tone plays off the green base better than cooler metals do.
15. Pearl Chrome
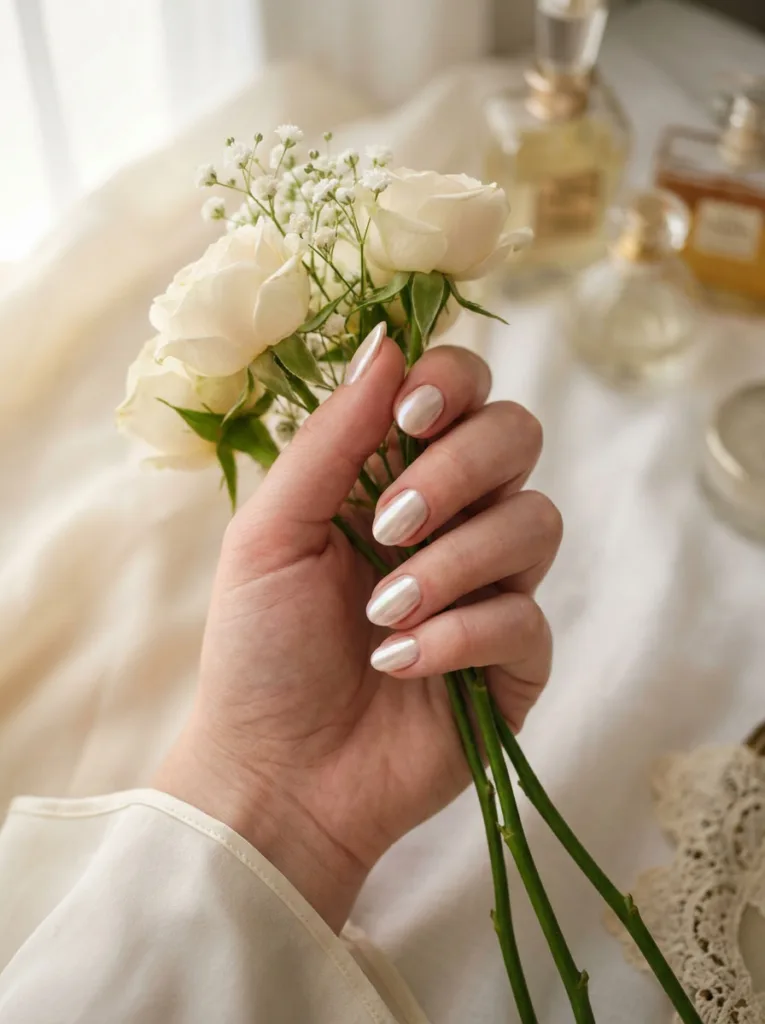
Apply the thinnest layer of powder you can manage over a sheer pink or nude base. A heavy application makes pearl chrome look like plain silver instead of the soft, opalescent finish it’s meant to have. Buff gently and stop as soon as the shine appears. It’s the quiet one on this list, but it still catches light in a way flat polish never will.
16. Chrome Half-Moon
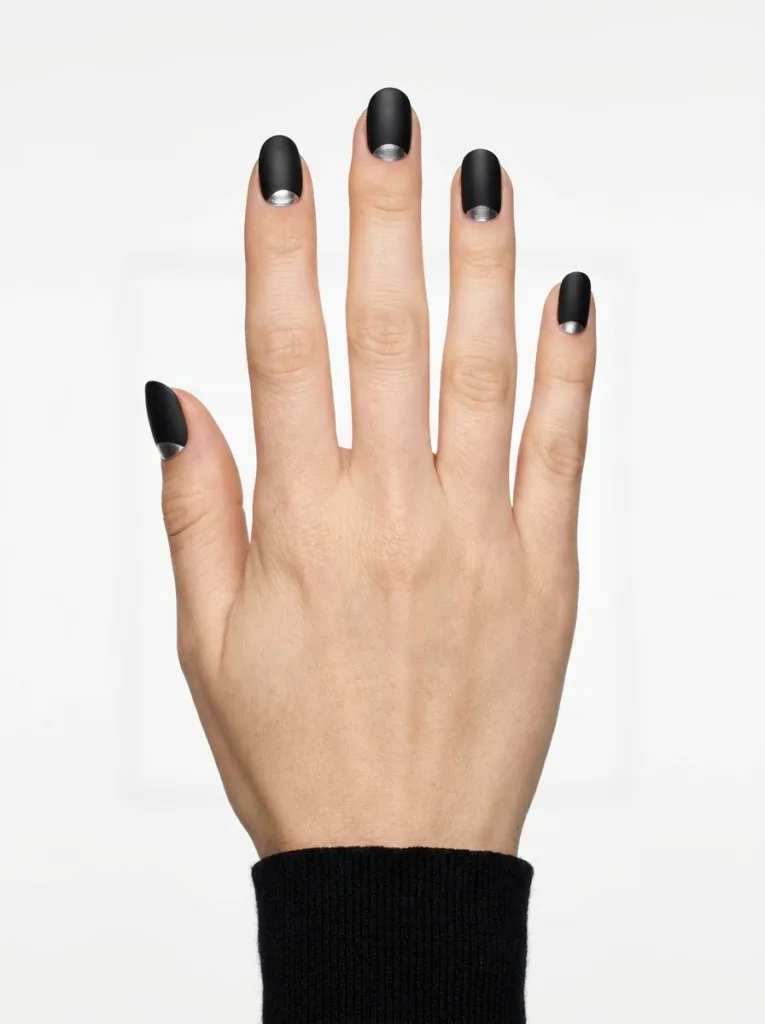
Stick a curved half-moon guide sticker at the base of each nail before you apply your top coat. Rub chrome powder only above the sticker line, then peel it away right after buffing, before the top coat fully cures. This keeps the curved edge clean in a way that’s nearly impossible to freehand with a brush.
17. 3D Raised Chrome Lines
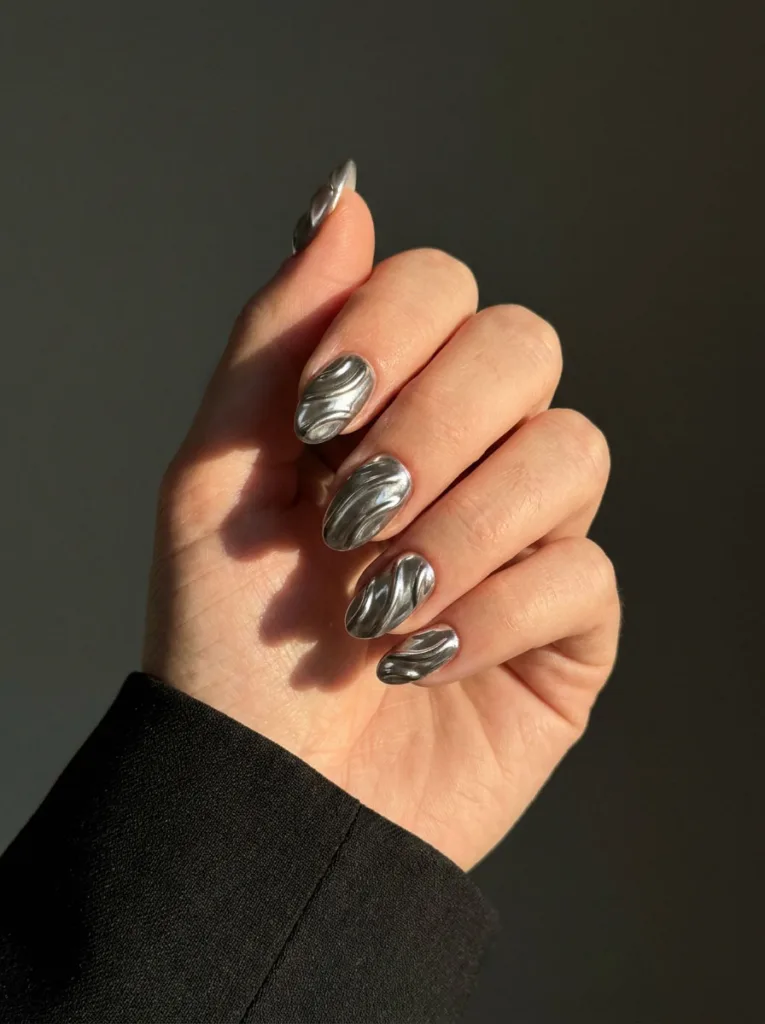
Use a fine detail brush to draw thin lines of builder gel across the nail, then cure them fully hard under your lamp. Apply a non-wipe top coat over the entire nail, cure again, then buff chrome powder specifically over the raised ridges. This design takes real control with the brush. Practice on a nail wheel first, or book a salon appointment instead.
18. Chrome with Rhinestones
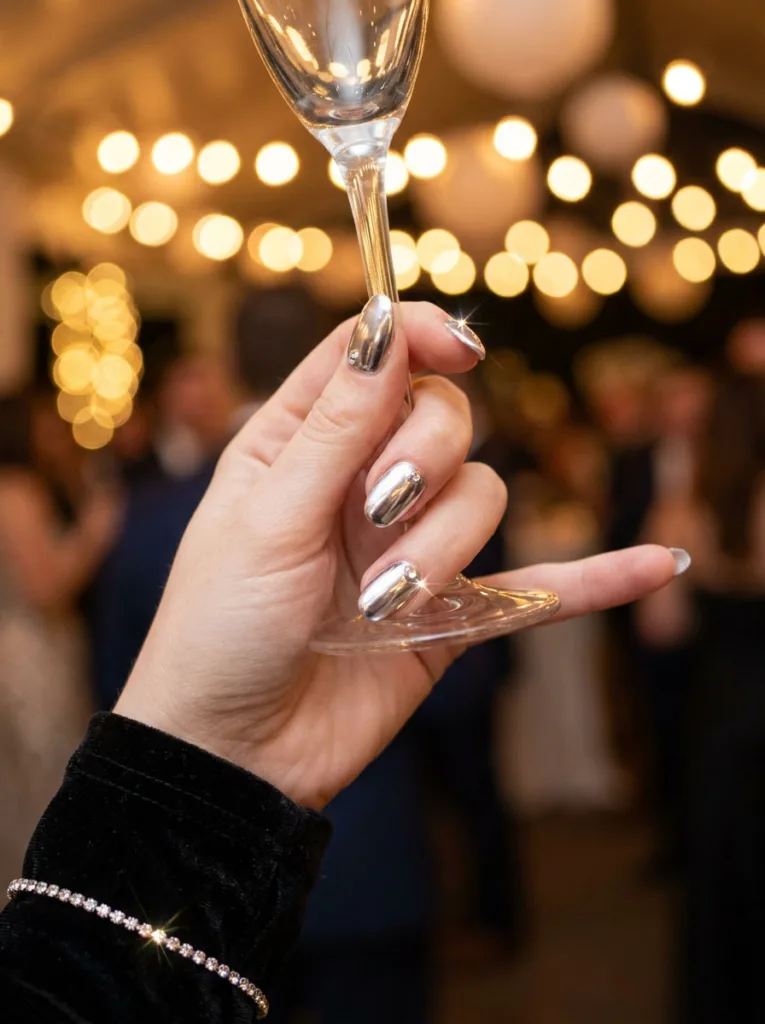
Press your crystal or rhinestones into the top coat while it’s still wet, right before your final cure. Placing a stone on top of already-cured chrome won’t bond, and it will pop off within a day or two. One stone near the cuticle usually looks more polished than a full nail covered in crystals. It’s also far less likely to catch on clothing or hair.
Which Design Fits Your Skin Tone and Nail Shape
Almond and square shapes show off chrome best, since their wider surface reflects more light. Shorter nails work fine too, but skip heavy texture like deep ridges. Chrome powder highlights every imperfection underneath it, so smoother nails photograph better.
Skin tone matters too. Not sure which undertone you have? Check the veins on your wrist:
- Blue-toned veins usually mean cool undertones. Silver, cobalt, and lilac chrome tend to suit you best.
- Green-toned veins usually mean warm undertones. Rose gold, gold, and pearl finishes pull more shine on you.
It’s not a strict rule, so trust what looks good on you over any chart.
How to Make Chrome Nails Last Longer
Chrome nails typically last two to three weeks with gel, or about one week with regular polish. The finish itself doesn’t chip like paint. It dulls slowly instead, as the top coat wears down bit by bit.
Everyday Habits That Protect the Shine
Wear gloves when cleaning or doing dishes. Household chemicals break down top coat faster than daily wear alone does. Reapply a thin top coat layer every few days. It refreshes the shine and buys you a few extra days of wear.
Hot water is another factor people overlook. Long showers and hot tubs soften gel over time. That softening loosens the seal around the edges faster than normal daily use would. Swim often? Rinse your hands with cool water afterward, then pat them dry instead of rubbing with a towel. Rubbing can catch a lifted edge and peel away more of the chrome layer than a single soak ever would.
Cuticle oil helps more than people expect. Dry, cracked skin around the nail pulls at the edge of the gel every time you bend your finger. Keeping that skin hydrated reduces the tugging that causes lifting. A drop of oil each night is worth the ten seconds it takes.
How to Remove a Chrome Manicure Safely
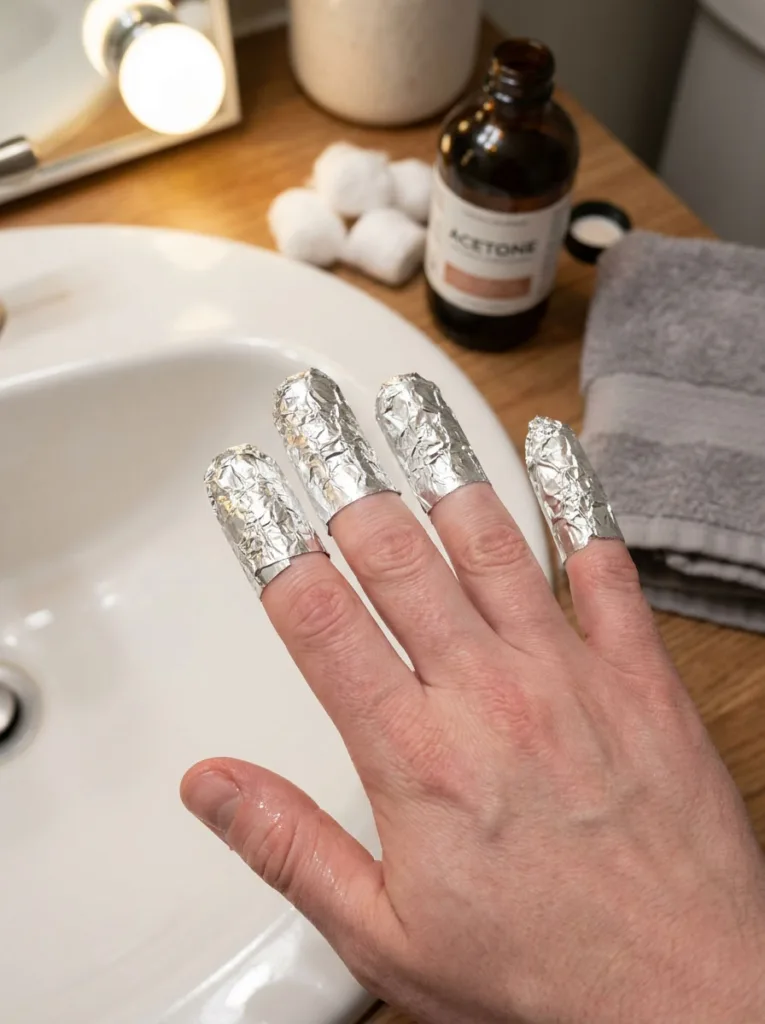
Soak cotton pads in acetone and wrap each nail in foil for 10 to 15 minutes. Gently push off the softened gel with a cuticle stick afterward. Don’t peel chrome polish off while it’s dry. That habit strips extra layers off your natural nail plate, and it’s the fastest way to weaken your nails over time.
Set looking dull before the two-week mark? Light buffing plus one fresh top coat layer often restores most of the shine without a full redo. Keep an eye on the edges, though. White patches near the cuticle or tip mean the seal has broken and moisture is getting underneath. At that point, removing and reapplying protects your natural nail better than trying to stretch the set another week.
Frequently Asked Questions
1. Does chrome powder damage your natural nails?
Chrome powder itself is not harmful. Damage usually comes from peeling gel off instead of soaking it, or from overbuffing the nail plate during prep.
2. Can you use chrome powder on regular nail polish?
Yes, but the effect fades faster without a gel top coat. A gel-based top coat locks the powder in place for a longer-lasting mirror finish.
3. How long do chrome nails last?
Gel chrome manicures last two to three weeks. Regular polish versions usually hold their shine for about one week before dulling.
4. Is chrome powder the same as glitter?
No. Glitter reflects light in scattered flecks. Chrome nail powder creates one continuous mirror surface across the whole nail.
5. Do chrome nails work on short nails?
Yes. Short, smooth nails often show the mirror effect more clearly than long nails, since the surface curves less.
6. Does chrome powder work over dip powder or acrylic?
Yes, as long as the surface is sealed with a non-wipe gel top coat first. Chrome bonds to the top coat, not to the acrylic or dip powder underneath.
7. Is chrome powder safe for weak or damaged nails?
The powder itself is safe. The risk comes from soaking off or peeling a full gel set, which can thin already-weak nails further. Ask for a lighter gel builder if your nails are brittle.
8. Why does my chrome manicure look spotty instead of solid?
This usually means the top coat wasn’t fully non-wipe, or humidity got to it before the powder went on. Wipe with a lint-free pad and reapply the top coat in a dry room before trying again.
Conclusion
Chrome nails deliver salon-level shine whether you book an appointment or try it yourself with a $15 kit. This metallic manicure holds its mirror finish for two to three weeks with gel. A fresh top coat keeps it looking sharp in between. Pick one of these 18 looks based on your skin tone and nail shape. Grab a non-wipe top coat and buff in the powder with a light hand. Your next manicure gets a mirror finish that actually turns heads.