22 Easter Nails Ideas You’ll Actually Want to Copy
Stuck scrolling through fifty Easter nail pins, unsure which one you could actually recreate yourself? You are not alone. Most Easter nail inspiration looks stunning saved to a board and nearly impossible to pull off at your kitchen table.
These cute Easter nails ideas are inside, ranging from five-minute beginner looks to detailed salon-worthy art, plus the exact pastel shades, nail shapes, and tools each one calls for. Every design also comes with a skin tone and nail shape pairing, since that detail decides how a pin actually looks on your own hand.
You will also find real technique steps, how long each design lasts, and the mistakes that ruin most first attempts. Pick one below and give yourself twenty minutes to try it before the holiday arrives.
What’s Trending in Easter Nails This Year
Trends shift every season, but a few looks are dominating right now. Here is what is actually showing up on salon menus and nail art feeds this spring.
Pastel Colors Are Still Leading
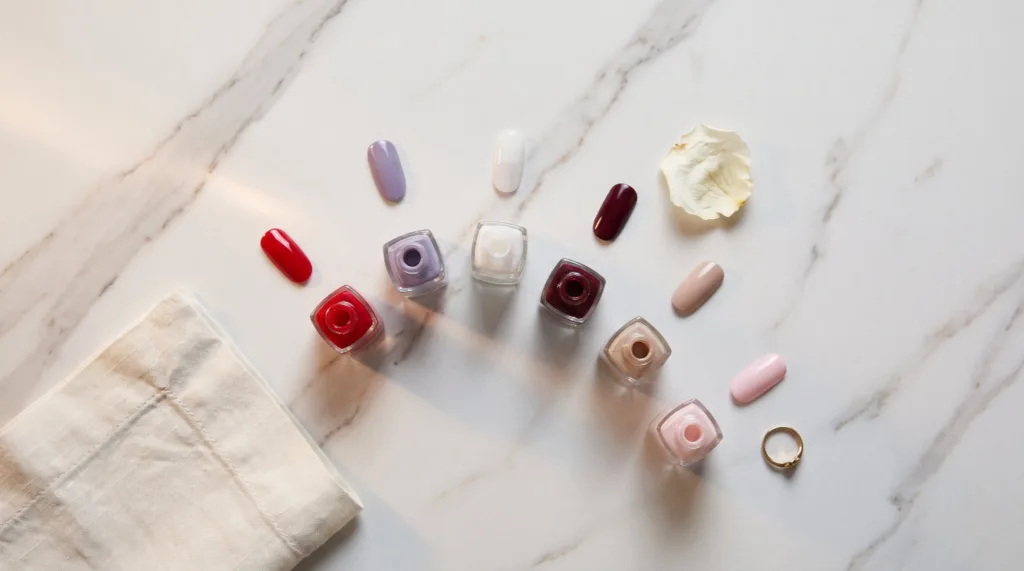
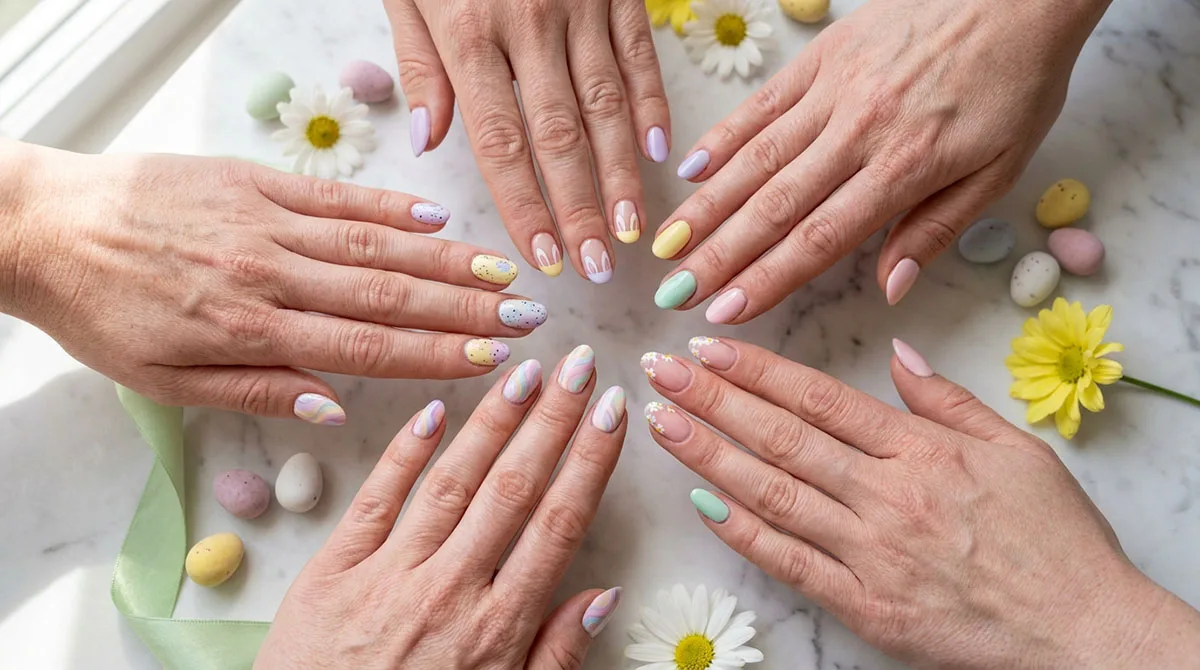
Pastel shades lead the pack again this year. Soft lavender, butter yellow, mint green, and blush pink dominate salon menus this season. Milky, slightly opaque bases have replaced flat, chalky pastels almost everywhere. That one change matters more than which exact pastel you pick.
Speckled and Aura Details
Speckled egg nails remain the most requested look. A dotting tool and a steady hand recreate that candy egg texture in minutes. Aura nails, with a soft blurred center in one shade, fit right into Easter’s pastel palette too. Both trends are easy to combine on the same set.
Minimal Bunny Art and French Tips
Minimal bunny art has grown up. Instead of full cartoon rabbits, one delicate line drawing on a single accent nail delivers the same charm with less commitment. Colored French tips in lilac or mint round out the trend list. Both work well past the holiday itself, which is a bonus.
Choosing the Right Nail Shape and Base Color
Before you pick a design, think about shape and color. They decide how a design reads before any art gets added, and they matter more than people expect.
Picking a Nail Shape
Almond and coffin shapes give speckled eggs and floral art more surface to shine. There is more real estate for detail. Short square or round nails suit simpler looks instead, like skittle manicures or single-color pastels. Neither shape is better. It just depends on how much art you want to fit.
Matching Color to Your Skin Tone
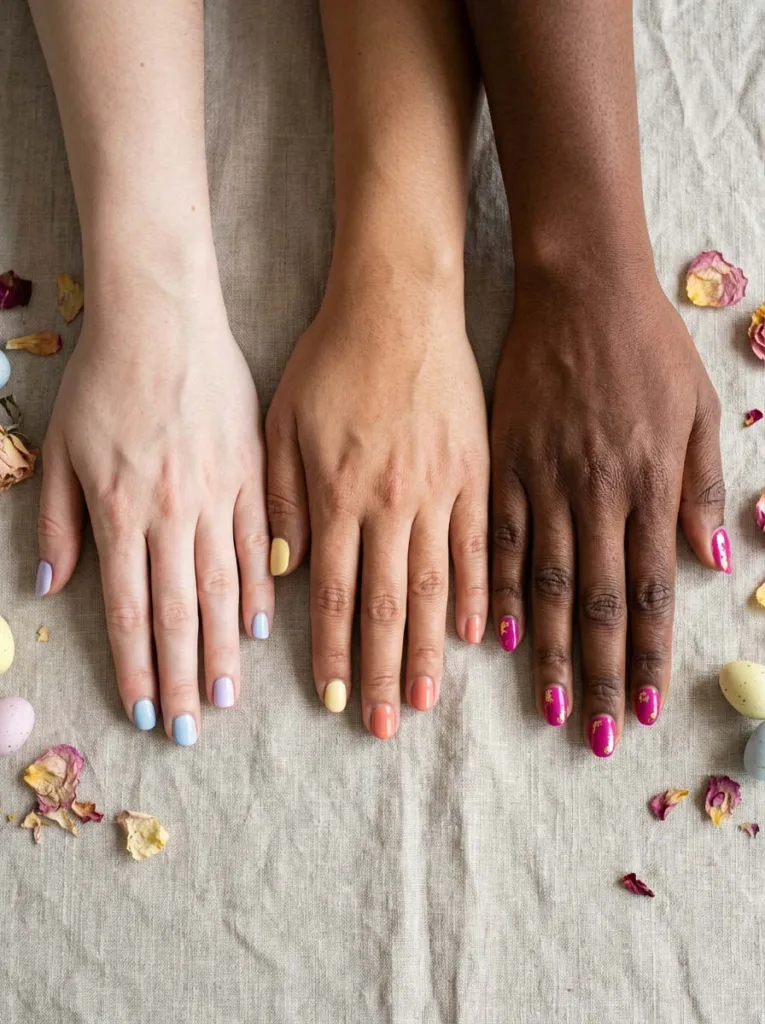
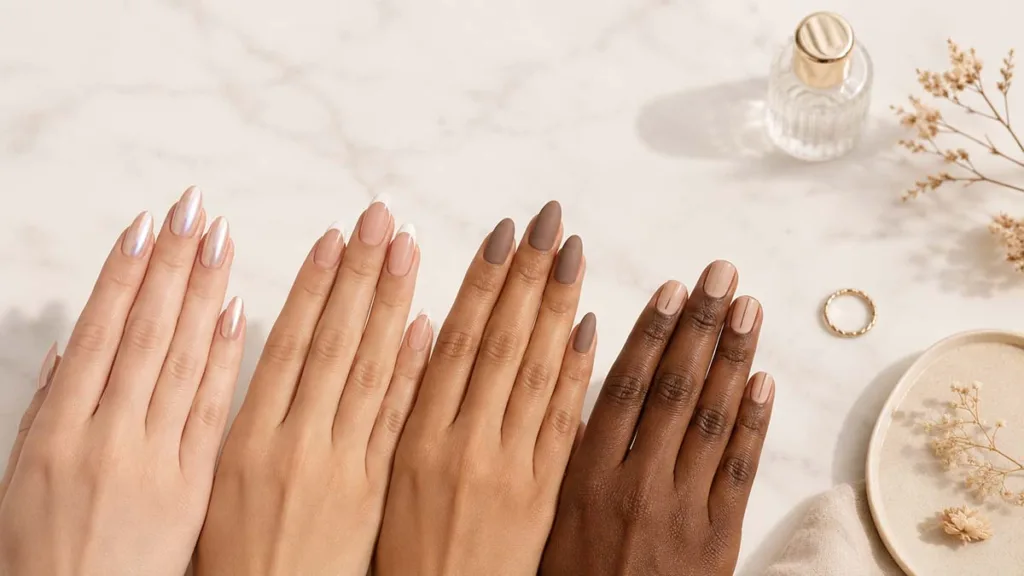
Fair skin tones tend to glow next to baby blue, lilac, and soft peach. Medium skin tones pair well with butter yellow, coral, and mint. Deeper skin tones look striking with cream, gold accents, and saturated pastels like fuchsia or cobalt blue. Try a color on one nail first if you are unsure. It is a low-risk way to test before committing to a full set.
Why a Nude or Milky Base Works
A nude or milky base works as a neutral canvas for almost any design listed below. It also holds up well as it grows out, which matters if your appointment lands a week or two before Easter Sunday. Nobody wants an obvious grow-out line showing up in family photos. If you would rather ease into pastels first, these pink nails for spring use the same milky base approach without any holiday-specific art.
22 Easter Nail Designs to Try
Each of these designs works for salon visits or an at-home mani night. Pick one that matches your skill level and the vibe you want for the holiday.
1. Speckled Egg Nails
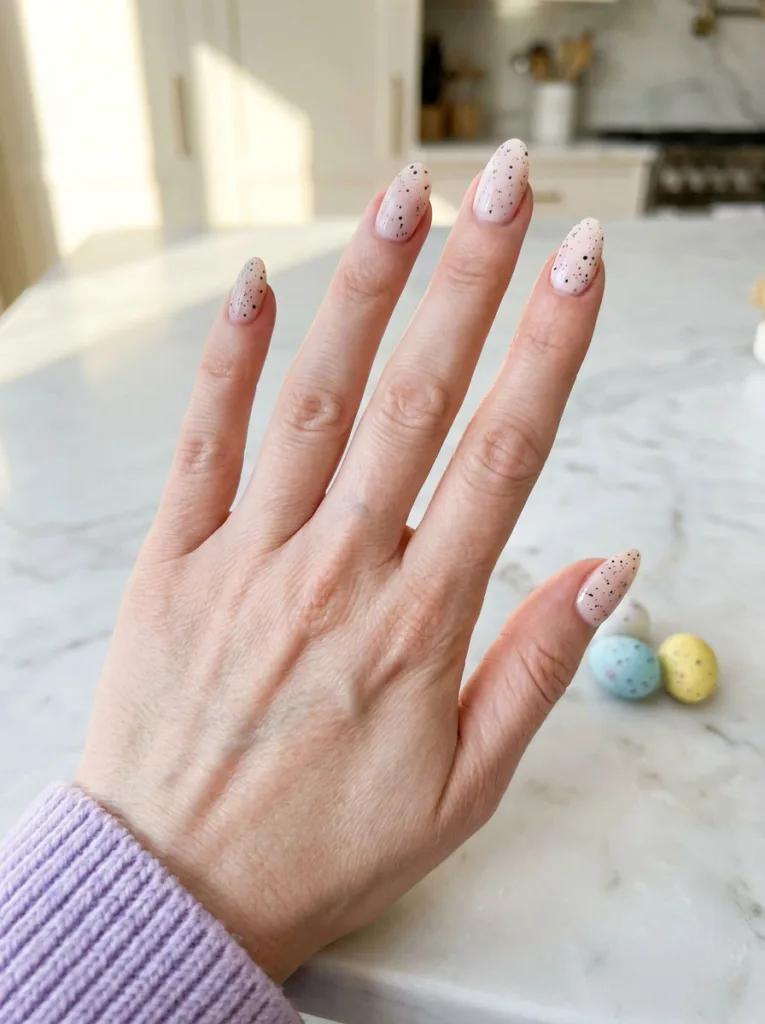
Best for: anyone who wants the trendiest look with almost no effort
Speckled egg nails are the design everyone keeps asking for this year, and it is easy to see why. Paint a pastel or nude base first, then load a dotting tool with black polish and flick it across each tip. The scattered specks mimic real candy eggs without looking costumey. This design works on short or long nails, pairs with almost any pastel, and takes less than fifteen minutes once you get the flicking motion down.
2. Bunny Ear French Tips
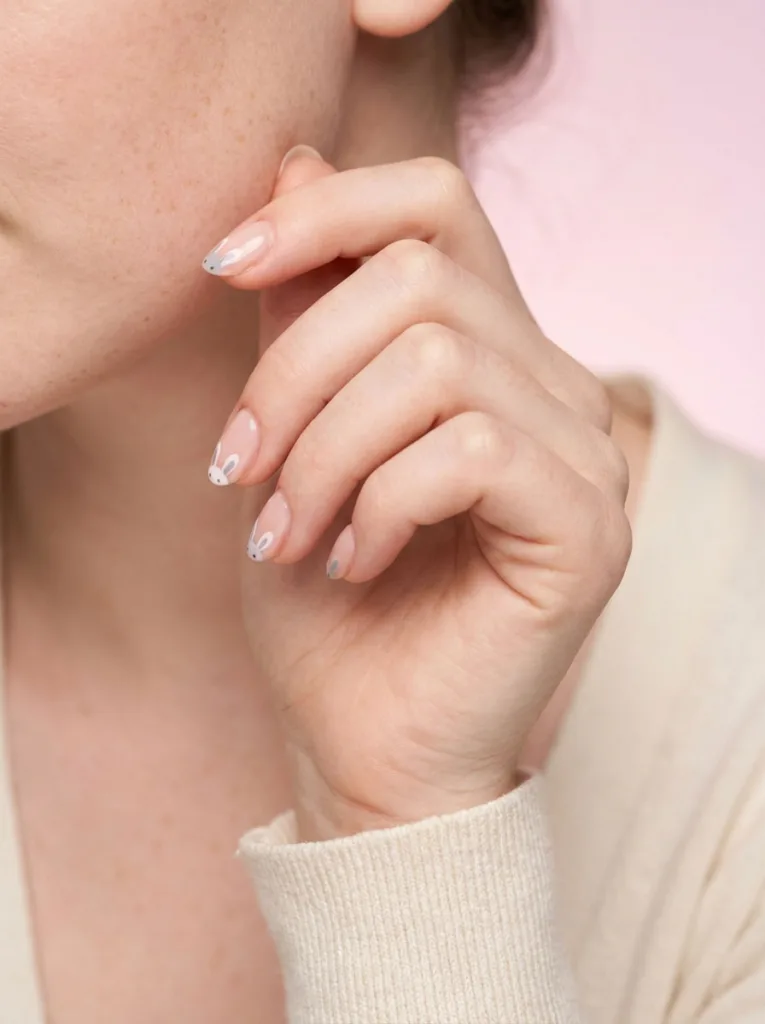
Best for: work-friendly, subtle festivity
Give your classic French manicure a holiday update by swapping the white tips for tiny bunny ears. Paint a sheer pink or nude base, then use a fine detail brush or a stencil to draw two soft, rounded ears at the tip of each nail. Keep the ears white or light gray for contrast. This design stays subtle enough for work while still reading as festive, and it grows out gracefully if you get it done early.
3. Pastel Skittle Nails
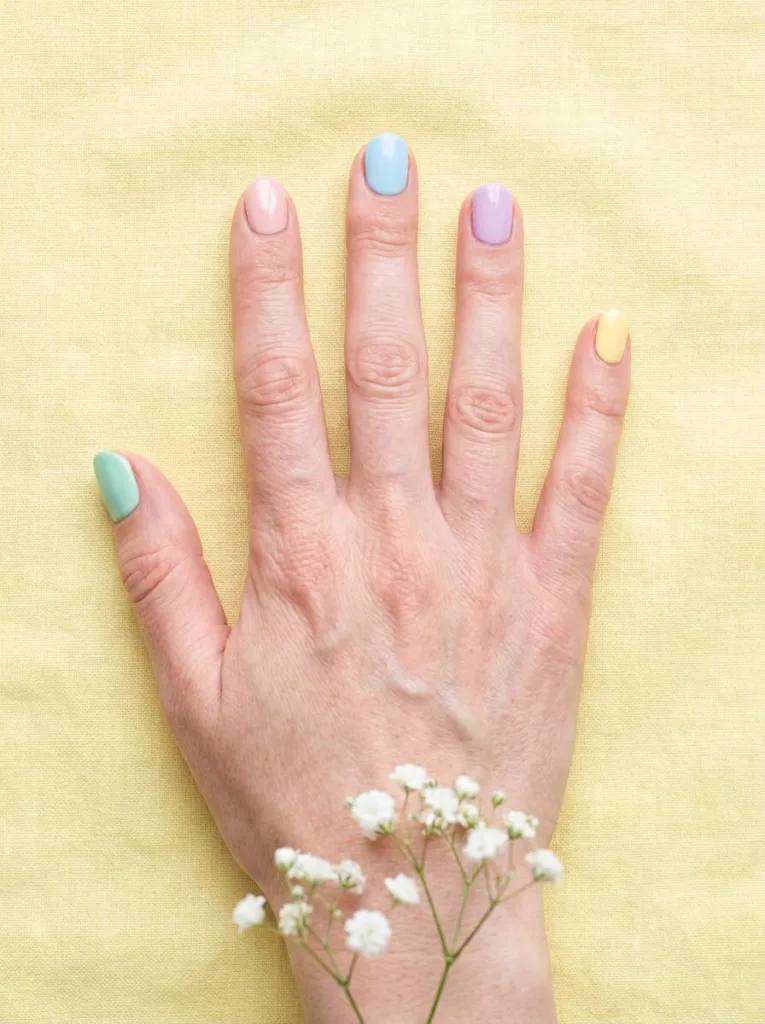
Best for: total beginners with zero art skills
Skittle nails skip the art entirely and let color do the work. Paint each nail on your hand a different pastel shade, like mint, blush, baby blue, lilac, and soft yellow, with no pattern layered on top. There is no freehand skill required here, just a steady coat of five different polishes. This is the fastest design on this list, and it still reads as festive because the color story does all the heavy lifting.
4. 3D Easter Egg Dots
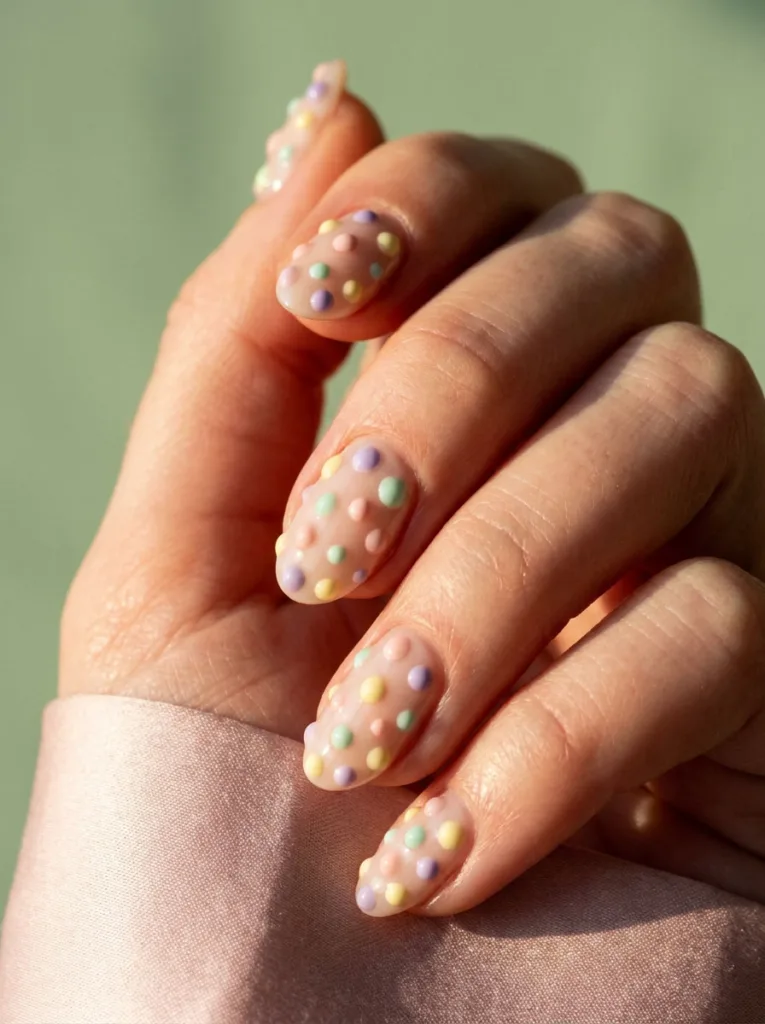
Best for: textured, photo-ready nails
For texture that shows up well in photos, try raised 3D dots in rainbow pastels over a nude or milky base. Use a dotting tool to layer small beads of polish, letting each one dry slightly before adding the next so it keeps its shape. The dots resemble decorated Easter eggs and catch the light differently than flat polish. This look takes more patience than most on this list, but the payoff is worth the extra ten minutes.
5. Daisy Accent Nails
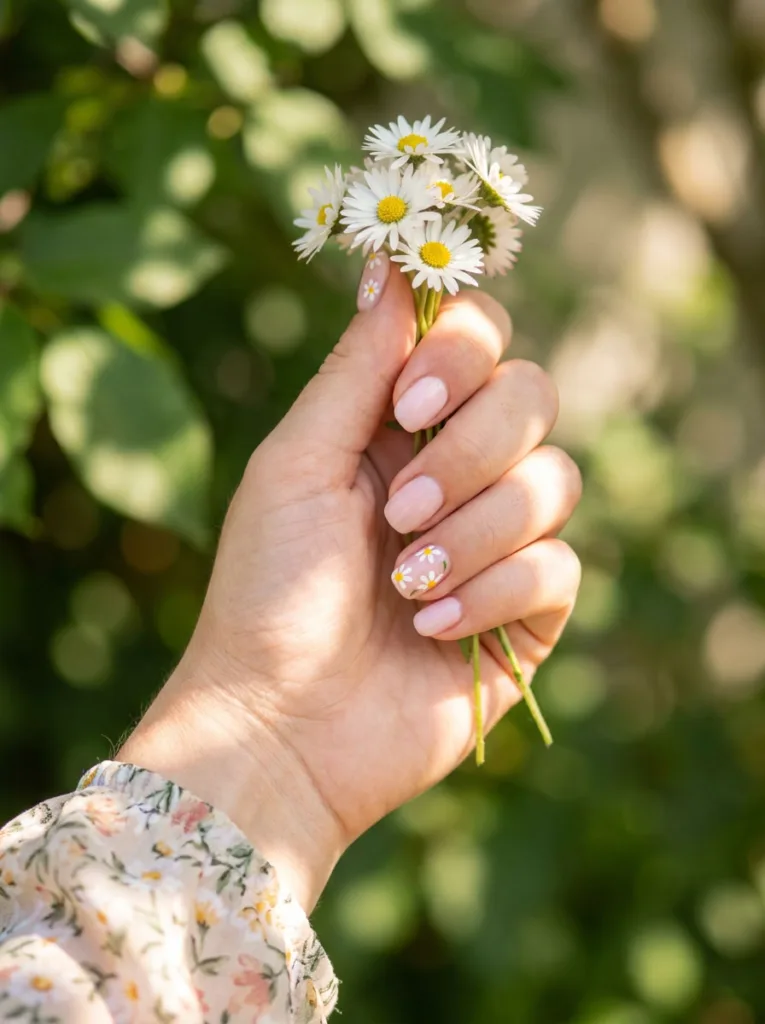
Best for: floral fans who want a light touch
Daisies feel like spring in nail form, and they only need one or two accent nails to make an impact. Start with a milky pink or nude base, then paint small white petals with a yellow center using a thin detail brush or nail art pen. Keep the rest of your nails a plain pastel so the daisies stand out. This design works for anyone who wants floral art without covering every single nail.
6. Robin’s Egg Blue Nails
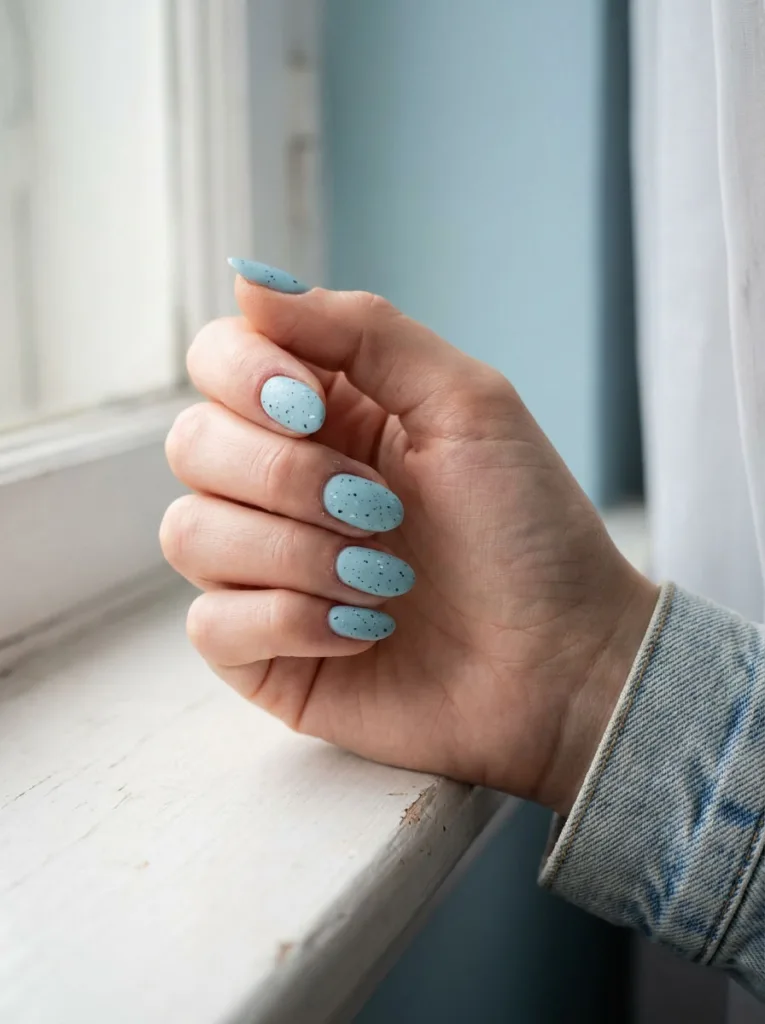
Best for: quiet, natural-looking color
If bright pastels are not your style, this quieter option might be. Paint your nails a soft robin’s egg blue, then speckle black and white dots across the surface in a random pattern. It reads as natural rather than costumey, and it works well past Easter into the rest of spring. For an upgraded finish, add a few tiny gold flecks on top before you seal it, similar to the finish used on these baby blue spring nails.
7. Carrot Nail Art
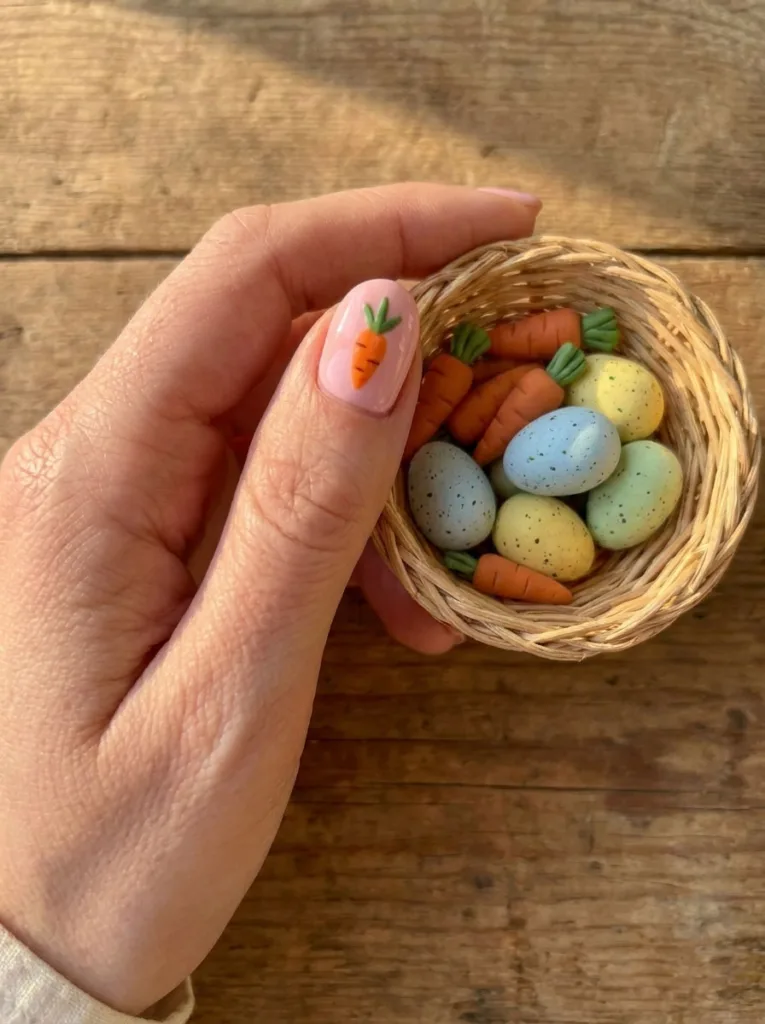
Best for: playful, bunny-themed fans
No Easter mani list is complete without a nod to the bunny’s favorite snack. Paint dainty orange carrots with small green tops on a pastel pink or nude base, using one or two nails as accents rather than covering every finger. It is a playful, slightly cheeky design that still looks put together. Nail stickers are a solid shortcut here if freehand carrots feel intimidating.
8. Marble Pastel Nails
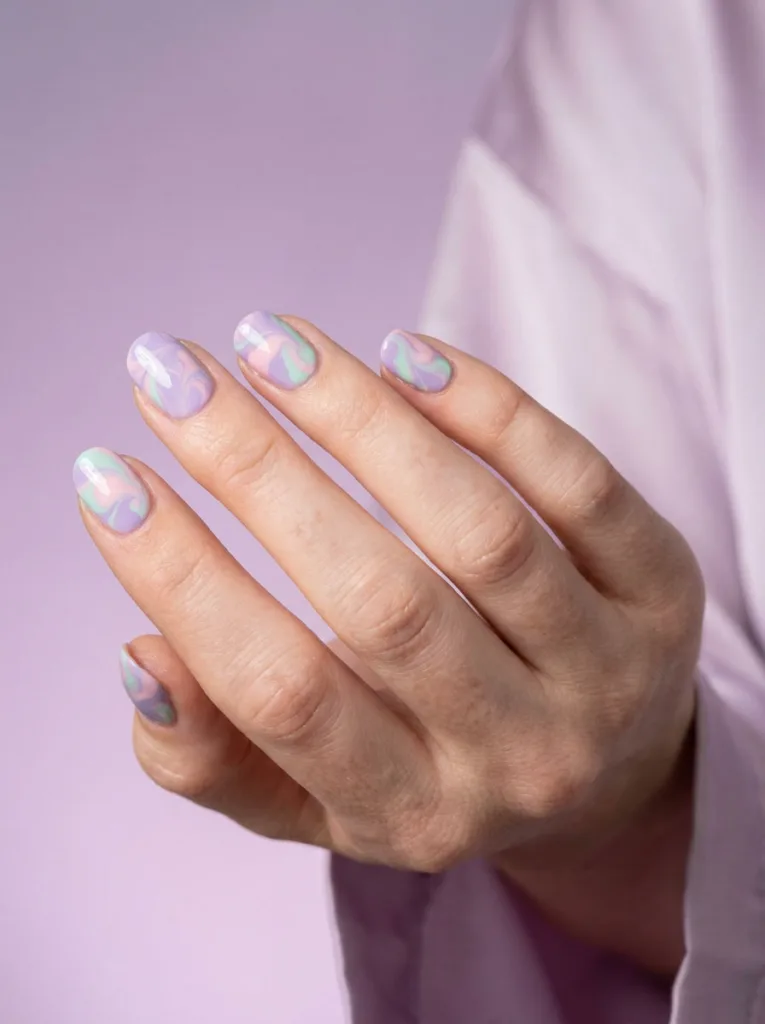
Best for: a pattern that looks different every time
Marble nails give you a one of a kind pattern every single time, which is part of the appeal. Drop two or three pastel polishes into a cup of room temperature water, swirl them together gently with a toothpick, then dip your nail straight in at an angle. Pull it out slowly and wipe away the excess polish from your skin. No two nails will look exactly alike, and that is the point.
9. Gingham Print Nails
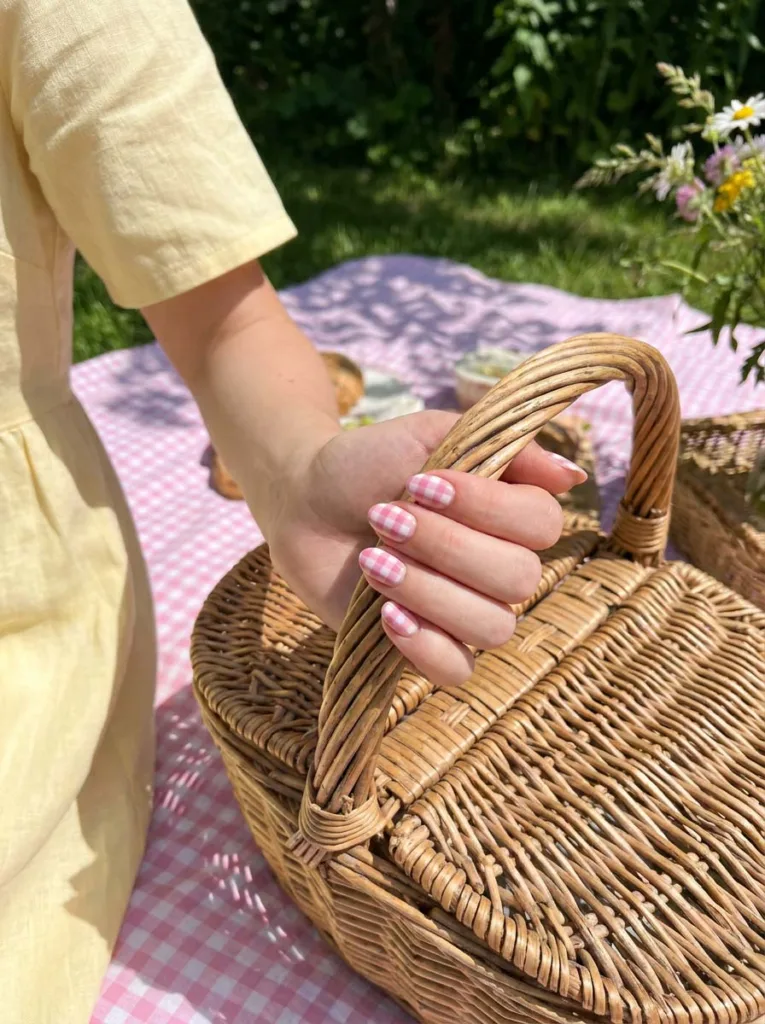
Best for: picnic and brunch outfits
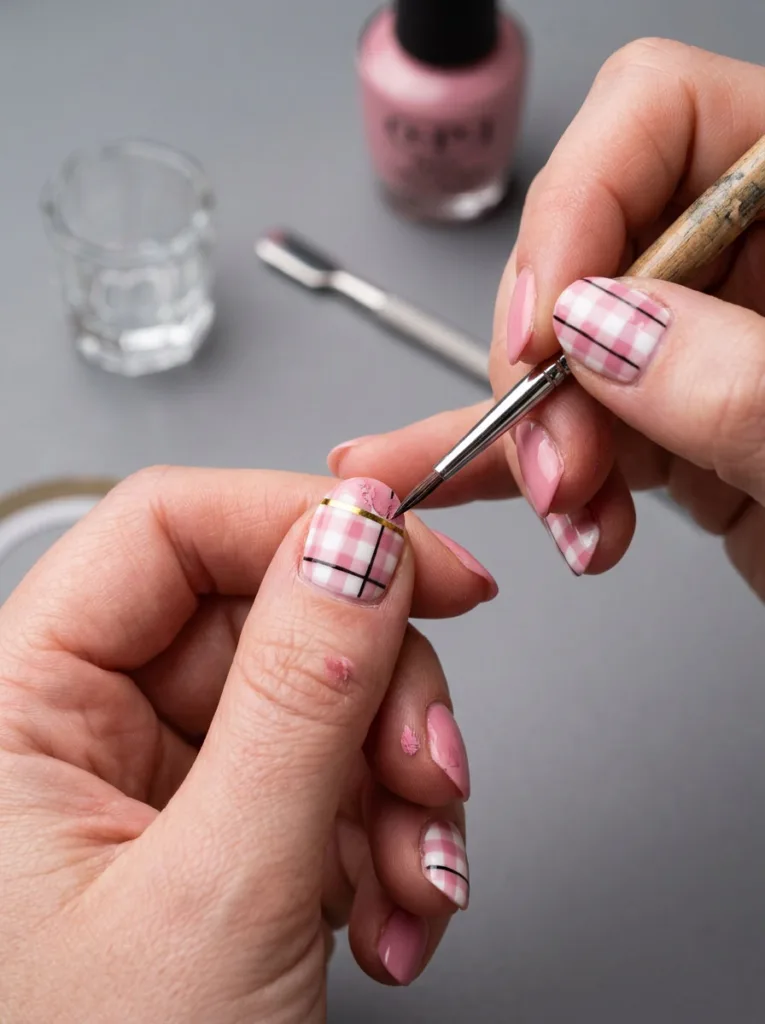
Gingham says picnic season louder than almost any other pattern, and it works well on nails too. Use thin nail striping tape to block out a grid pattern, then fill in alternating squares with pink or yellow polish. Peel the tape away before your top coat sets for the cleanest lines. This design looks intricate but is actually one of the more beginner friendly options here.
10. Checkerboard Pastels
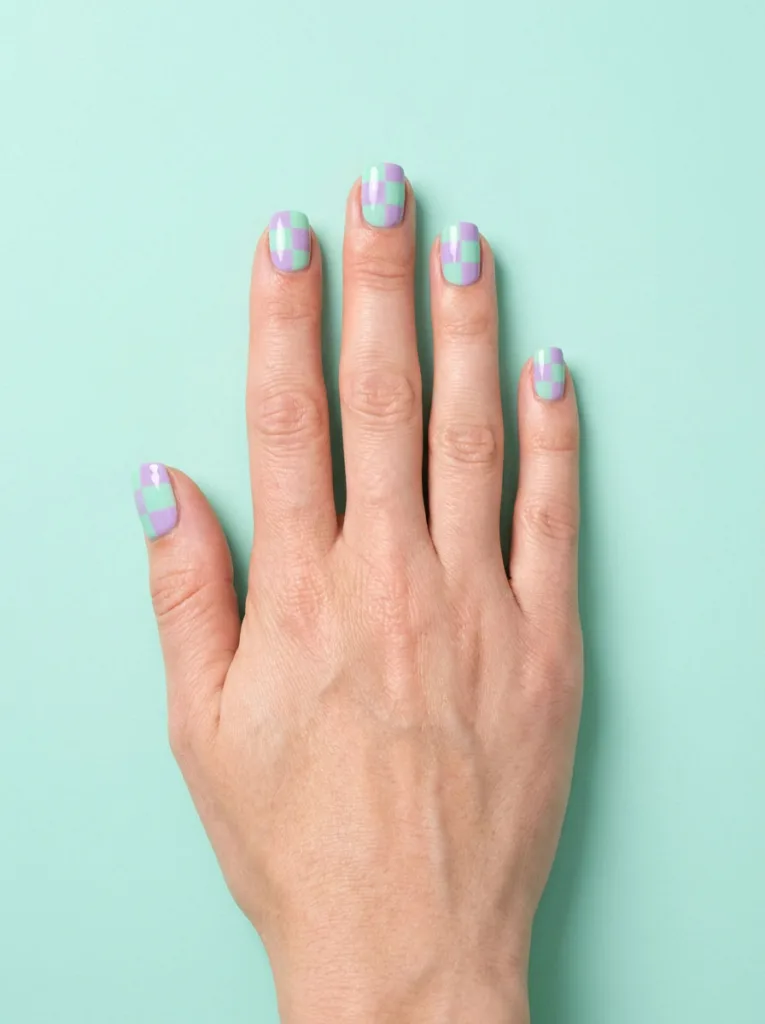
Best for: graphic, modern pattern lovers
Checkerboard nails have been trending for a while now, and the Easter version swaps black and white for two soft pastels. Unlike skittle nails, which keep each nail one solid color, this design puts a full grid pattern on every single nail. Use striping tape to map out your squares, then fill in alternating spaces in mint and lilac, or any two colors you like. Keep your lines as straight as possible for the crispest look. This design pairs especially well with a short square nail shape.
11. Floral French Manicure
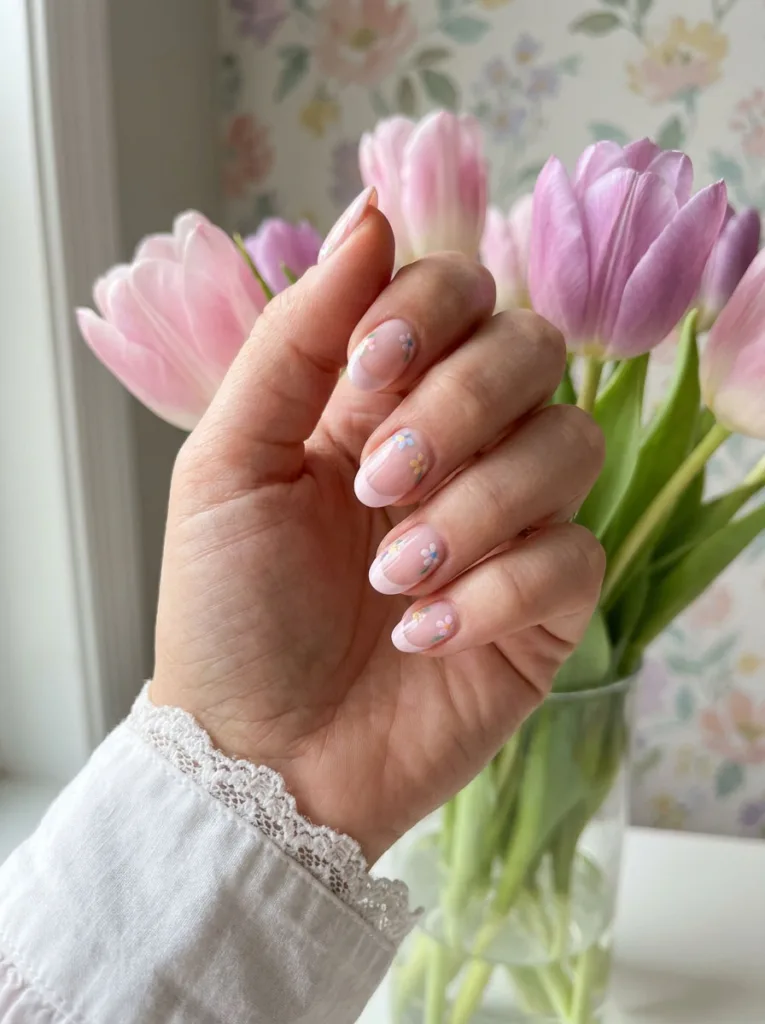
Best for: romantic, dressed-up looks
This is a French manicure with a spring makeover. Start with your usual white or pastel tips, then add tiny painted flowers just above the tip line on each nail. Little five petal blooms in pink, white, or lavender work best because they are easy to paint small. It reads as romantic and put together, and it transitions easily into regular spring nails once Easter has passed.
12. Chick and Egg Mismatch
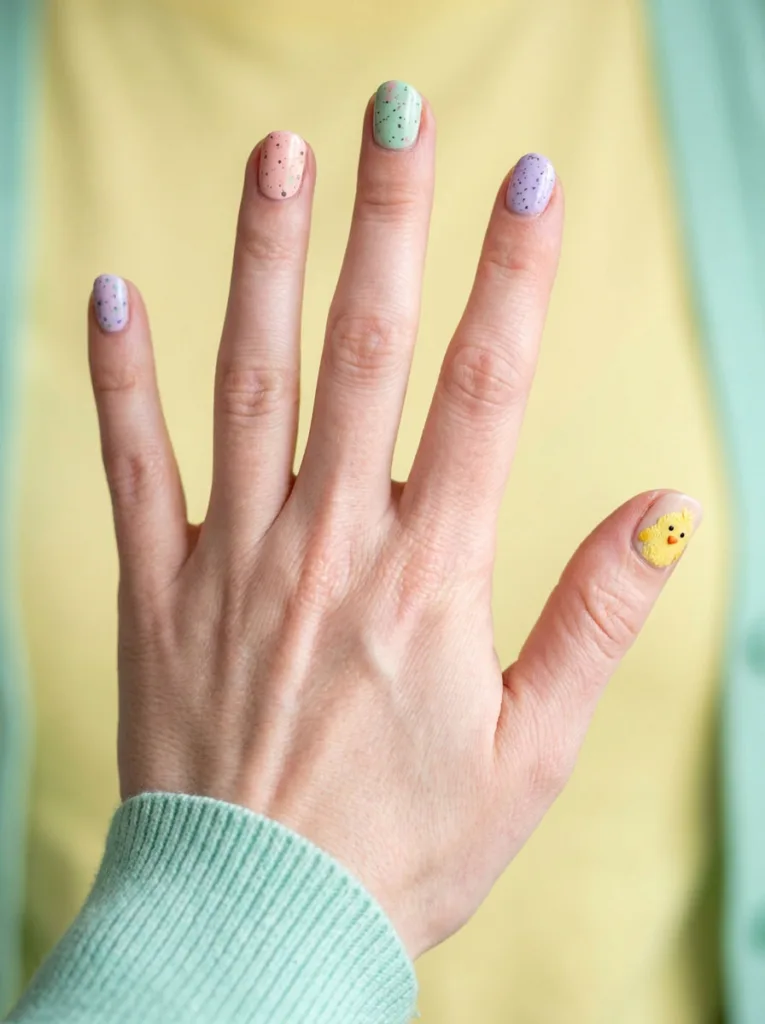
Best for: mixing several designs on one hand
Mismatched nails let you tell a bigger story across all ten fingers instead of repeating one design. Paint a fuzzy yellow chick with an orange beak on one accent nail, then fill the rest with speckled eggs in different pastel shades. It feels like a tiny farmyard scene without being overly literal. This design works best on nails with a bit of length so the details have room to breathe.
13. Glitter Gold Accent Nail
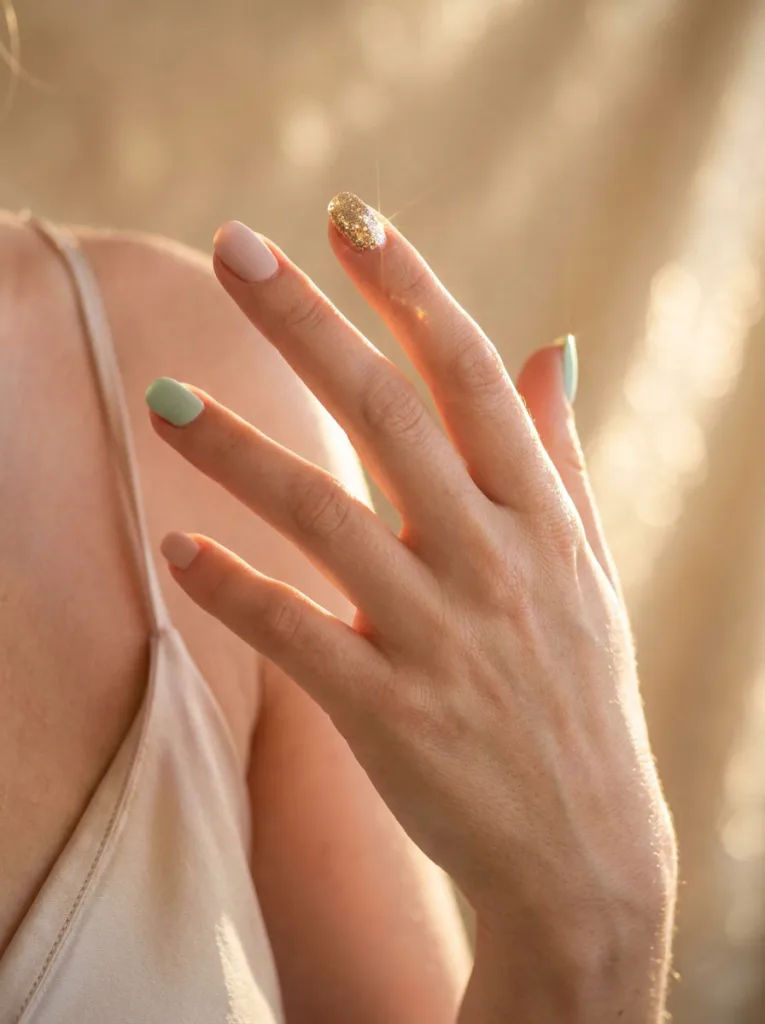
Best for: adding sparkle without overdoing it
Sometimes the easiest way to elevate a simple manicure is to add one glitter nail. Paint the rest of your nails in soft pastels, then cover a single accent nail, usually the ring finger, in gold or champagne glitter polish. It adds sparkle for Easter brunch or photos without turning your whole hand into a disco ball. Two coats of glitter polish usually gives full, even coverage.
14. Butterfly Nail Art
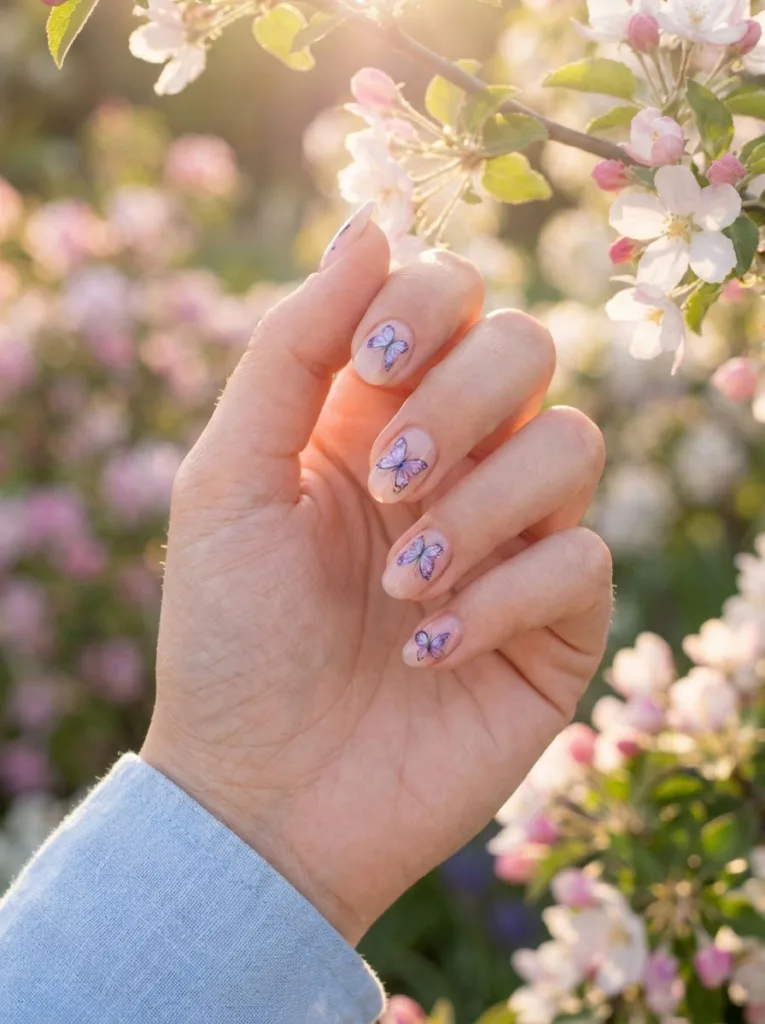
Best for: delicate, grown-up spring nails
Butterflies signal that spring has fully arrived, and they pair beautifully with pastel Easter colors. Paint small violet or blue butterflies with fine detail work, adding a touch of shimmer to the wings for extra dimension. One butterfly per nail, or a single statement butterfly on an accent nail, both work well. This design leans a little more delicate and grown-up than bunnies or eggs.
15. Sunny Yellow French Tips

Best for: a subtle seasonal update at work
A small swap can make a big difference. Replace the classic white tips of a French manicure with a cheerful butter yellow instead. Keep the base a sheer pink or nude so the yellow tips really pop. It is subtle enough to wear to work the week of Easter, but it still feels seasonal and bright next to your usual manicure.
16. Polka Dot Pastel Nails
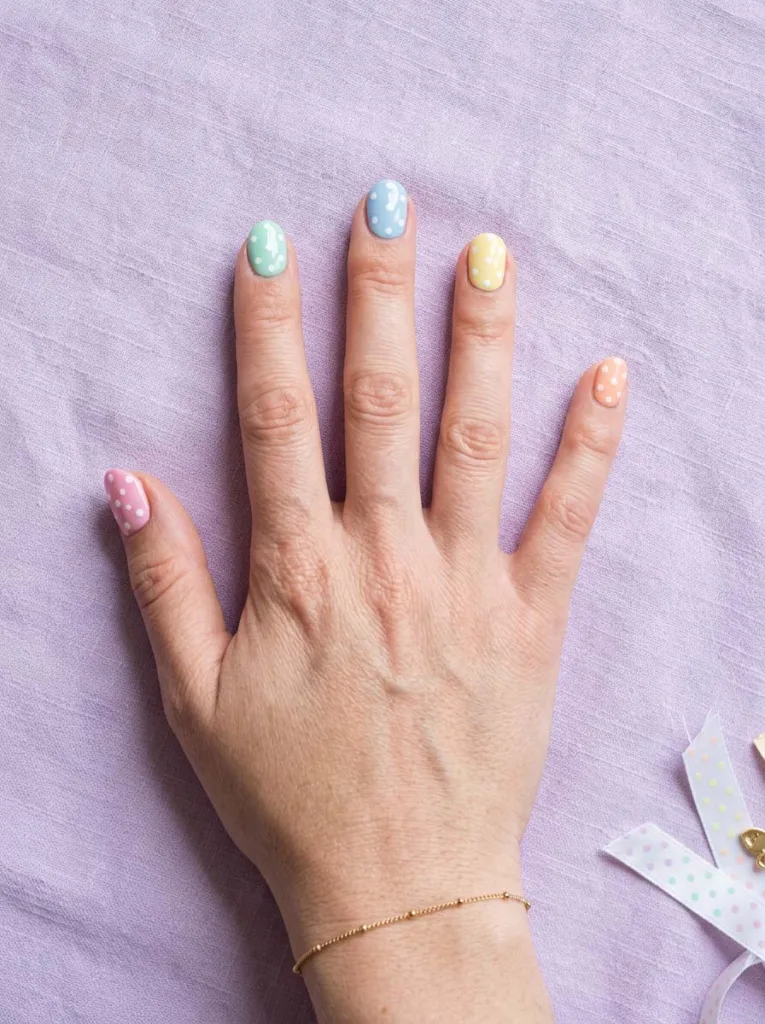
Best for: quick, forgiving DIY sessions
Polka dots are endlessly forgiving, which makes this one of the easiest designs to recreate at home. The difference between this and checkerboard nails comes down to the shape: dots instead of squares, scattered instead of gridded. Paint each nail a different pastel shade, let it dry completely, then use a nail art pen or a dotting tool to add white polka dots across the surface. Vary the dot sizes slightly for a more natural, less uniform look. This design photographs well and takes under twenty minutes start to finish.
17. Cross Accent Nail
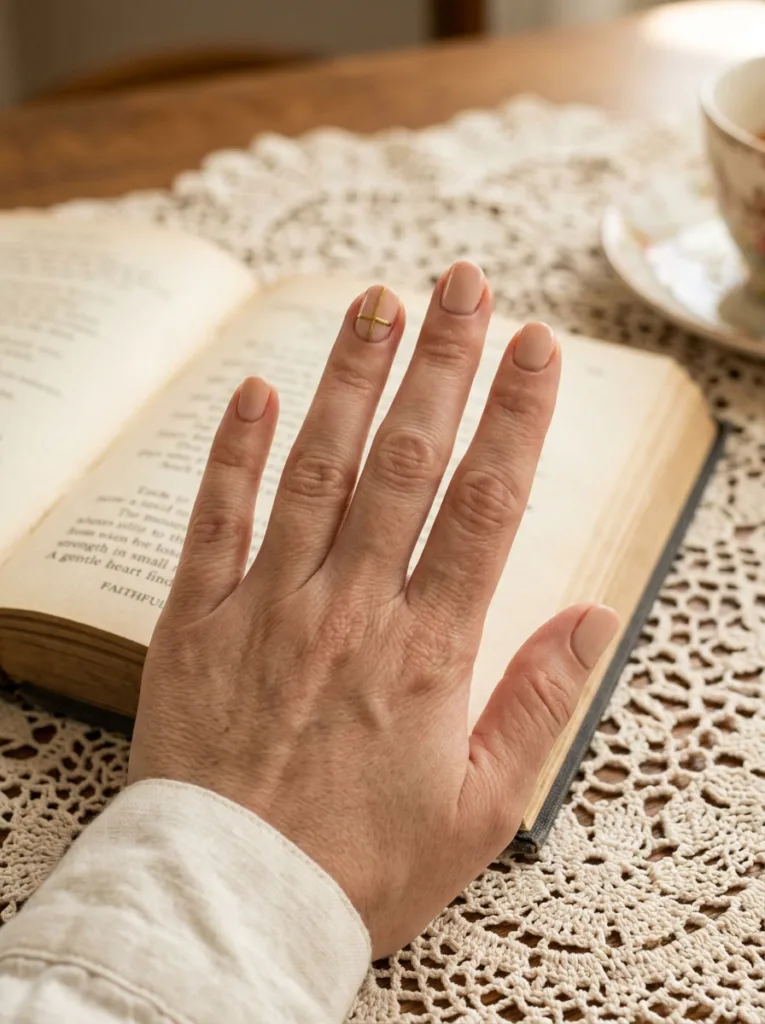
Best for: church or family gatherings
For a design with more meaning behind it, add a single small cross to one accent nail. Paint it in gold or white against a pastel or nude base, keeping the rest of your nails simple. This understated detail works well for church or family gatherings where a loud, cartoonish design might feel out of place. A fine liner brush or a thin striping brush gives you the cleanest lines.
18. Striped Pastel Nails
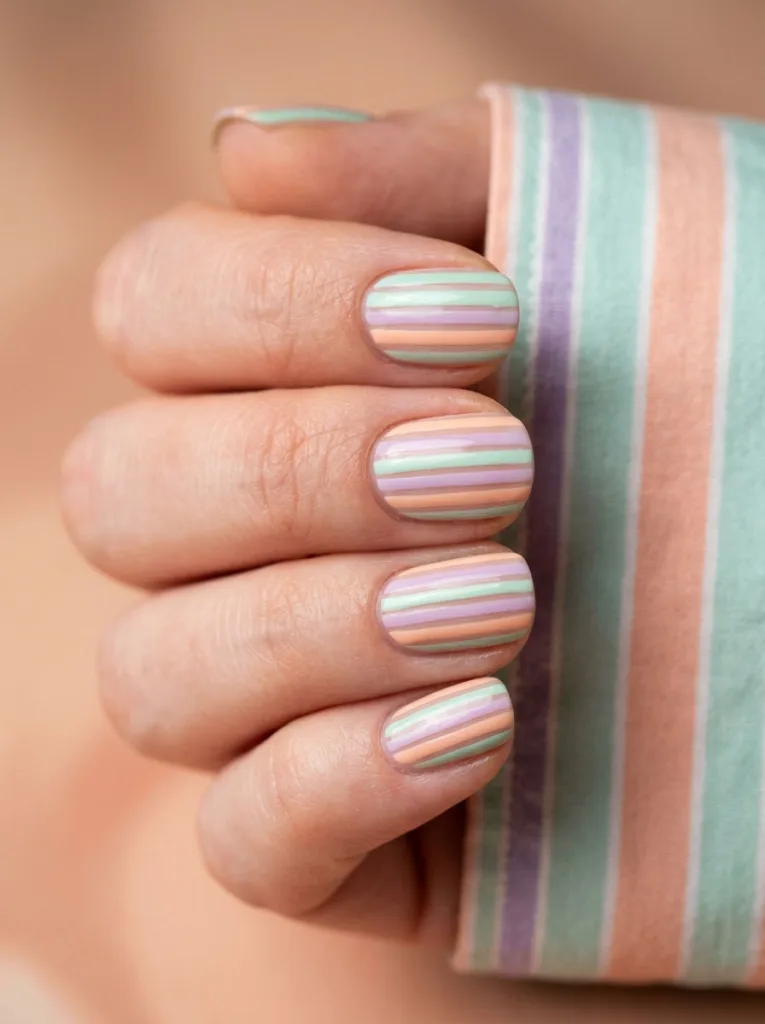
Best for: graphic nails without freehand art
Stripes give you a graphic, modern look without much freehand skill involved. Alternate thin vertical stripes of mint, lilac, and peach using either striping tape or a fine detail brush. Keep the stripes even in width for the most polished result. This design goes well with almost any Easter outfit since it pulls from a full pastel palette rather than committing to just one color.
19. Fried Egg Nail Art
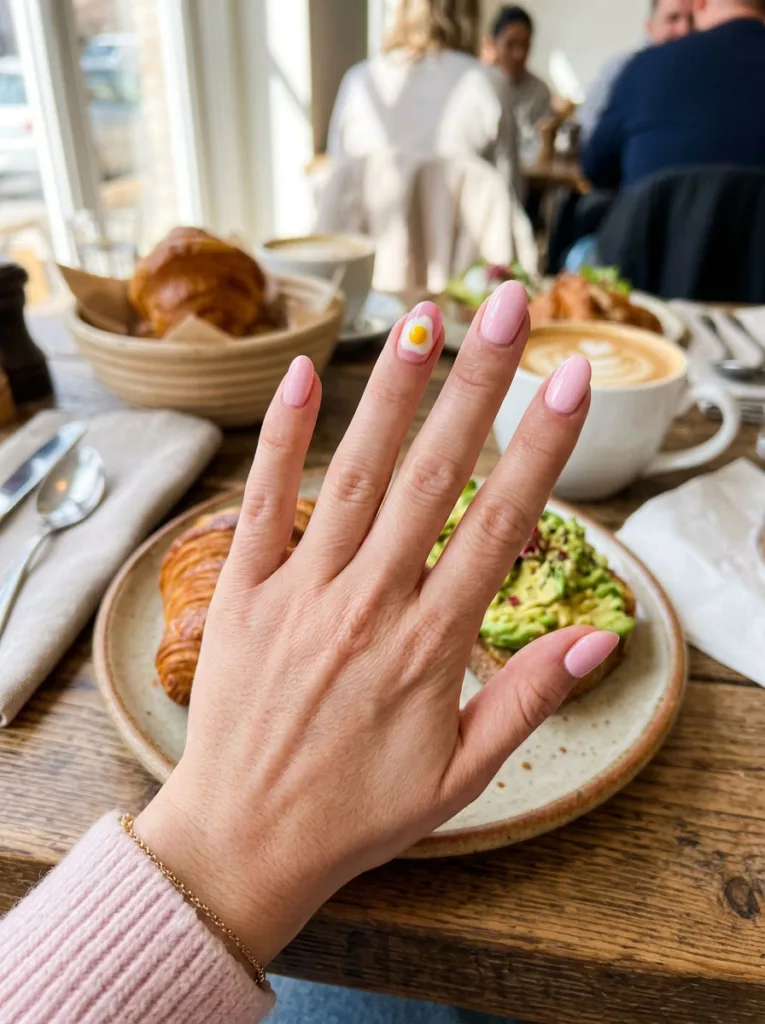
Best for: a design with a sense of humor
This design has a sense of humor built right in. Paint a sunny side up egg, complete with a rounded yellow yolk, on top of a bright hot pink French tip. It plays on the classic Easter egg theme while feeling completely different from speckled or floral designs. Save this one for your ring finger or thumb as an accent rather than repeating it on every nail.
20. Ombre Spring Nails
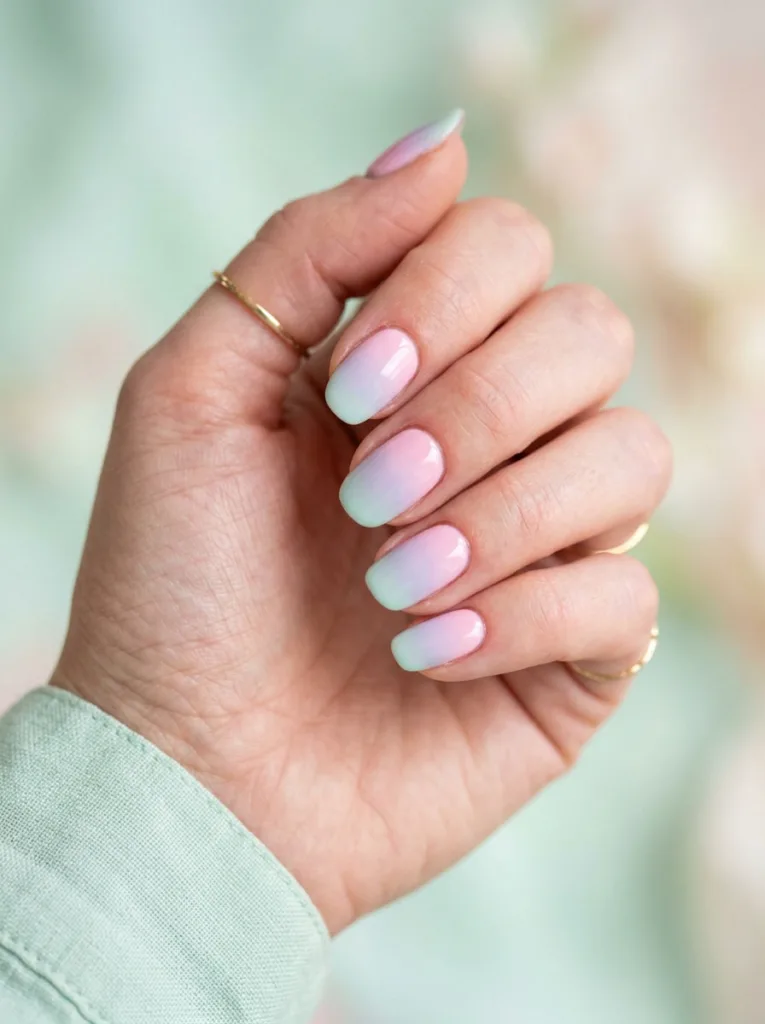
Best for: color with zero actual art required
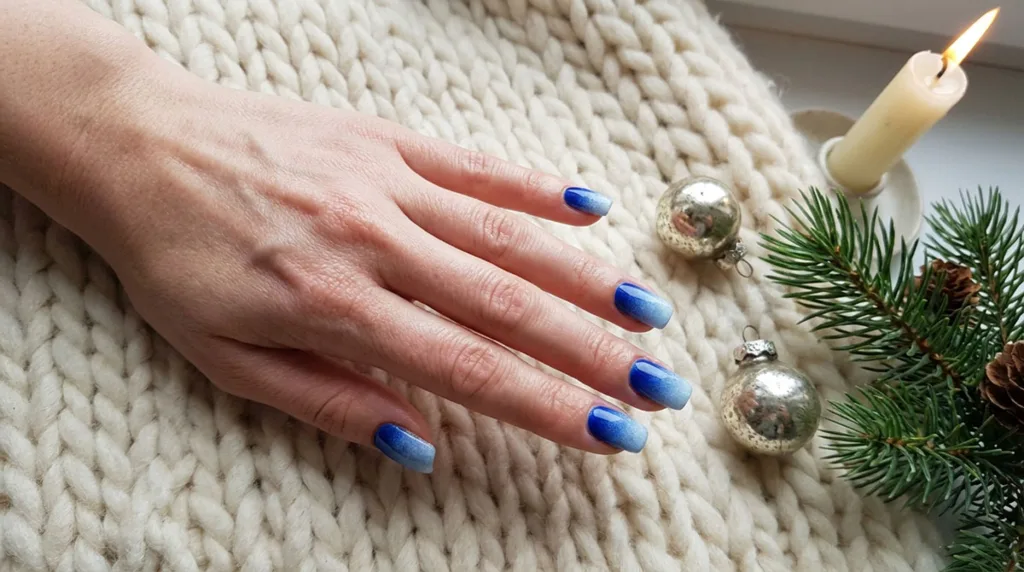
Ombre nails give you color without any actual art required. Blend pastel pink into lavender or mint, working from your cuticle to the tip using a makeup sponge dabbed with both colors. The gradient should shift gradually rather than in a hard line. This design works on any nail shape and length, and it looks just as good in May as it does on Easter Sunday.
21. Abstract Pastel Swirls
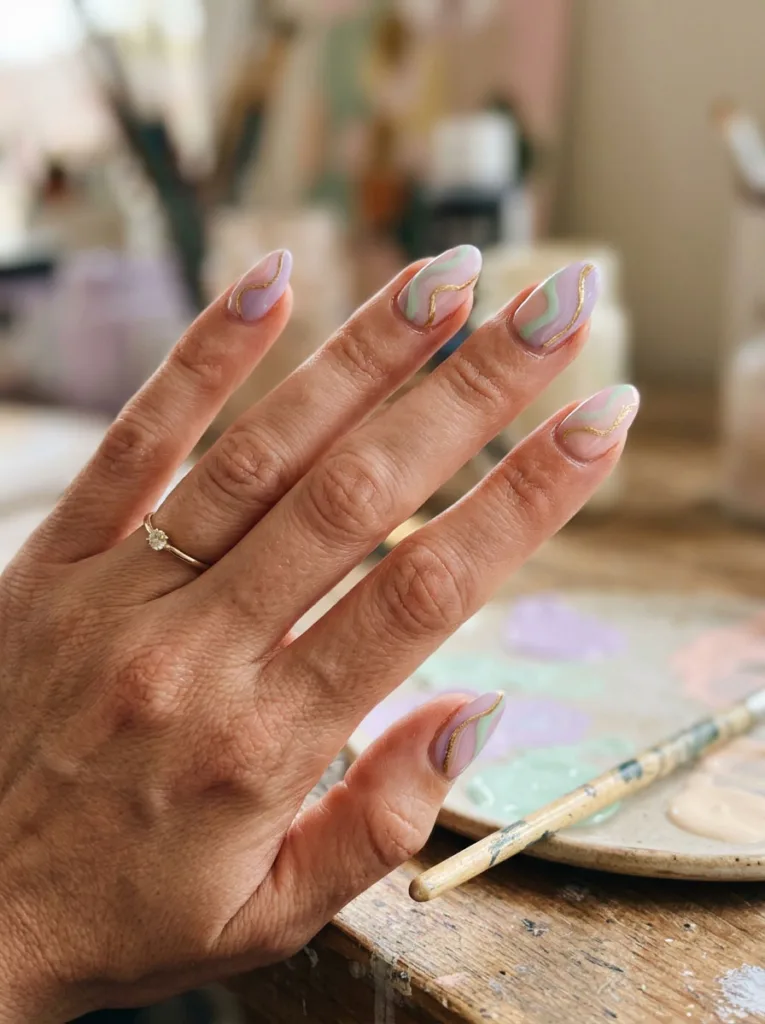
Best for: modern, less literal Easter nails
If bunnies and eggs feel a little too literal for your taste, this is the design for you. Paint loose, abstract shapes in two or three pastel colors across your nail, then finish with a thin gold line accent using a striping brush. It still nods to the season through color alone, without leaning on any obvious Easter symbols. This design reads as modern and a little more sophisticated.
22. Coffin-Shaped Statement Nails
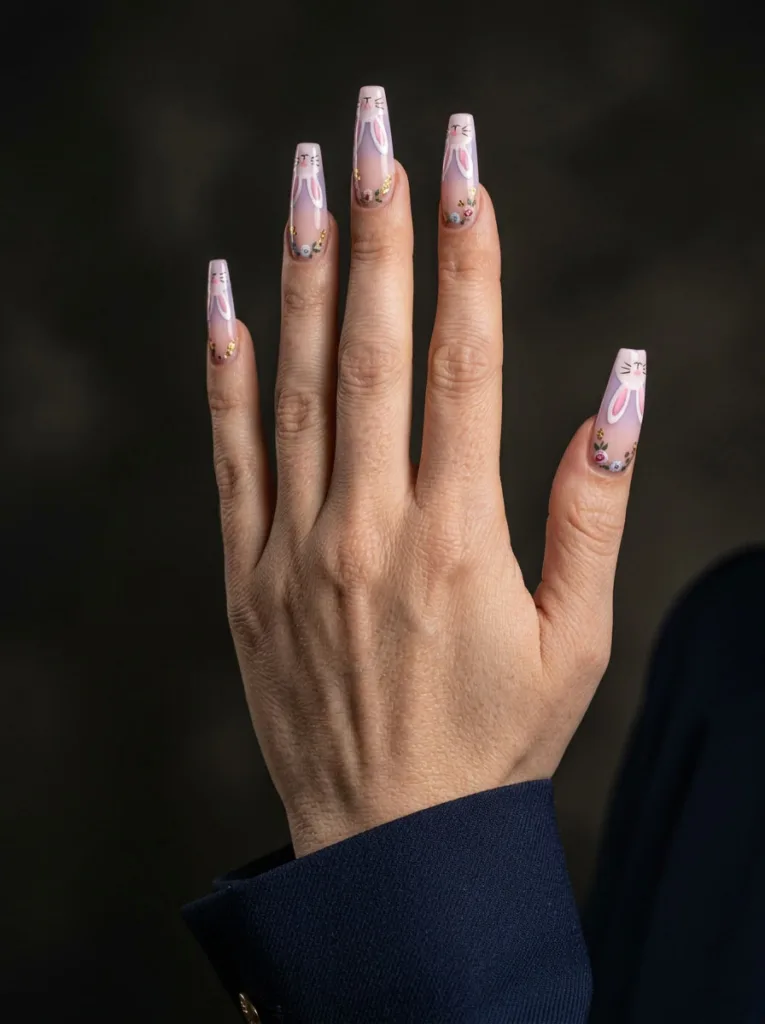
Best for: maximum surface for detailed art
Coffin nails give you the most surface area of any shape on this list, which makes them ideal for detailed art. Use the extra length and width to layer bunny ears, florals, or a classic French tip design, whichever style you are drawn to most. Because the shape itself is already a statement, keep your color palette to two or three pastels so the design does not feel cluttered.
Easy DIY Techniques Anyone Can Try
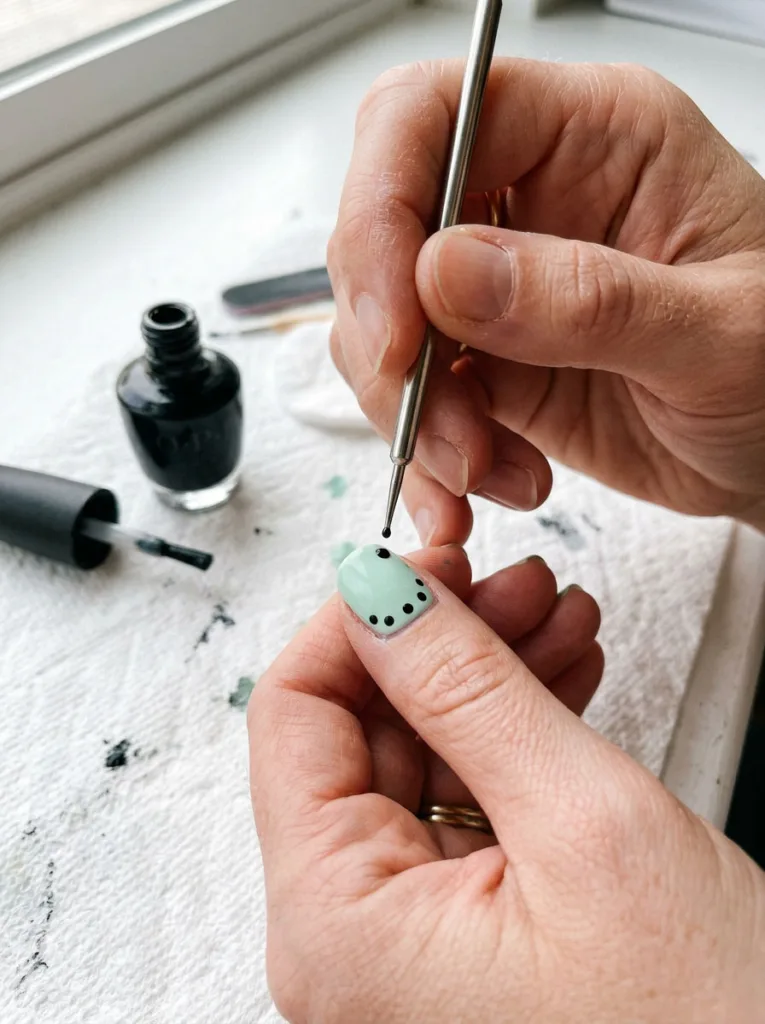
A salon visit for detailed Easter nail art typically runs $35 to $65, more if you add gel or dip powder. Doing it yourself costs closer to $15 to $25 total for polish, a dotting tool, and striping tape, and you can reuse all three for your next manicure. Start with clean, dry nails and one thin coat of base polish before adding any art. A few small techniques cover almost everything on the list above.
How to Get the Speckled Egg Look
For speckled eggs, dip an old toothbrush or a small dotting tool lightly into black polish. Flick it toward your nail from an inch away for scattered, natural looking specks. Practice on paper first if you are nervous about the pressure. It only takes a couple of tries to get a feel for it.
How to Marble Your Nails at Home
For marble nails, drop two pastel polishes into a cup of room temperature water. Swirl gently with a toothpick, then dip your nail straight in and pull it out at an angle. Clean up the skin around your nail with a small brush dipped in acetone once it dries.
How to Get Clean Gingham or Stripes
For gingham or stripes, apply nail striping tape to dry polish, then paint over it and peel the tape off before the top coat sets. This keeps lines sharp without a steady hand. Work in good lighting so you can see exactly where the tape lines sit.
Sealing It All In
Seal every design with a strong top coat. This step matters more than the art itself for keeping designs chip free through Easter weekend. Reapply a thin layer every few days if you are wearing regular polish instead of gel.
How Long Easter Nail Art Lasts
Not every design is meant to last the same amount of time, and that is worth planning around before you book anything or start painting.
Gel and Dip Powder
Gel and dip powder manicures usually last two to three weeks. That means you can book an appointment several days before Easter and still look fresh for photos afterward. Both options hold detailed art, like speckled eggs or floral tips, especially well.
Regular Polish
Regular polish holds up for about a week with a solid base and top coat. It is the easiest option if you plan to change your design again soon after Easter. Just know that chipping happens faster on regular polish than on gel.
Press-On and Glue-On Nails
Press-on and glue-on nails have gotten a lot better in the last few years, with most quality sets lasting seven to fourteen days. That is more than enough time to cover Easter Sunday, brunch, and any egg hunt photos that follow. If you want a design to survive an actual egg hunt with kids, gel or dip powder is still the safer bet over regular polish.
Common Mistakes to Avoid
Most Easter nail art fails come down to a handful of predictable reasons. Knowing them ahead of time saves you a redo.
Speckles Turning Into Blobs
If your dotting tool sits too close to the nail, specks turn into blobs instead of fine dots. Hold it back a full inch and flick your wrist, not your whole hand. Test the motion on a paper towel first so your first real attempt is not on your nail.
Marble Colors Turning Muddy
Marble nails go muddy when you use more than three colors or stir the water too long. Stick to two or three polishes and swirl just enough to create a pattern, not a blend. Cold water also works better than warm, since it keeps the polish from spreading too thin.
Tape Pulling Up Wet Polish
Striping tape ruins gingham and stripe designs when it gets removed too late. Peel it off while the top layer is still slightly tacky, not fully dry. If it pulls up color anyway, touch up the gap with a small brush before you add your top coat.
Frequently Asked Questions
1. What colors are best for Easter nails?
Pastel shades like lavender, mint, butter yellow, and blush pink are the most popular Easter nail colors. Nude and milky bases also work well as a canvas for detailed art.
2. How do I do Easter nail art without being a professional?
Start with simple techniques like speckled eggs, skittle color blocking, or striping tape patterns. These require basic tools and little freehand skill.
3. Can kids wear Easter nail designs safely?
Yes, look for non-toxic, water based polish made for children, like Piggy Paint or Suncoat. Both peel off without acetone. Harvard Health notes that acetone-free, water-based formulas are gentler on thin, fragile nails, which is exactly the category most kids’ nails fall into.
4. Do Easter nails work for toes too?
Absolutely. Simple pastel colors or small egg accents translate well to a pedicure, especially for sandal season photos.
5. How do I remove Easter nail art after the holiday?
Soak cotton pads in acetone remover and wrap each nail in foil for five minutes before wiping clean. This works for polish, gel, and most press on styles.
Ready for Your Easter Manicure
These easter nail ideas all come down to matching your skill level, your nail shape, and how long you need the look to last. Speckled eggs and skittle nails suit beginners. Marble and coffin shaped statement nails reward a little more patience. Gel or dip powder makes sense if Easter falls early in your appointment window, while regular polish works fine if you plan to switch designs again soon after. Pick one design from this list, gather your polish, and give yourself twenty minutes this week to try it before the holiday arrives.