15 Innovative Almond Shaped Nail Designs Ideas
The one nail shape that makes every design look more expensive—and most people are filing it wrong.
Almond shaped nails are narrow at the sides, wide at the base, and tapered to a soft rounded point. That geometry does something no other shape does as cleanly: it elongates the fingers, frames nail art, and makes even a single coat of nude polish look intentional. But the shape only delivers when filed correctly. Uneven sidewalls or an over-pointed tip undermine the whole effect.
This guide covers 15 innovative almond shaped nail designs for 2026, from beginner-friendly almond nail ideas to advanced 3D work, plus a step-by-step shaping guide so the foundation is right before any polish touches the nail. It also covers skin tone guidance, maintenance habits, and short nail options.
Why Almond Nails Are Worth the Hype
Few nail shapes manage to be both classic and fashion-forward at the same time. The almond silhouette is one of them. It flatters a wide range of finger lengths and widths, and it holds nail art better than a squared tip because the shape naturally draws the eye toward the center.
What Makes the Almond Shape Flattering
The tapered sides create an optical illusion that makes fingers appear longer and slimmer. Unlike stiletto nails, the almond tip is rounded enough to stay practical. You can still type, open packages, and go about your day without a second thought. The curve also distributes pressure more evenly, which means less chipping at the corners compared to square nails.
Almond vs. Other Nail Shapes
| Shape | Tip Style | Best For |
| Almond | Soft tapered point | Elongating fingers, versatile nail art |
| Oval | Full, rounded | Natural everyday look |
| Stiletto | Sharp point | Drama; fragile for daily wear |
| Square | Flat, blunt | Durability: less elongating |
| Coffin | Flat, squared-off point | Bold, statement looks |
If you want elegance without the drama of a stiletto, almond is the right call.
How To Shape Almond Nails at Home
Shaping almond nails takes patience, but it is achievable at home. Work slowly and check symmetry as you go. Most people get a clean almond shape in 10 to 15 minutes once they have practiced a few times.
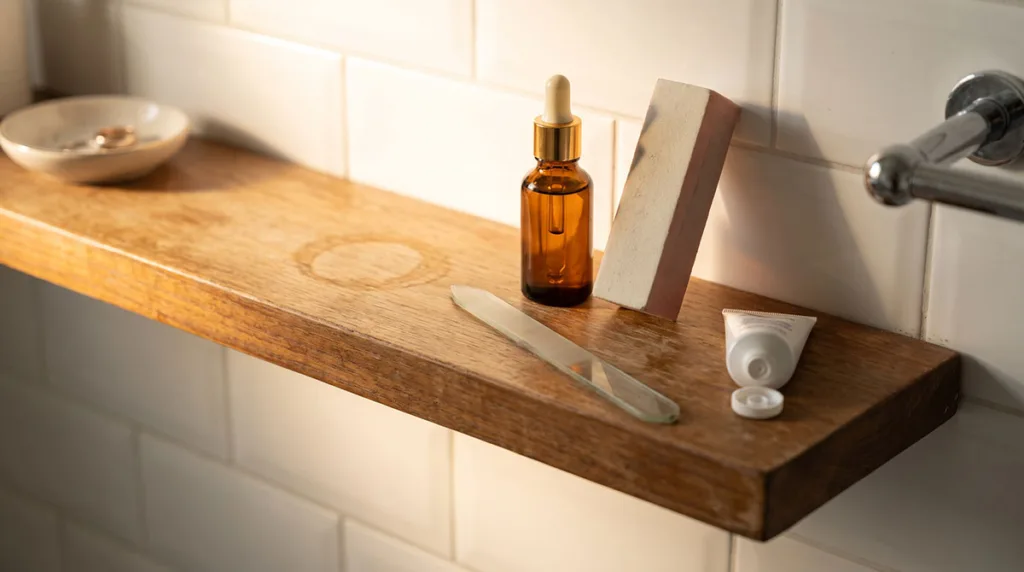
Tools You Need
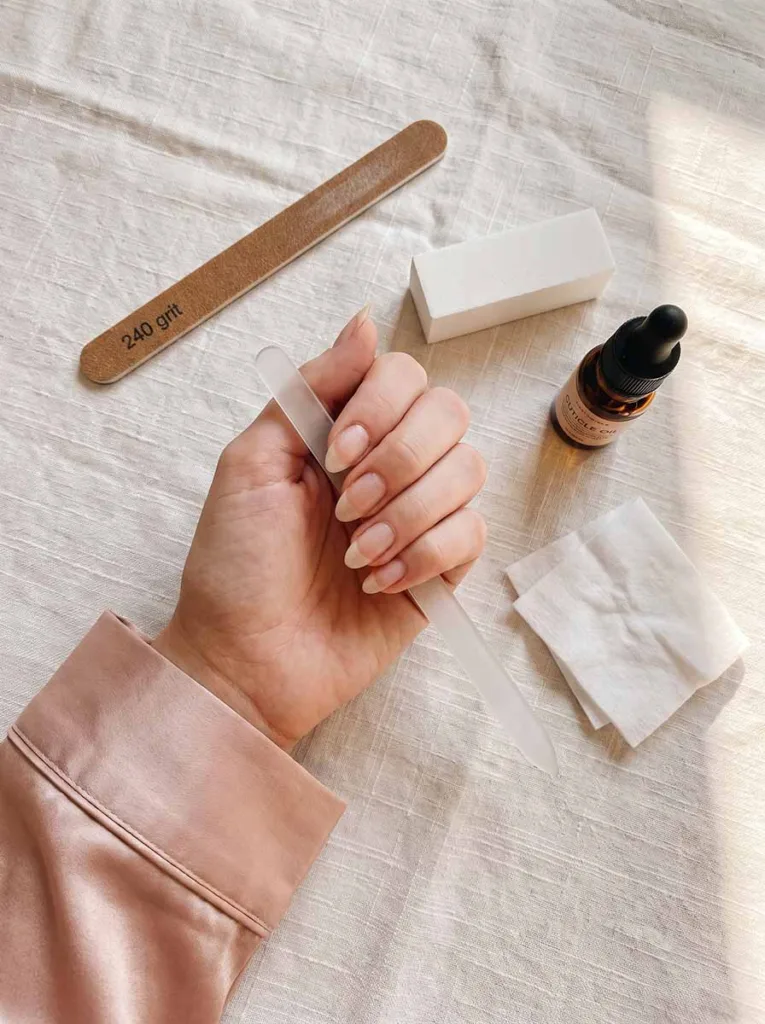
- Medium-grit file (180 grit) — for initial shaping
- Fine-grit file (240 grit) — for smoothing and refining the tip
- Buffing block — to prep the surface before polish
- Cuticle oil — for hydration after filing
- Isopropyl alcohol or lint-free wipe — to remove dust before applying base coat
Skip the metal file for natural nails. Metal files cause microtears at the nail edge that lead to splitting over time. Use emery boards or glass files instead.
Step-By-Step Filing Guide
- Trim your nails to a manageable length with nail scissors. Leave enough free edge to taper.
- File the left side at a 45-degree angle, moving the file toward the center tip in single strokes.
- Mirror the right side at the same angle — symmetry is everything with this shape.
- Work in one direction only. Never saw back and forth. That motion frays the nail tip.
- Check from the front and side. Both edges should taper evenly to a centered, rounded peak.
- Refine the tip with your fine-grit file, smoothing any sharp point into a gentle curve.
- Buff lightly and wipe with isopropyl alcohol before applying base coat.
- Apply cuticle oil and massage it into the nail bed and surrounding skin.
Common Shaping Mistakes to Avoid
- Filing too aggressively thins the sidewalls and weakens the entire nail
- Skipping symmetry checks mid-process results in mismatched hands
- Over-pointing the tip moves you into stiletto territory and increases snapping risk
- Using a coarse metal file on natural nails causes fraying that no topcoat can fix
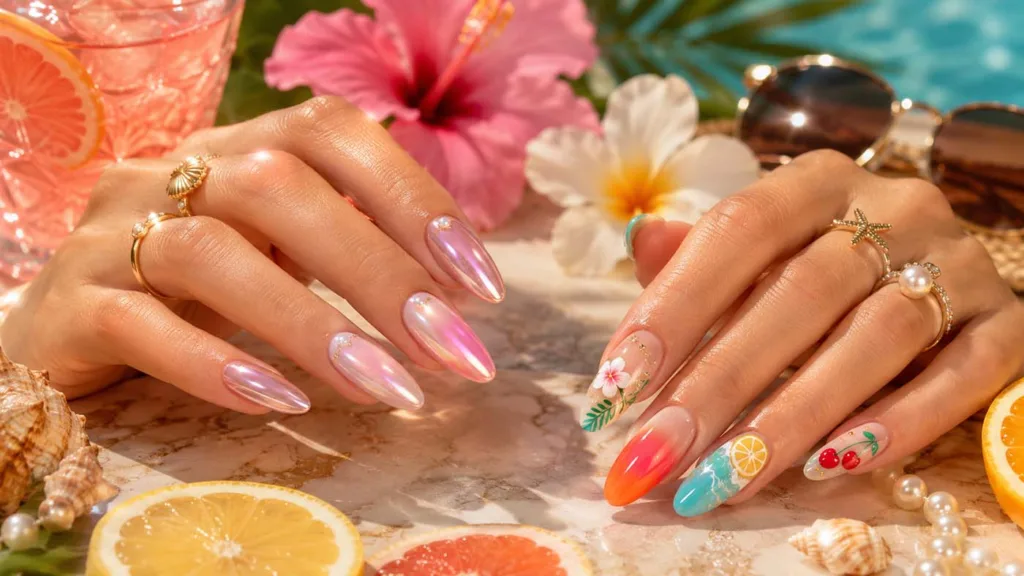
15 Innovative Almond Shaped Nail Designs
These 15 designs run from barely-there to completely bold, organized loosely from low-effort to more advanced, so you can pick based on your skill level and time.
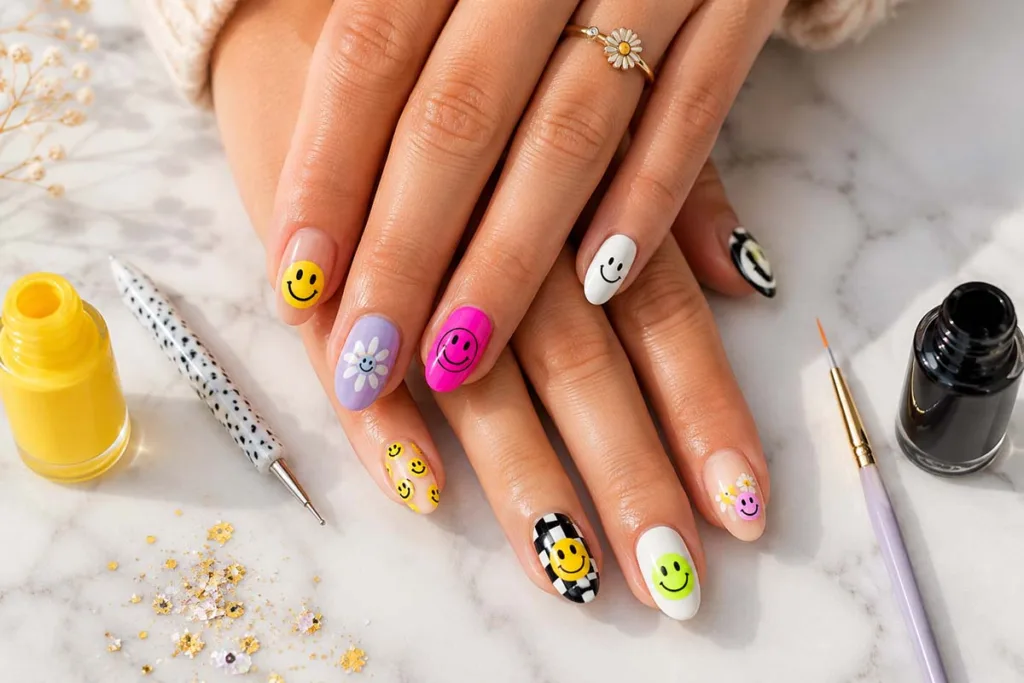
1. Butter Glaze Almond Nails

Best for: Everyday wear, spring and summer
Difficulty: Beginner
A warm, creamy yellow-white polish with a high-gloss topcoat creates the butter glaze effect. The tone sits between ivory and pale yellow, richer than stark white but lighter than true cream. It looks expensive against most skin tones and photographs cleanly in natural light.
Apply two thin coats for an even finish, then seal with a gel-effect topcoat for the wet, dimensional look that makes this finish work. If you want extra warmth, mix a drop of nude into your white before applying it.
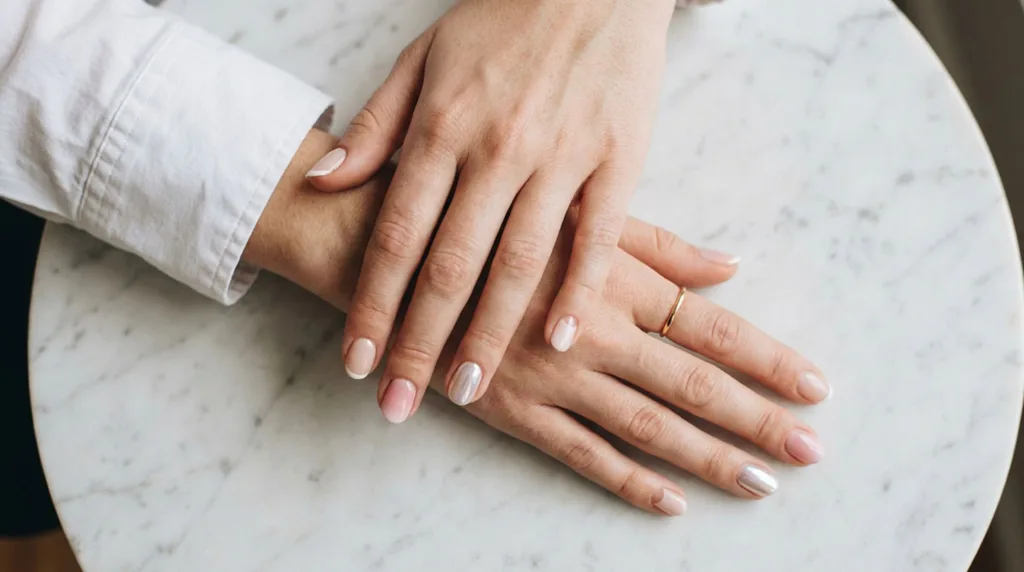
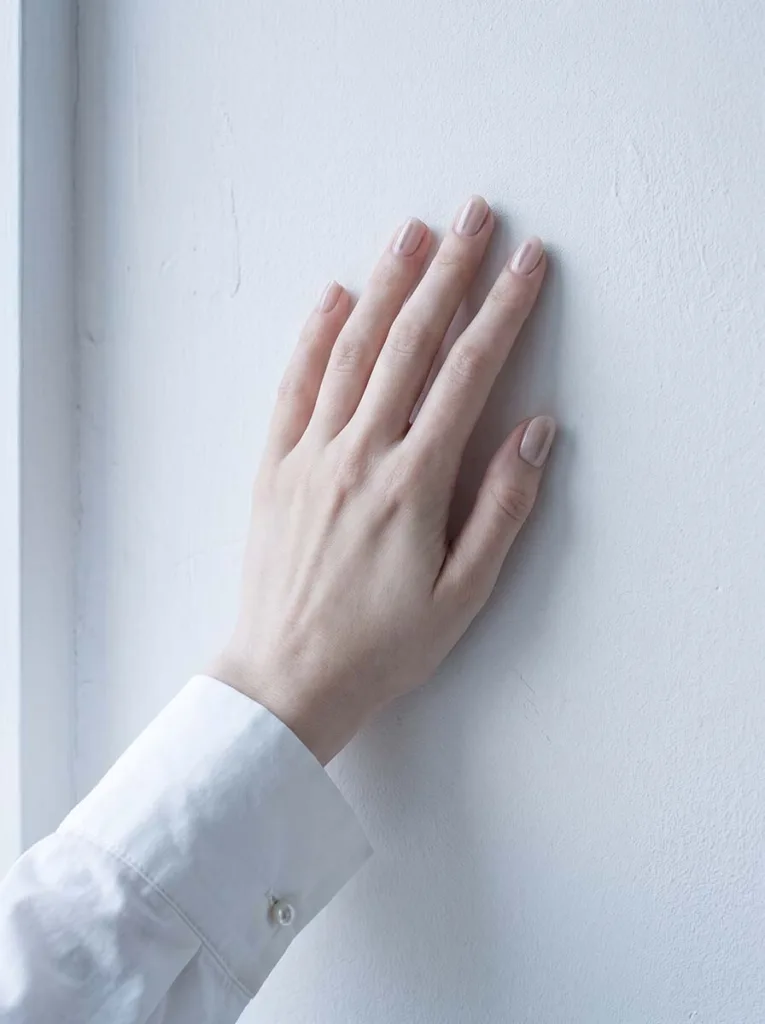
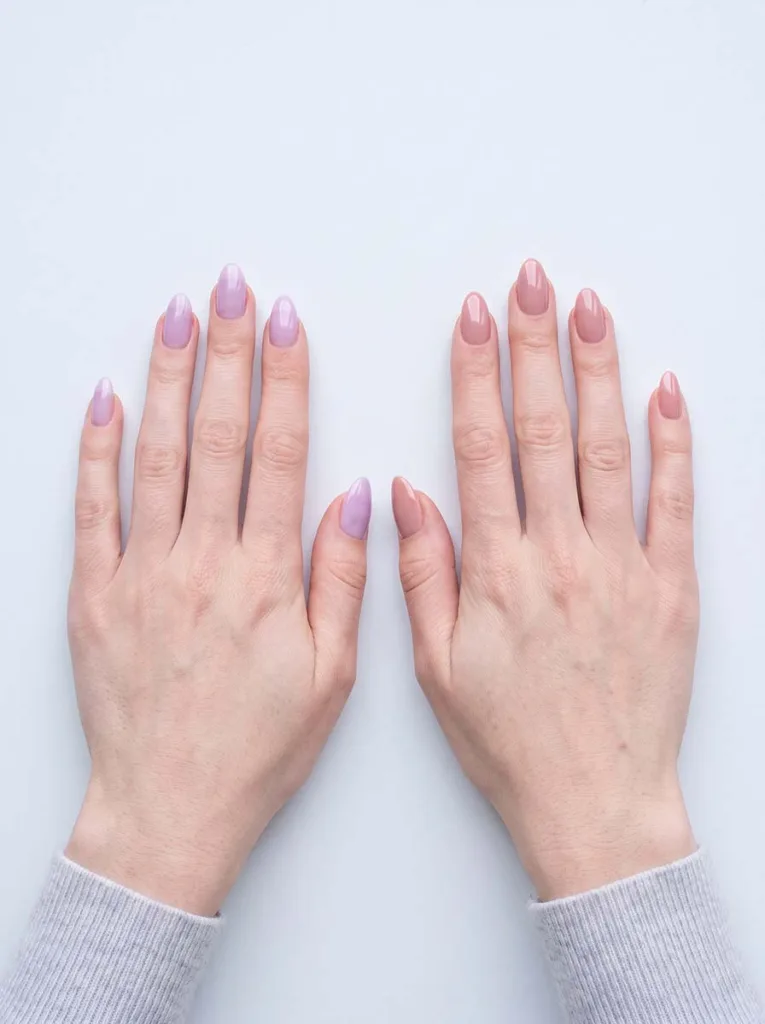
2. Soft Nude and Minimalist Lines
Best for: Office, everyday, transitional styling
Difficulty: Beginner
A nude base toned to your skin is the most underrated almond nail look there is. The almond silhouette does the visual work; the color just needs to stay out of the way. Once the base dries, use a thin striping brush to paint a single fine line down the center of two or three nails, or place a tiny dot near the cuticle on the accent nail.
The line detail adds polish without demanding attention. This look works in gel or regular polish and holds up well through a full work week.
3. Cherry Red Short Almond Nails
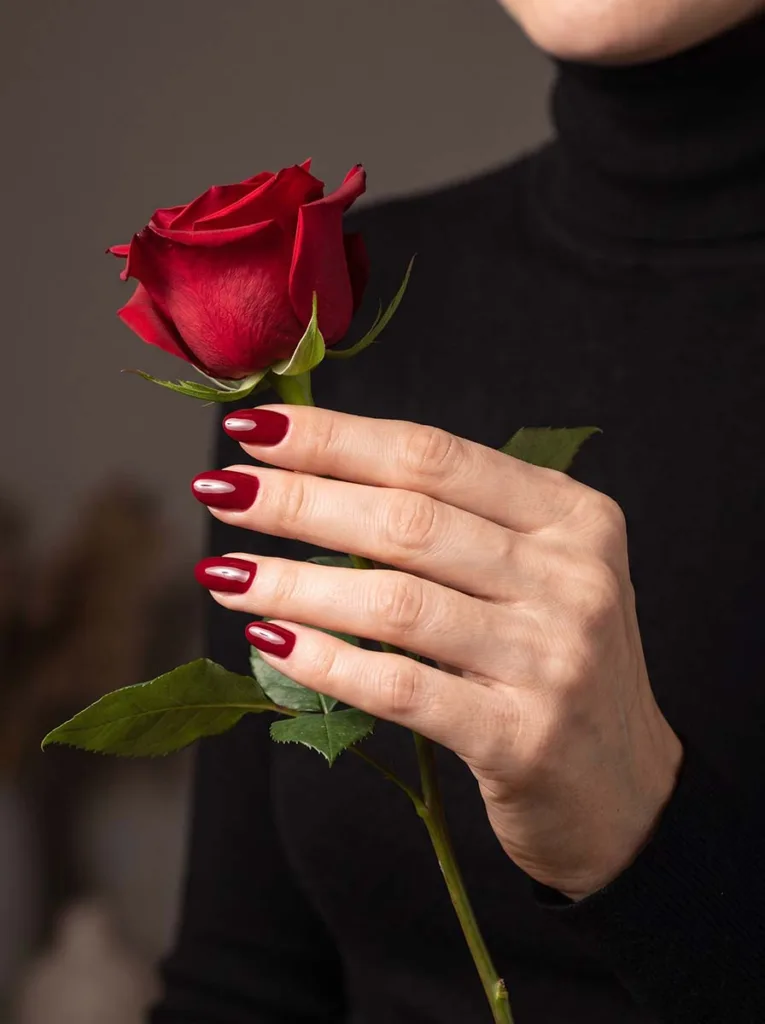
Best for: Any occasion, year-round
Difficulty: Beginner
Cherry red never really goes out of style, and on a short almond shape, it reads as confident and modern rather than retro. Choose a glossy crème formula with no shimmer or metallic interference—that keeps the color clean and pure.
Apply one thin coat, let it tack, then follow with a second full coat to build opacity evenly from cuticle to tip. Seal immediately with a fast-dry topcoat. The almond tip sharpens the red’s visual impact in a way a square or oval nail simply cannot match.
4. French Tips Reinvented
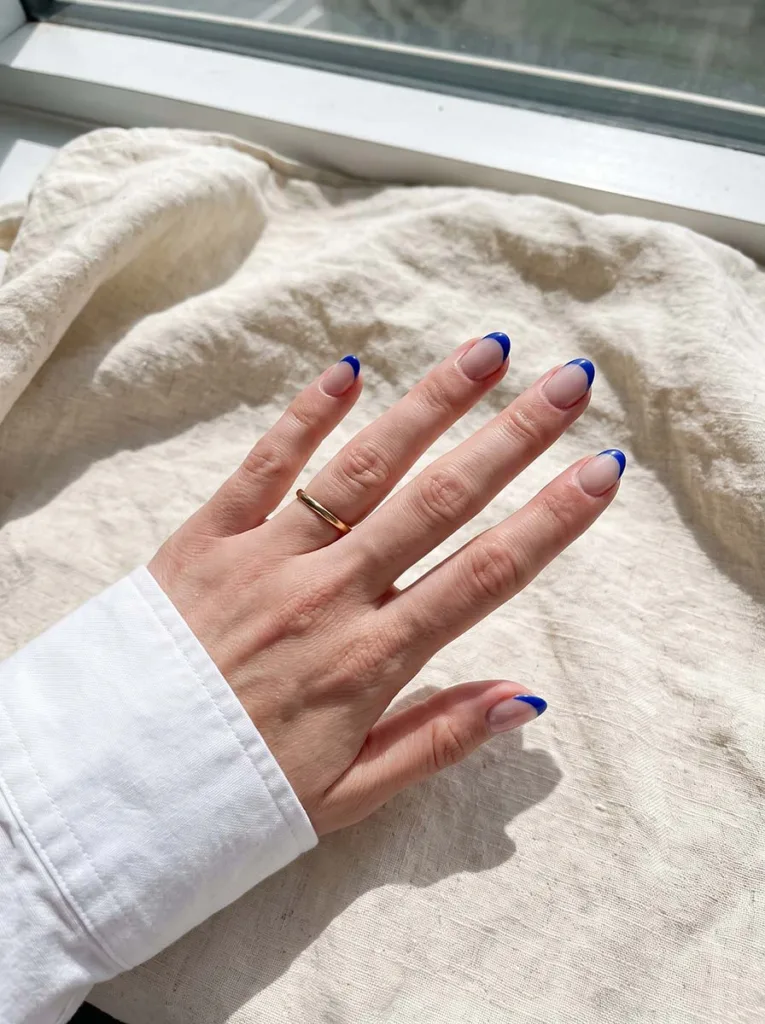
Best for: Events, date nights, elevated everyday
Difficulty: Beginner to intermediate
The almond nail actually improves the French tip. The curved tip line looks like an architectural detail rather than a salon afterthought. Color options worth trying:
- Deep cobalt blue tip on a sheer natural base
- Soft lavender tip on a shimmery rose base
- Chocolate brown tip on a warm nude base
- Burgundy tip on a milky white base
Use nail guides or French tip stickers to keep the smile line consistent across all ten nails. Remove the guide while the polish is still slightly wet to avoid lifting. Finish with a glossy topcoat to meld the tip line into the base.
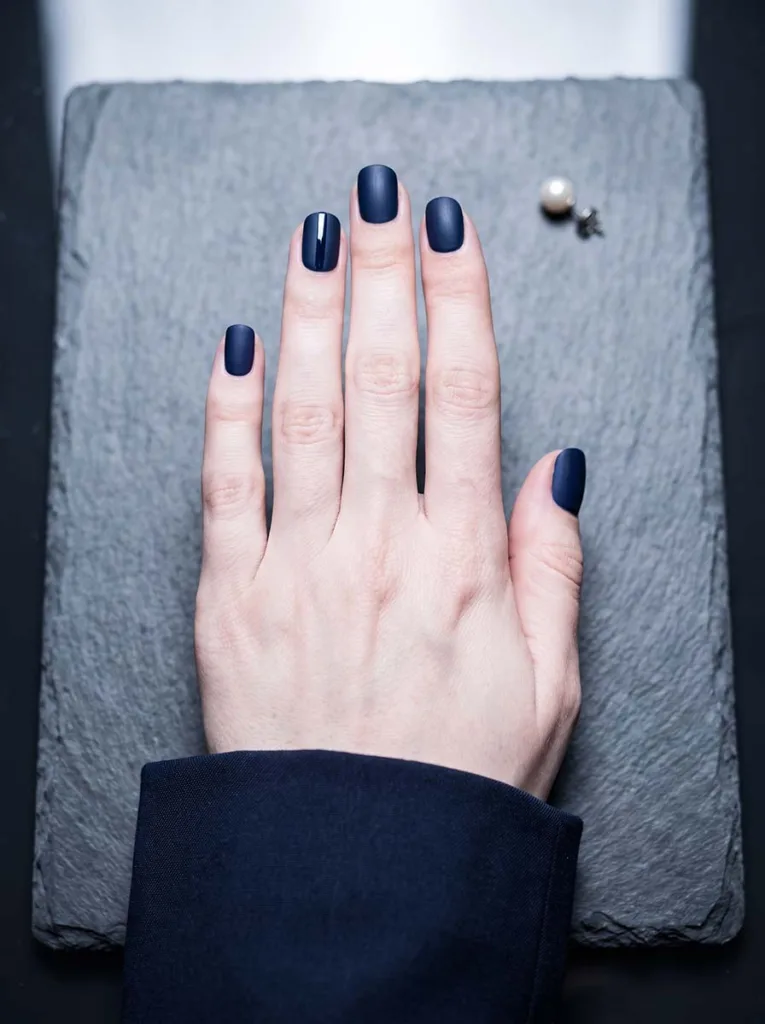
5. Burgundy Velvet Almond Nails
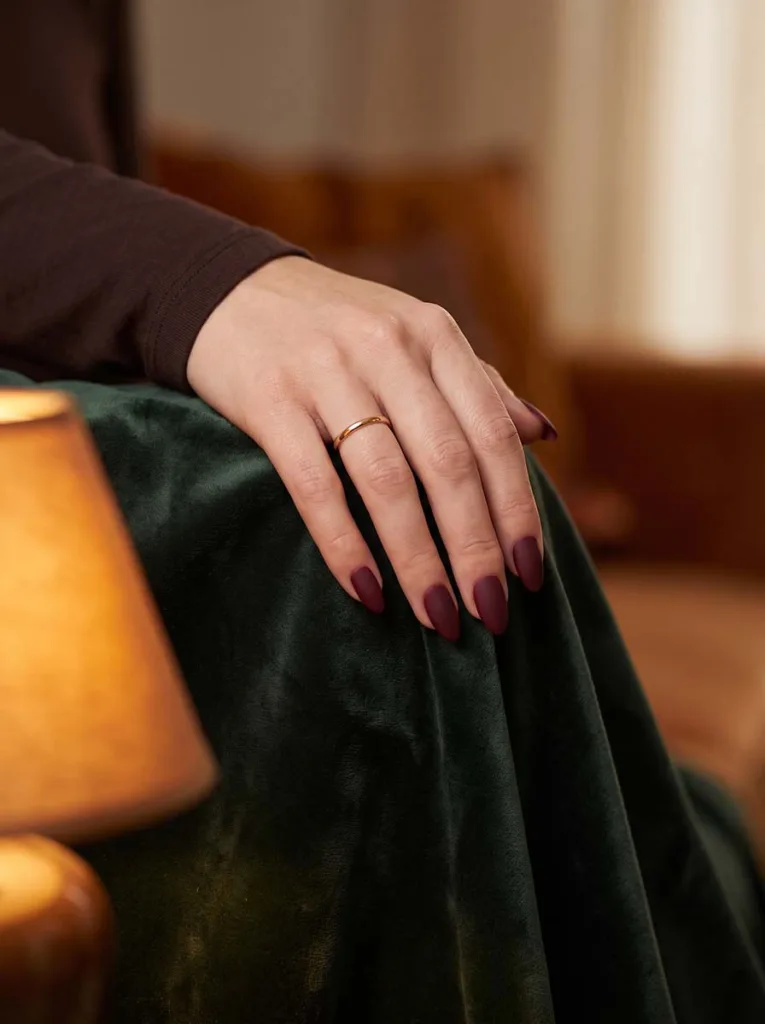
Best for: Autumn, winter, evenings
Difficulty: Beginner
Deep burgundy gel in a matte or satin finish needs no nail art. The color and shape carry it. The richness of burgundy deepens further under a matte topcoat, making the surface look almost touchable.
For a satin version, use a topcoat with a subtle sheen rather than a flat matte. Satin sits between glossy and matte and catches light softly, which suits the almond shape well.
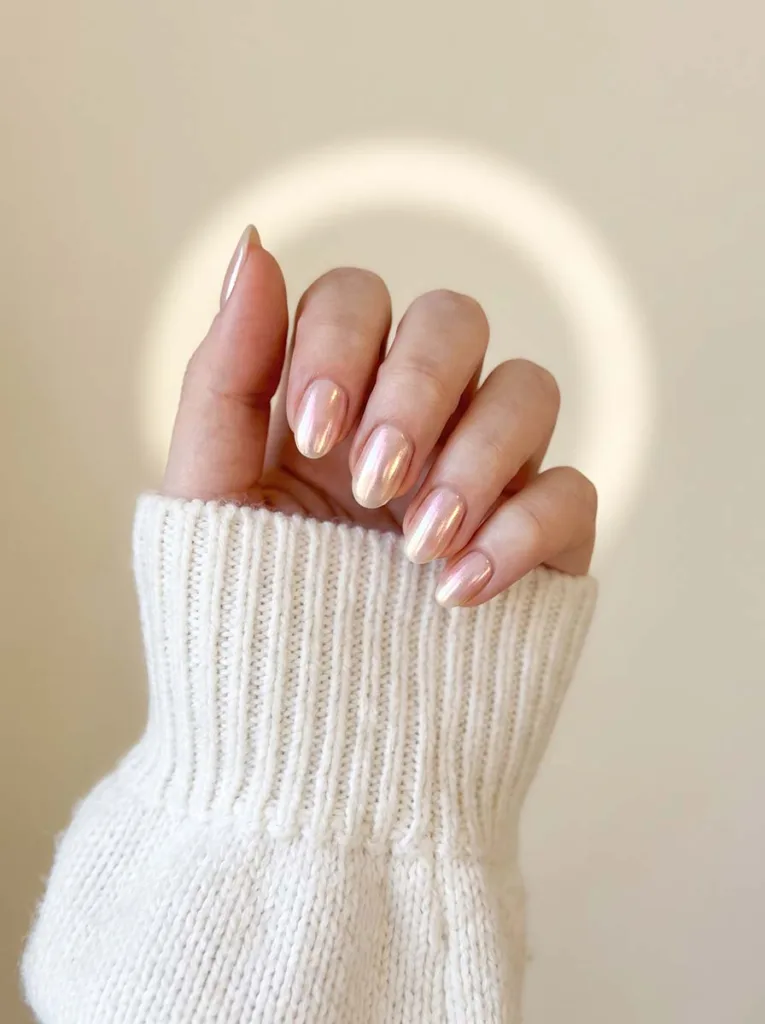
6. Glazed Donut Shimmer
Best for: Spring, summer, everyday glamour
Difficulty: Intermediate
The glazed donut effect uses a pearlescent chrome powder burnished over a cured, uncleansed gel base. The result is a creamy, iridescent sheen that shifts between pink, white, and gold depending on the angle of the light. On almond nails, the shimmer concentrates at the tip, giving the nail a dimensional, almost wet appearance.
The technique requires gel equipment. A UV/LED lamp and an uncleansed sticky layer are essential for the powder to adhere and pack densely. Apply the powder with a silicone-tipped applicator using small circular motions from the center outward, building intensity before sealing with a no-wipe topcoat.
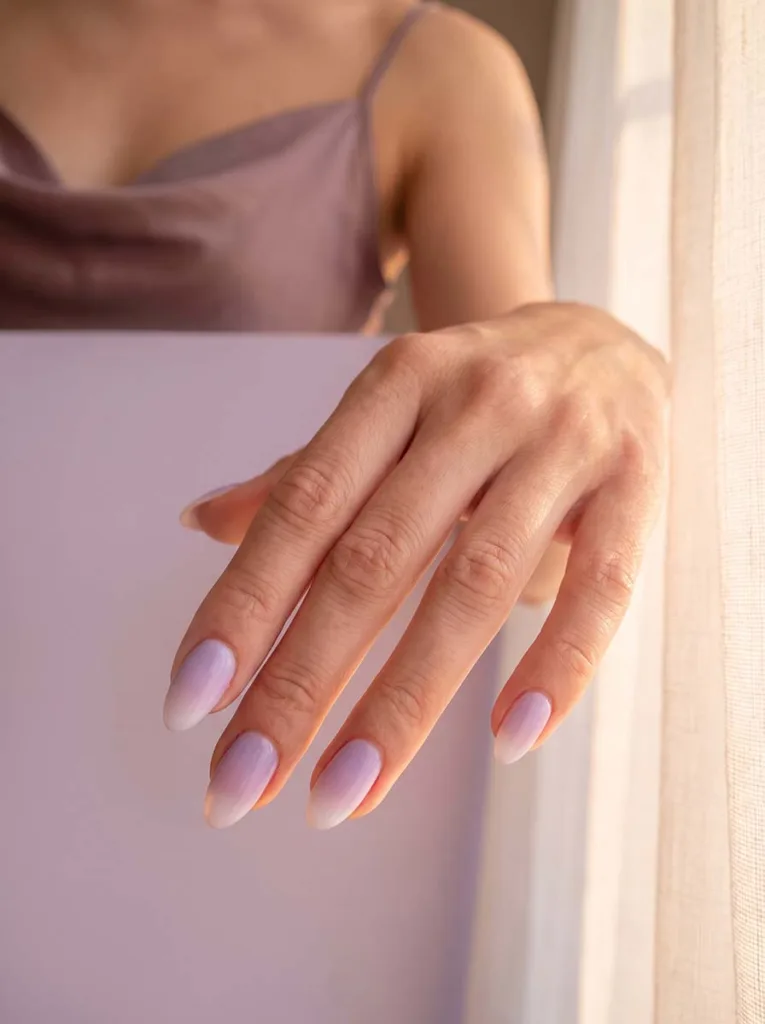
7. Digital Aura Ombre
Best for: Editorial looks, evening, social content
Difficulty: Intermediate
Aura nails use a diffused, sponged ombre that radiates outward from the center of the nail like a soft glow. On the almond shape, the color peaks at the tip, creating a pointed beam of pigment. The effect is dreamy and editorial without being difficult to execute.
The most popular palettes in 2026 are lavender-to-white, dusty rose-to-nude, and mint-to-clear. Use a small sponge to dab the color from the center toward the edges, blending with a clean sponge section before the polish sets. Multiple light layers build the gradient more cleanly than one heavy application.
8. Velvet Matte with Glossy Details
Best for: Photography, events, editorial styling
Difficulty: Intermediate
Paint the nails in a deep velvet matte finish—burgundy, forest green, or navy—and add a single glossy accent detail to one or two nails: a thin line, a dot at the cuticle, or a half-moon arc near the base. The contrast between the flat matte surface and the shiny detail creates a tactile, dimensional effect.
Execution order matters here. Apply the matte topcoat to all nails first, let it cure completely, then draw the accent with a gloss gel liner over the cured matte. Seal only the accent detail with a no-wipe topcoat so the matte areas stay flat.
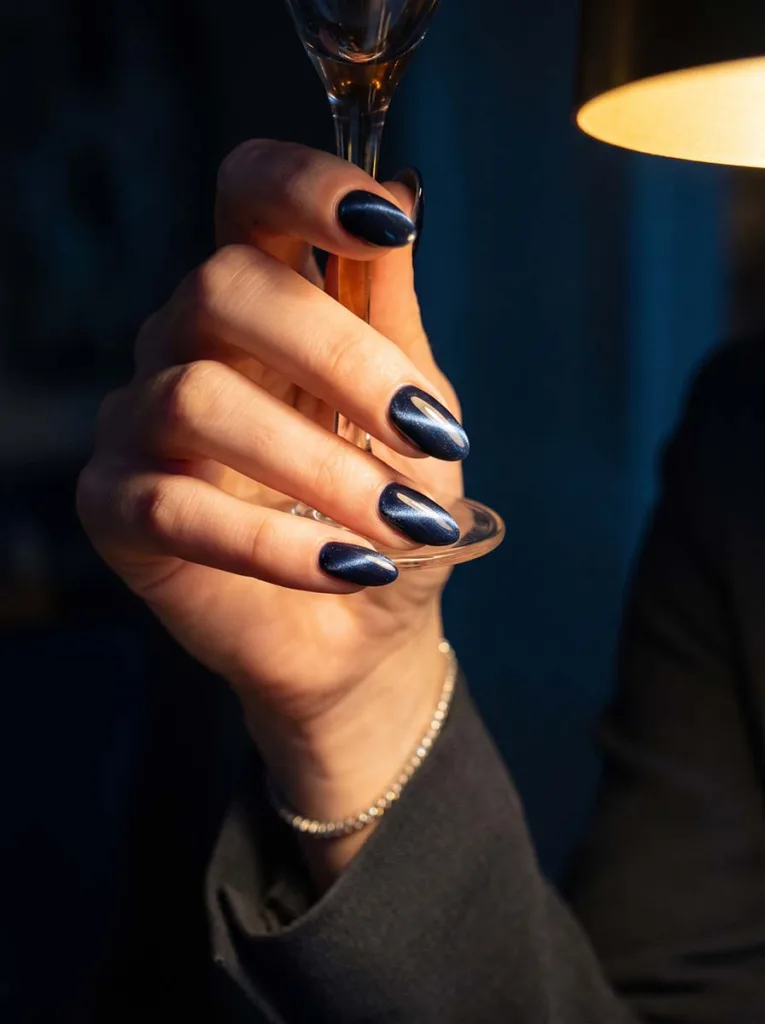
9. Magnetic Cat Eye
Best for: Evening, autumn, winter
Difficulty: Intermediate
A cat eye gel polish contains fine magnetite particles suspended in the formula. When a magnet is held close to the nail during curing, the particles migrate into a streak pattern that mimics a feline iris. On the almond shape, the streak follows the natural curve of the tip, making it look like the eye is widening toward a point.
Cure the base coat and two thin layers of cat eye polish normally, then apply the final coat, hold the magnet 2 to 3mm above the nail for 10 seconds, and cure immediately without moving the magnet. Deep jewel tones—forest green, midnight blue, burnt copper, and deep violet—show the shift effect most clearly.
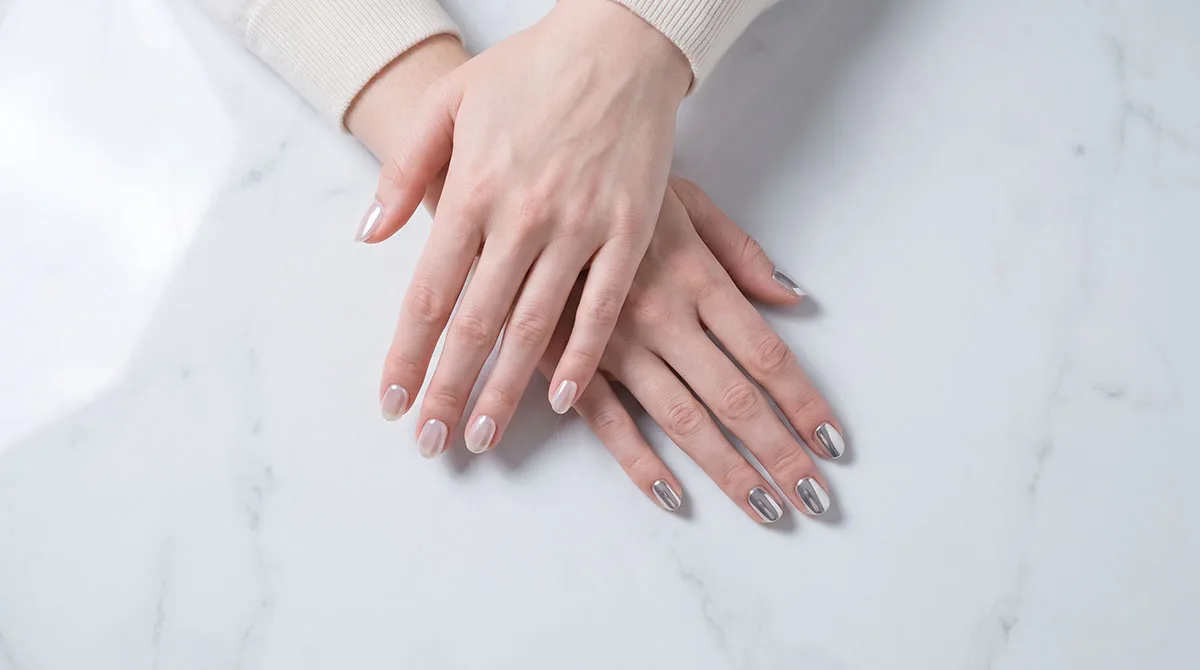
10. Chrome Mirror Finish
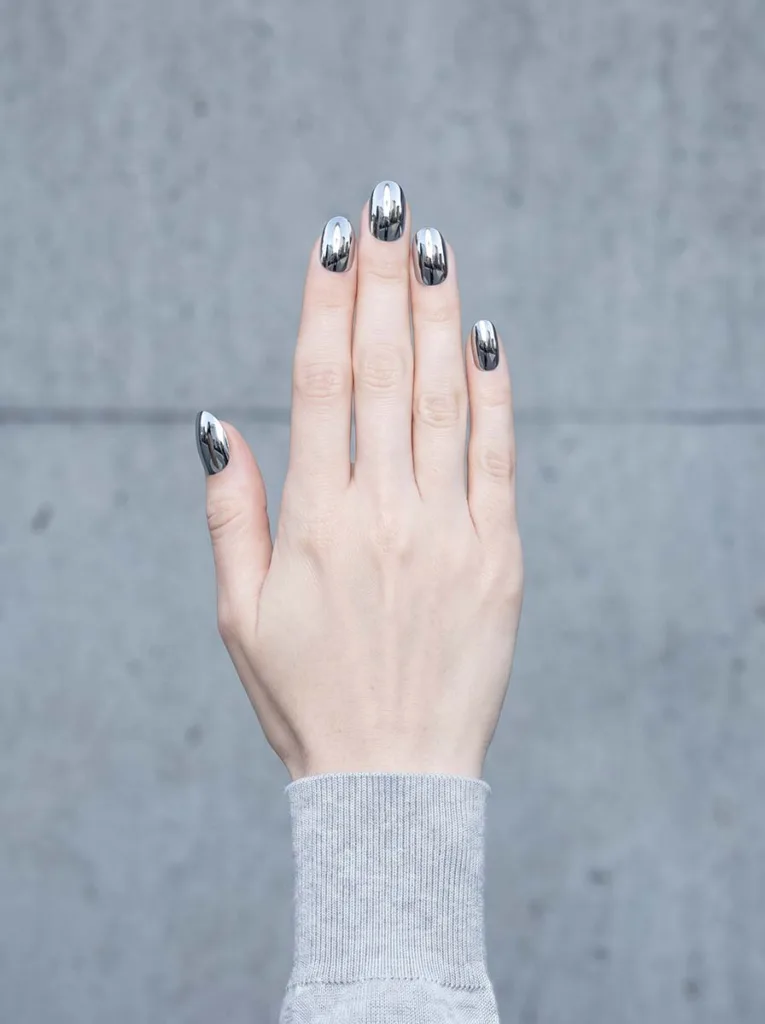
Best for: Statement occasions, parties, editorial
Difficulty: Intermediate
A chrome powder applied over a cured gel base produces a mirror-like reflective surface. The almond tip concentrates and scatters the reflection naturally. Silver chrome is the most classic option, but rose gold and holographic rainbow chrome are the dominant finishes trending in 2026.
Cure the base gel to a sticky, uncleansed layer. Apply the chrome powder with a felt applicator using firm, even strokes from cuticle to tip, then buff until the surface turns reflective. Seal immediately with a no-wipe gel topcoat—a wipe-required topcoat will dull the mirror effect.
11. Cobalt Blue Architectural Tips
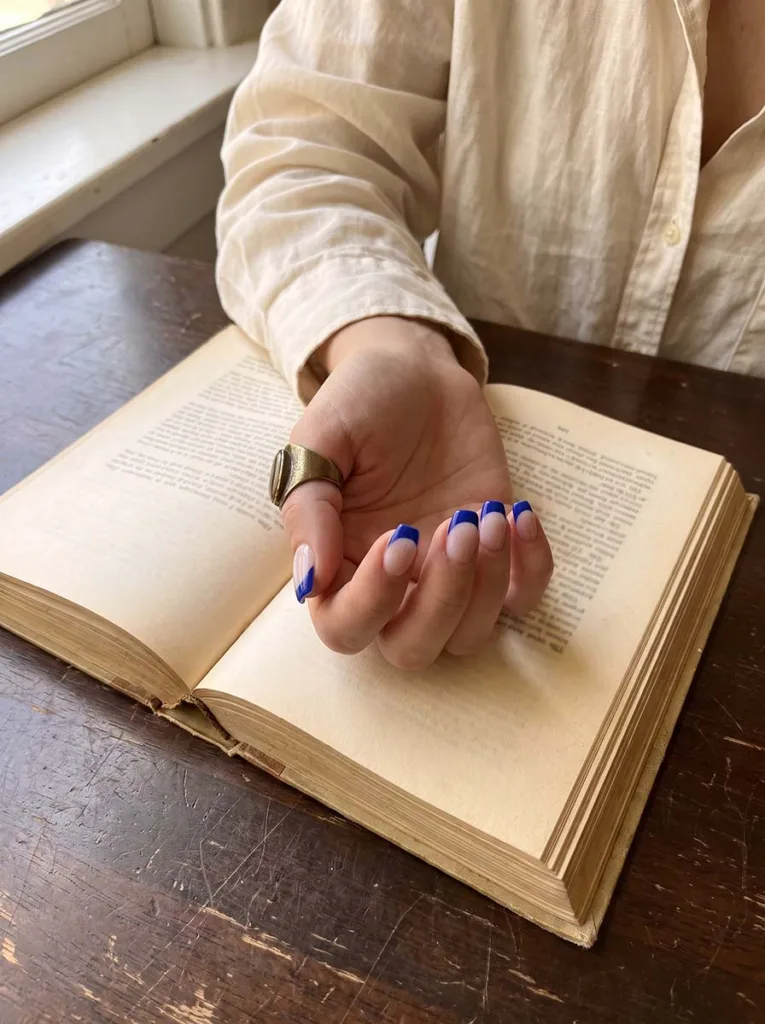
Best for: Year-round, modern office, fashion-forward
Difficulty: Intermediate
A cobalt blue French tip on a milky white or sheer natural base creates a strong color-contrast look on almond nails. The saturated blue reads bold and intentional against a pale base, and the almond tip sharpens the horizontal tip line into something that looks more designed than painted.
This works on both short and long almond nails. On short nails, keep the tip line thin — about 1.5 to 2mm — for proportion. On longer nails, a slightly thicker line at 2.5 to 3mm creates a more architectural finish.
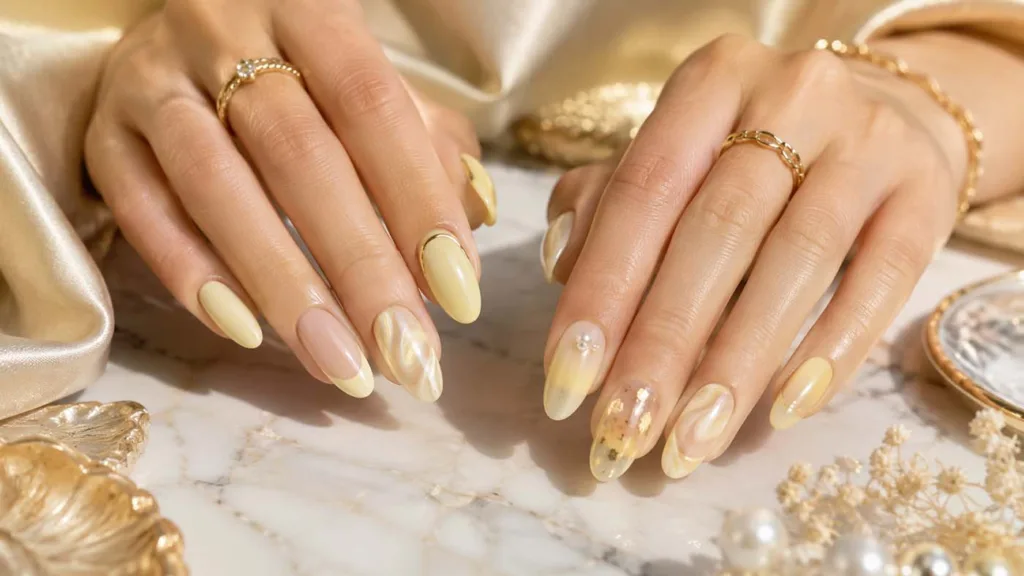
12. Milky White with Gold Foil
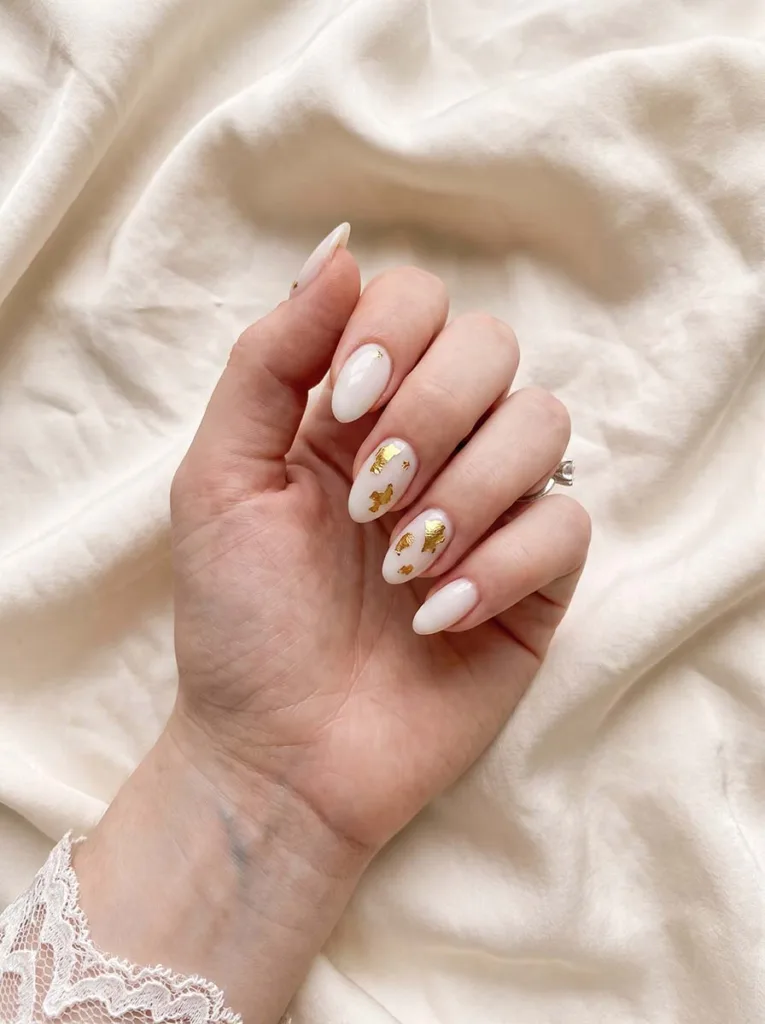
Best for: Bridal, events, elevated everyday
Difficulty: Intermediate
A milky white base is translucent enough to look wearable but opaque enough to photograph cleanly. While the second coat is still tacky, press a few irregular flakes of gold foil onto one or two accent nails using a silicone tool or the foil transfer sheet itself. Asymmetric placements look more intentional than uniform ones.
Seal with a gel topcoat and cure to lock the foil flat. The foil catches light differently with every hand movement, which reads as glamorous without being as heavy as glitter.
13. 3D Floral Nail Art
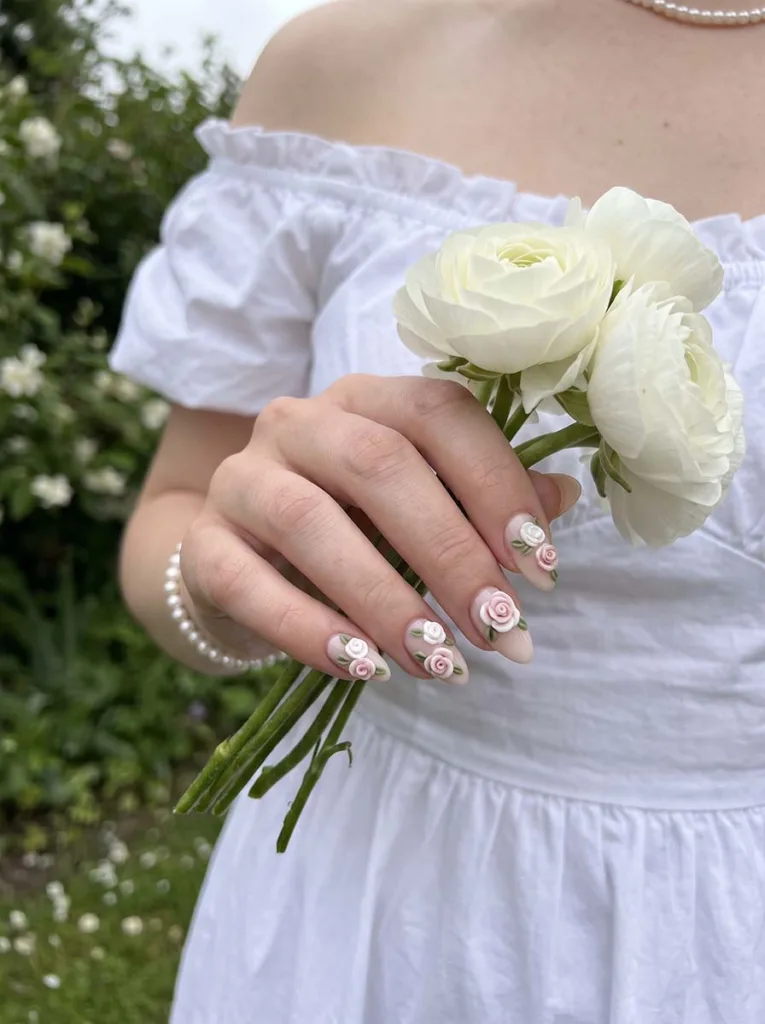
Best for: Bridal, spring events, special occasions
Difficulty: Advanced (salon recommended)
3D nail art is the most involved almond nail art on this list, using acrylic or hard gel sculpting to build raised floral elements directly on the nail surface. Tiny roses, cherry blossoms, or daisies sit above the nail plane by 1 to 3mm, creating a sculptural, jewelry-like effect. The almond shape frames these elements like a cameo: long enough to give them room and tapered enough to prevent crowding.
This technique requires a fine sculpting brush, acrylic or hard gel, and significant practice to execute well. For a DIY alternative, pre-made 3D nail charms in metal or resin can be adhered with gel and cured down, achieving a similar visual effect without the advanced sculpting skills.
14. Pressed Botanicals
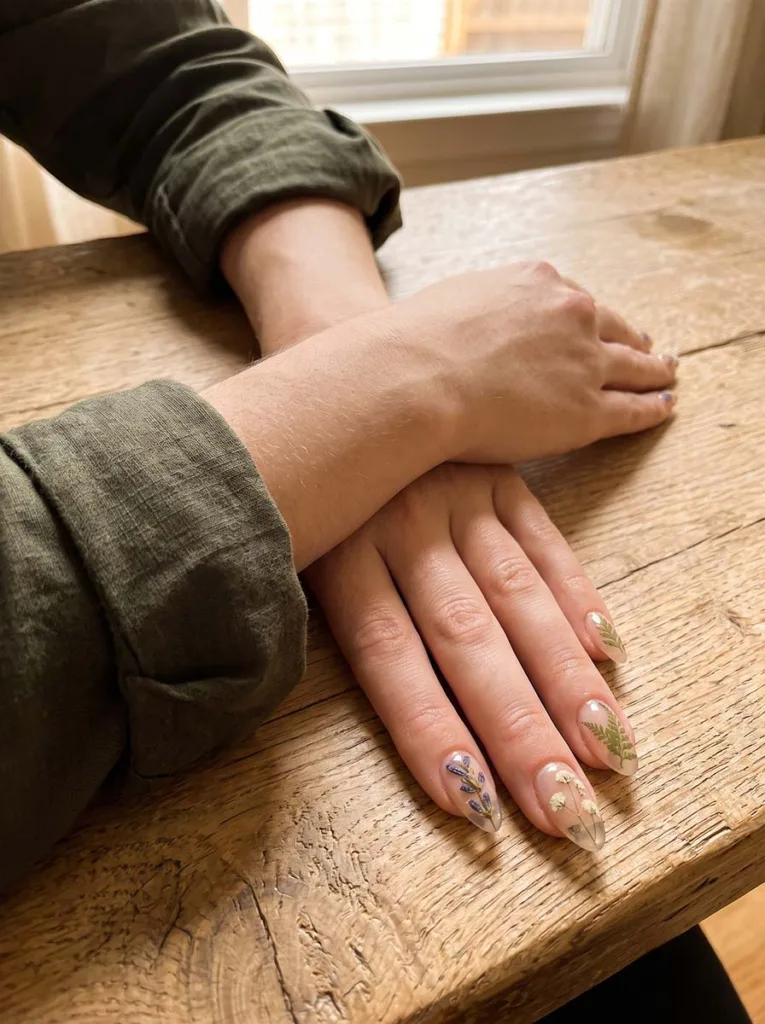
Best for: Spring, summer, outdoor events
Difficulty: Advanced (requires gel equipment)
Tiny dried flowers — lavender buds, baby’s breath, fern fronds, or violet petals — are embedded between two layers of gel to create a pressed botanical effect. Each nail becomes a miniature terrarium, preserving the texture and color of real plant material under a glass-smooth surface.
Apply a gel base and cure. While the layer is sticky, place the dried florals using fine-tip tweezers. Cover with a thin gel topcoat to encase the flowers, being careful not to flood the cuticle. Cure, then seal with a thick no-wipe topcoat. The florals hold their position and color for the full wear period of the gel set.
15. Dark Academia Nails

Best for: Autumn, winter, literary aesthetic
Difficulty: Beginner to intermediate
Dark academia nails draw from a muted, earthy palette—forest green, dusty plum, warm brown, ink black, or aged burgundy—worn in a satin or low-gloss finish. The palette is dark but not gothic. A thin gold accent line on the ring finger nail adds a vintage detail that ties the look together without tipping it into costume territory.
For the gold line, use a fine striping brush with a gel liner or thin nail art paint. Draw from the cuticle to the tip in one slow, steady stroke. It does not need to be ruler-straight—a slight natural curve follows the nail contour and looks more handcrafted.
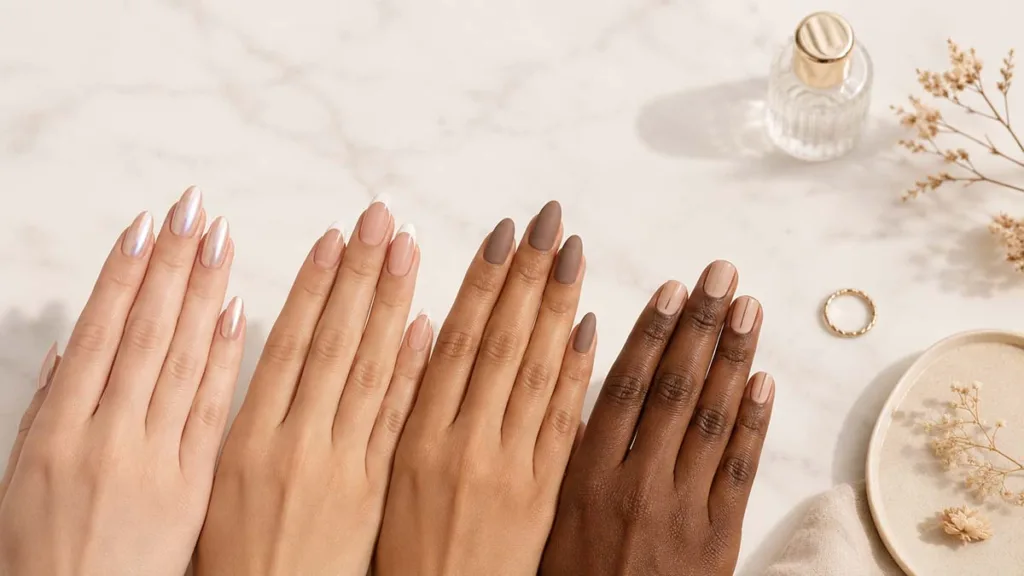
How To Choose a Design for Your Skin Tone
Nail color makes the almond shape more flattering when it works with the natural warmth or coolness of your skin rather than against it. If you want to go deeper on color choices, our nail color ideas guide covers the full spectrum.
Fair and Light Skin
Pastels and soft nudes glow on fair skin without washing it out. Sheer pinks, lavenders, and milky whites all work well. Deep shades like burgundy and midnight blue create a striking contrast—the pale skin amplifies the saturation.
Medium and Olive Skin
Warm nudes, terracotta, coral, and earthy reds flatter olive undertones without competing with them. Cobalt blue and bright white also pop cleanly on medium skin. Avoid overly yellow-toned nudes; they can make the hands look flat rather than polished.
Deep and Dark Skin
Bright, saturated colors—bold red, royal blue, electric green, and deep plum—show up most vividly on deeper skin tones and let the almond shape do its full visual work. Nude shades are most effective when they match or slightly deepen the natural skin tone rather than going lighter.
Almond Nail Care and Maintenance Tips
The tapered almond tip is thinner than the body of the nail, so it benefits from a few consistent protective habits.
- Apply a strengthening base coat under every polish application
- Wear gloves when washing dishes or using cleaning products
- Use cuticle oil daily—it keeps the nail flexible and less prone to snapping at the tip
- File a rough edge immediately if you notice a chip—waiting allows it to tear further
- Reapply topcoat every two to three days to extend manicure life
- Avoid using nails as tools—lateral pressure on the tip is the most common cause of breaks at the almond point
Gel or dip powder adds a hard protective layer worth considering if your natural nails tend to snap. Both options reinforce the sidewalls that taper on the almond shape without changing how it looks. For a full routine, see our nail care routine at home guide.
Short Almond Nails: Yes, They Work
The almond shape does not require length. Nails that extend just a few millimeters past the fingertip can be filed into a soft almond curve that looks completely intentional. Short almond nails suit the glazed donut finish, solid cremes, minimalist line art, and reinvented French tips particularly well. If you are growing your nails out, the short almond shape is the best transitional option. It never looks unfinished. For more inspiration, see our roundup of classy short nail designs.
FAQ Section
What are almond shaped nails?
Almond shaped nails are narrow at the sides, wide at the base, and tapered to a soft, rounded point. The silhouette resembles an actual almond. The shape is known for making fingers appear longer and slimmer.
How long do almond nails need to be?
Natural nails need to extend at least 2 to 3 millimeters past the fingertip to file into an almond shape. For a more dramatic taper, longer growth or nail extensions work best.
Are almond nails high maintenance?
Not necessarily. With a strengthening base coat, daily cuticle oil, and a topcoat refresh every few days, almond nails stay intact with minimal effort. Gel or acrylic extensions add durability if your natural nails break easily.
Conclusion
Almond shaped nails have been popular for years, and 2026’s design options give them more range than they’ve had in a while. The 15 designs above cover everything from a five-minute nude to full 3D botanicals—pick whatever suits your schedule and appetite for detail. Pick one design, gather your tools, and shape your first set this weekend.
For more nail design ideas, please visit VelvetBoard.