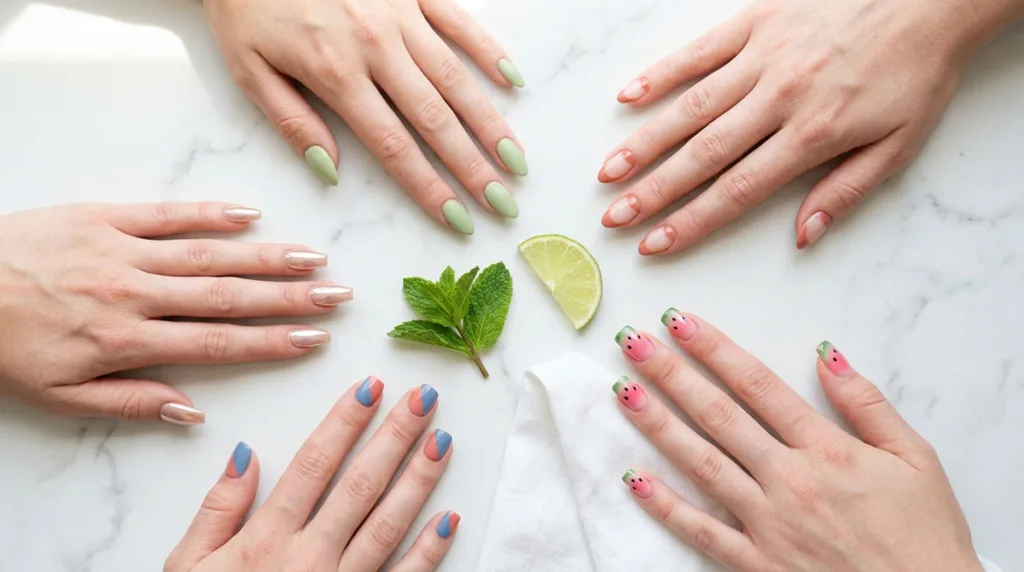
20 Grinch Nails Ideas With Whimsical Holiday Charm

The best grinch nails turn Christmas’s most famous grouch into the manicure everyone asks about. A vivid green base, one sly little face, and a single growing heart can carry an entire holiday outfit. These 20 designs range from five-minute sticker sets to freehand artistry. Every skill level and nail length has an option.
Grinch nails work because the palette does the heavy lifting. Emerald, lime, candy-apple red, and snow white read as Christmas instantly, even on the simplest design. Keep the character art to one or two accent nails per hand. Let the rest carry the theme with stripes, glitter, or ombré. The set will look deliberate rather than busy.
Each idea below includes a difficulty level and the shapes it suits best. You also get the exact wording for your nail technician. Book one to two weeks before your event so chips and regrowth never crash the party.
What to Know Before You Book Grinch Nails
Nail artists call the signature shade Grinch green: a vivid yellow-green that sits between lime and emerald. Short nails suit bold, simple patterns like stripes and glitter. Hand-painted faces need medium to long almond or coffin shapes for enough canvas. Gel polish holds detailed art for two to three weeks. That durability makes gel the default for grinch nails in December.
Beginners should start with decals, stamping plates, or press-on sets and reserve one accent nail for the character. Intermediate painters can tackle candy-cane stripes and string lights with a striping brush. Leave the full Grinch portrait to a skilled technician or a patient afternoon with a fine liner brush. The American Academy of Dermatology’s nail care basics stress protecting the nail underneath. Always wear a base coat, moisturize cuticles, and never peel off gel.
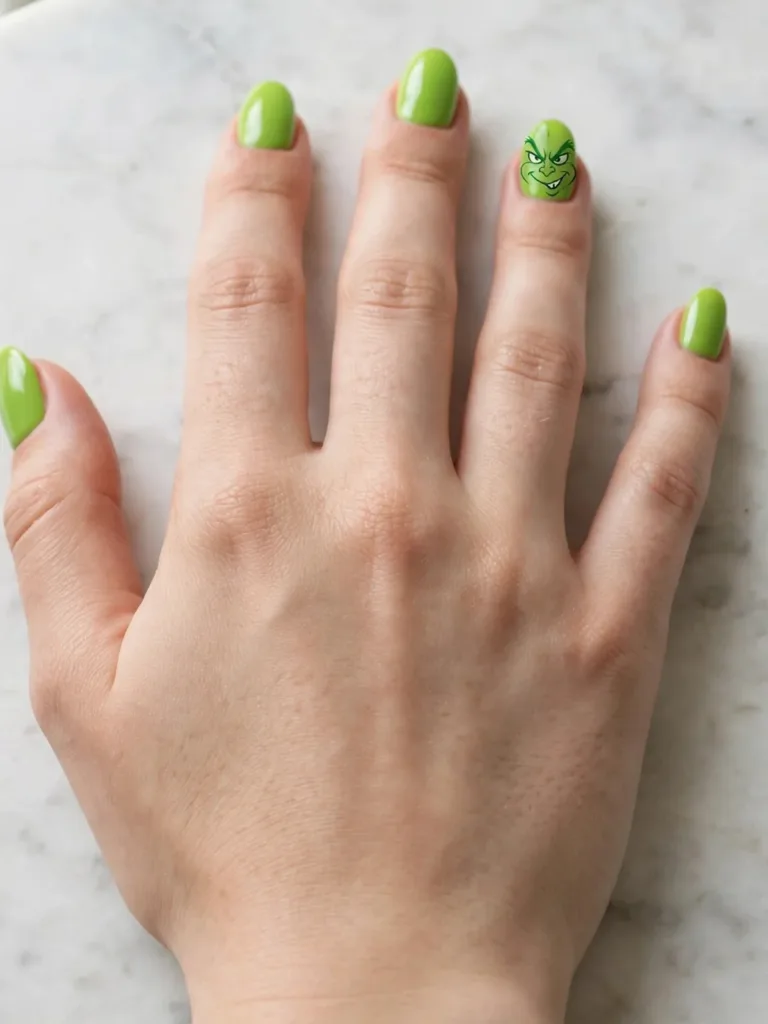
1. Classic Grinch Face Accent Nail
This is the design everyone pictures first. The Grinch’s sly face sits on a single accent nail, usually the ring finger. A lime-green base sets the stage. A fine liner brush then draws the furrowed brows, sideways smirk, and pointed chin. Keep the remaining nails in solid Grinch green or deep red so the face stays the star. Professional nail artists often sketch the nose and lips first. They then drag wet product outward with a thicker brush to mimic fur. The method appears in Scratch Magazine’s step-by-step Grinch tutorial. Seal the art with two thin top coats to prevent smudging.
Best for: anyone who wants the instantly recognizable look.
Ask your nail tech for: a hand-painted Grinch face on one accent nail with a lime-green base.
2. Grinch in a Santa Hat
A tiny red Santa hat perched on the Grinch’s head adds instant Christmas context and extra color contrast. The hat sits at an angle on the accent nail. It has a bright red cap, a white brim, and a fluffy pom-pom made with a dotting tool. The rest of the set can stay in Grinch green with one red glitter nail to echo the hat. This design reads clearly even from across the room, which makes it a strong choice for parties. Keep the hat small relative to the nail so the face underneath stays visible and expressive.
Best for: holiday parties and Christmas Eve gatherings.
Ask your nail tech for: a Grinch face accent with a tilted Santa hat and pom-pom detail.

3. Minimalist Grinch Outline on Nude
Not every Grinch design needs a full green base. This subtle version draws the Grinch’s face as a thin dark-green outline on a sheer nude nail. The line-art style feels modern and wearable. It suits short nails and office dress codes better than full-color art. It is one of the most wearable Grinch nails options for December. Ask for a milky or translucent nude base so the outline looks crisp. One outlined face per hand is enough. Repeat the nude base on the other nails, adding one green French tip to tie the set together.
Best for: work-friendly holiday nails and short natural nails.
Ask your nail tech for: a fine-line Grinch outline on a sheer nude base.

4. Grinch Green French Tips
French tips get a holiday twist when the white tips turn Grinch green. Paint a nude or pale pink base, then add vivid green tips with a clean smile line. This is one of the easiest grinch nails designs to wear. It borrows a classic, flattering shape and adds only color. Add a micro Grinch face on one ring finger for a playful accent. Or keep the set purely green-tipped for maximum versatility. The design flatters every nail shape, from short square to long almond, and grows out gracefully.
Best for: beginners and anyone who prefers classic shapes. If you love seasonal French designs, browse these French tip Christmas nail ideas for more inspiration.
Ask your nail tech for: Grinch-green French tips on a nude base.

5. Heart Growing Three Sizes
The story’s emotional peak becomes a sweet nail motif: a red heart that grows across your nails. Paint a tiny heart on the pinky and a medium one on the middle finger. Finish with a large heart on the index, all on a Grinch-green base. Some versions crack the largest heart down the middle for a dramatic touch. The progression reads clearly and needs no character drawing skill, since hearts are simple shapes. Use a dotting tool or a small brush for clean edges. Add a glossy top coat so the red hearts shine against the green. These grinch nails tell the whole story without a single face.
Best for: romantics and storytelling manicures.
Ask your nail tech for: red hearts in growing sizes across a green base.

6. Max the Dog Accent Nail
The Grinch’s loyal dog deserves his own spotlight. Max appears on one accent nail. He has floppy brown ears, big expressive eyes, and the single reindeer antler strapped to his head. Paint him over a white or pale-blue base so the brown details pop. Surround him with Grinch-green nails to keep the theme cohesive. The antler makes strangers smile. Ask your artist to make it slightly oversized for charm. This design pairs naturally with a Grinch face on the opposite hand for a duo set.
Best for: dog lovers and duo-hand story sets.
Ask your nail tech for: a hand-painted Max with his antler on one accent nail.

7. Paw Print Trail
Tiny paw prints trailing across a Grinch-green base suggest Max trotting through the snow. Use a dotting tool for the prints. Paint one larger dot for the pad and three small dots for the toes, in white or gold. Scatter the prints diagonally across two or three nails rather than every nail, so the trail feels intentional. This is a genuinely easy DIY design because paw prints forgive wobbles. Pair it with a Max accent nail for a complete story. Or wear the trail alone for a subtle nod.
Best for: easy DIY and short nails.
Ask your nail tech for: white paw-print trails on a Grinch-green base.

8. Cindy Lou Who Set
Cindy Lou Who brings pink into the Grinch palette. Paint two or three nails in soft pastel pink with white snowflakes. Add her signature red bow on one accent nail. Keep the remaining nails Grinch green so the pink reads as her character, not a random color. The bow can be hand-painted or built from two small triangles with a dotting-tool center. This set feels sweeter and younger than the Grinch-face designs. It suits mother-daughter matching manicures or anyone who prefers pastels.
Best for: pastel lovers and matching sets.
Ask your nail tech for: pink snowflake nails with a red bow accent.

9. Whoville Snowy Wonderland
This scenic design turns your nails into the view from Mount Crumpit. A snowy white or pale-blue base carries quirky Whoville rooftops and curved chimneys. Tiny lit windows glow in red, gold, and blue. The whimsical Dr. Seuss architecture needs a fine liner brush and a steady hand. This advanced design is best left to a talented technician. Keep the houses small and clustered toward the tips so the scene reads at a glance. Add holographic silver snow over the top for falling-snow sparkle that catches holiday lights beautifully.
Best for: detailed art lovers and long nails.
Ask your nail tech for: a snowy Whoville village scene with quirky rooftops.

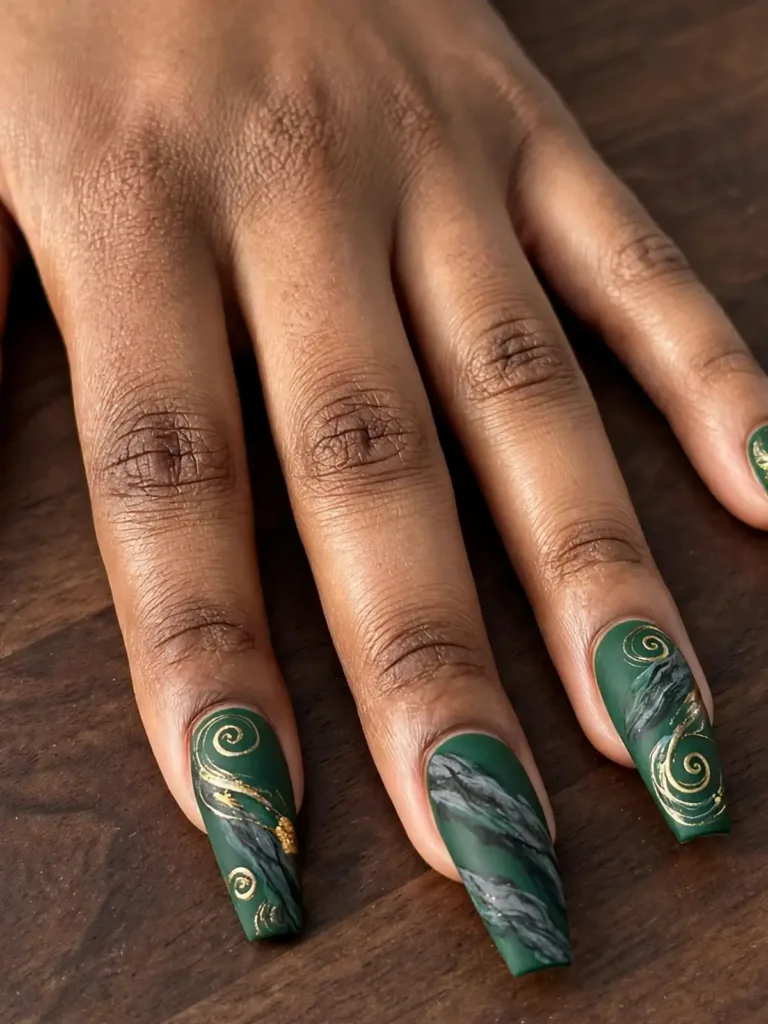
10. Mount Crumpit Matte Lair
The Grinch’s cave becomes a moody, modern manicure. A deep forest-green base gets a matte top coat, then thin grey and black streaks suggest rocky shadows. A few metallic gold swirls hint at the stolen Christmas treasures hidden inside. The matte finish sells this design. It looks velvety and expensive, and it hides minor imperfections in the streak work. This is one of the easiest advanced-looking designs because the streaks are meant to be irregular. Wear it to evening events where the gold catches the light.
Best for: evening parties and matte-finish fans.
Ask your nail tech for: a matte forest-green base with grey shadow streaks and gold swirls.
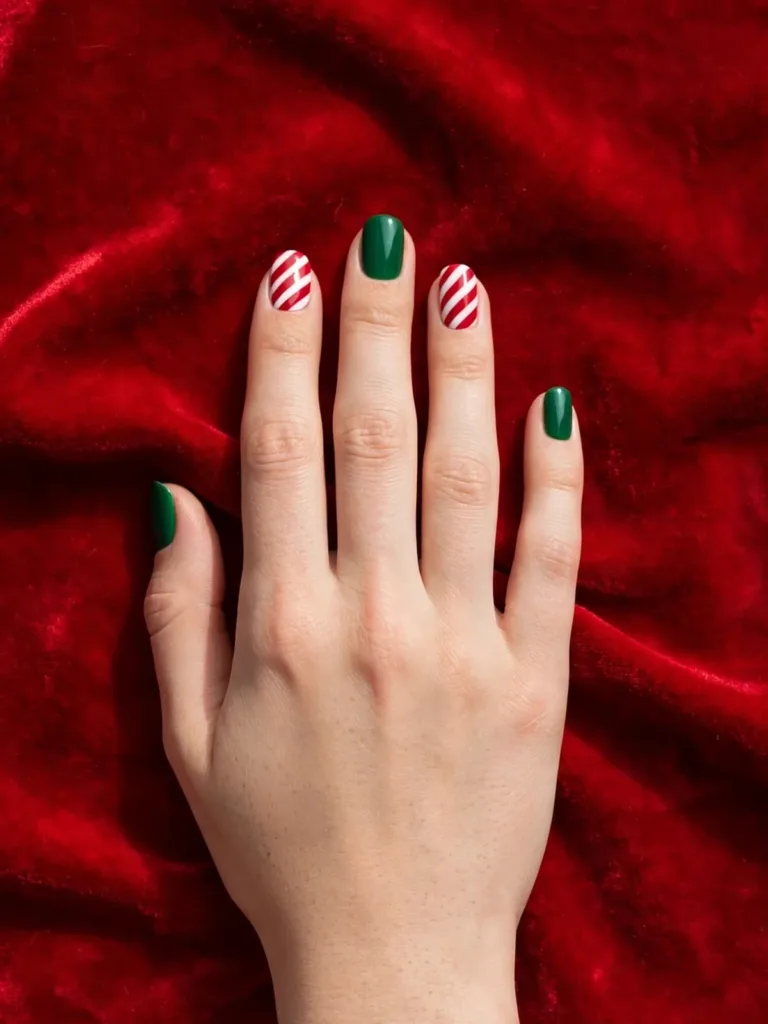
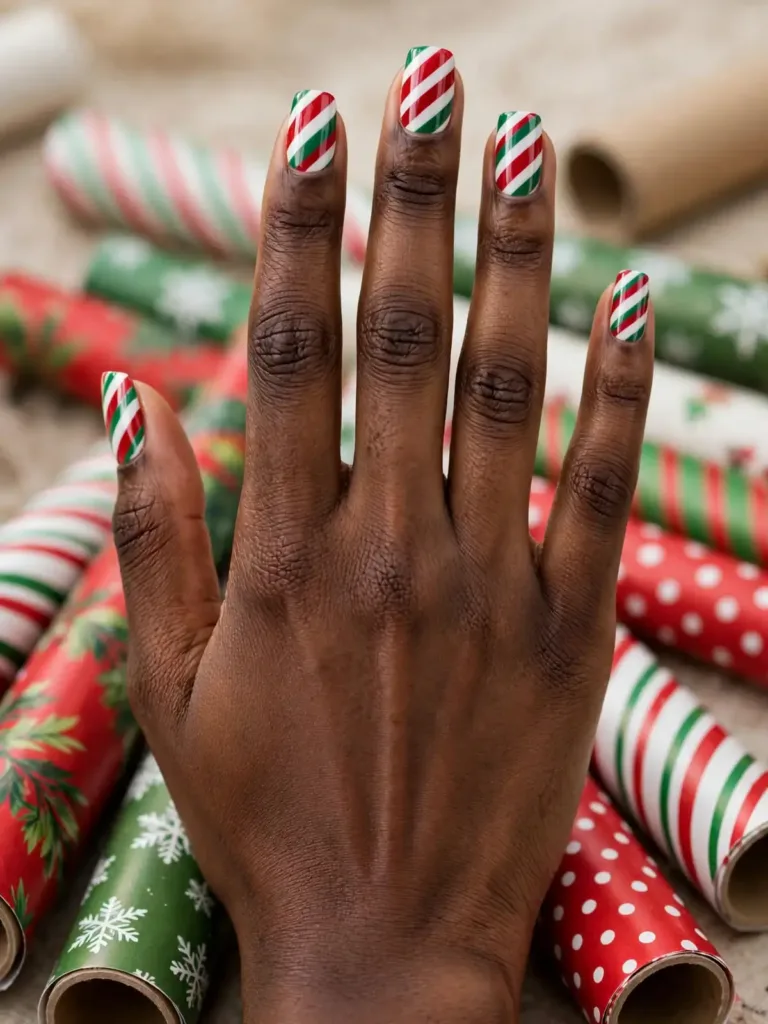
11. Candy Cane Stripes
Red-and-white diagonal stripes bring classic Christmas energy next to Grinch green. Paint two accent nails with crisp candy-cane stripes using a striping brush. Keep the rest of the set in solid green. The diagonal angle makes fingers look longer, which flatters short nails especially well. For the cleanest lines, let the white base dry fully before adding red stripes, then seal with top coat. This design needs zero drawing skill. It delivers maximum holiday recognition, which is why it never goes out of style. Few grinch nails deliver this much festive impact with so little effort.
Best for: short nails and zero-fuss holiday style.
Ask your nail tech for: diagonal red-and-white candy-cane stripes on two accent nails.
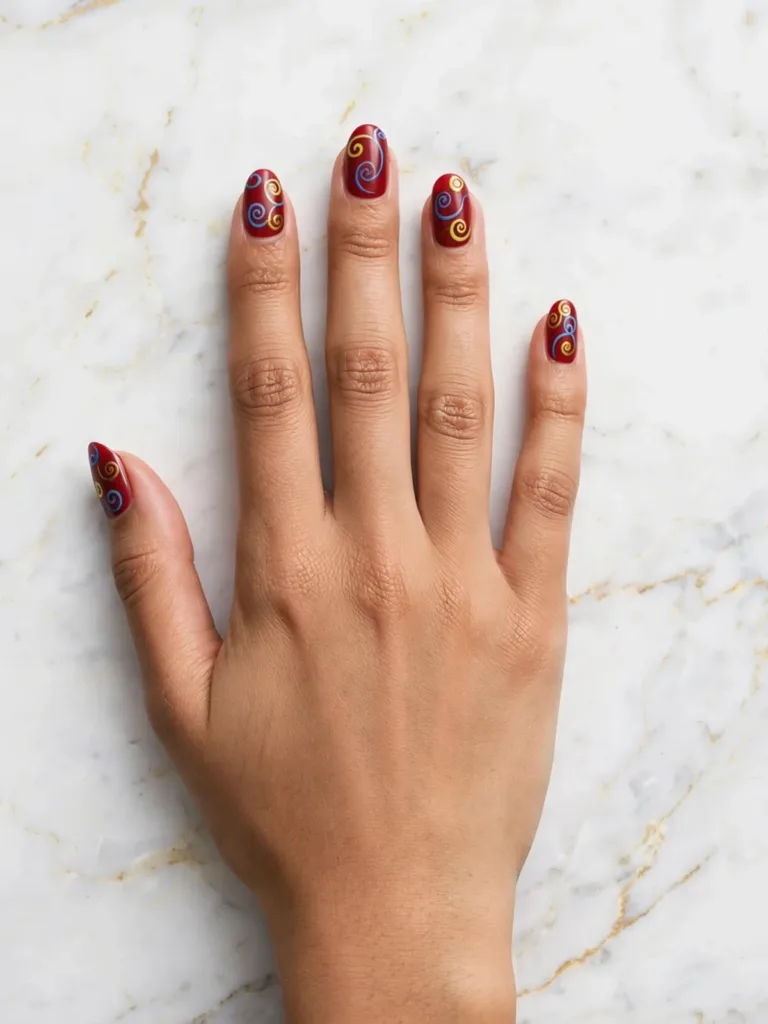
12. Seussical Swirls
Thin, curling swirls in blue, yellow, and gold capture the Dr. Seuss illustration style without any character faces. Paint a red or white base, then swirl the colors with a fine liner brush in loose, playful curves. The swirls suit every nail length because they scale easily, and they look charmingly hand-drawn even when imperfect. This design pairs beautifully with one Grinch face accent nail, since the swirls echo the world he lives in. Add a single gold swirl per nail to keep the color story rich.
Best for: artistic types who skip character faces.
Ask your nail tech for: multicolor Seuss-style swirls on a red base.
13. Tangled String Lights
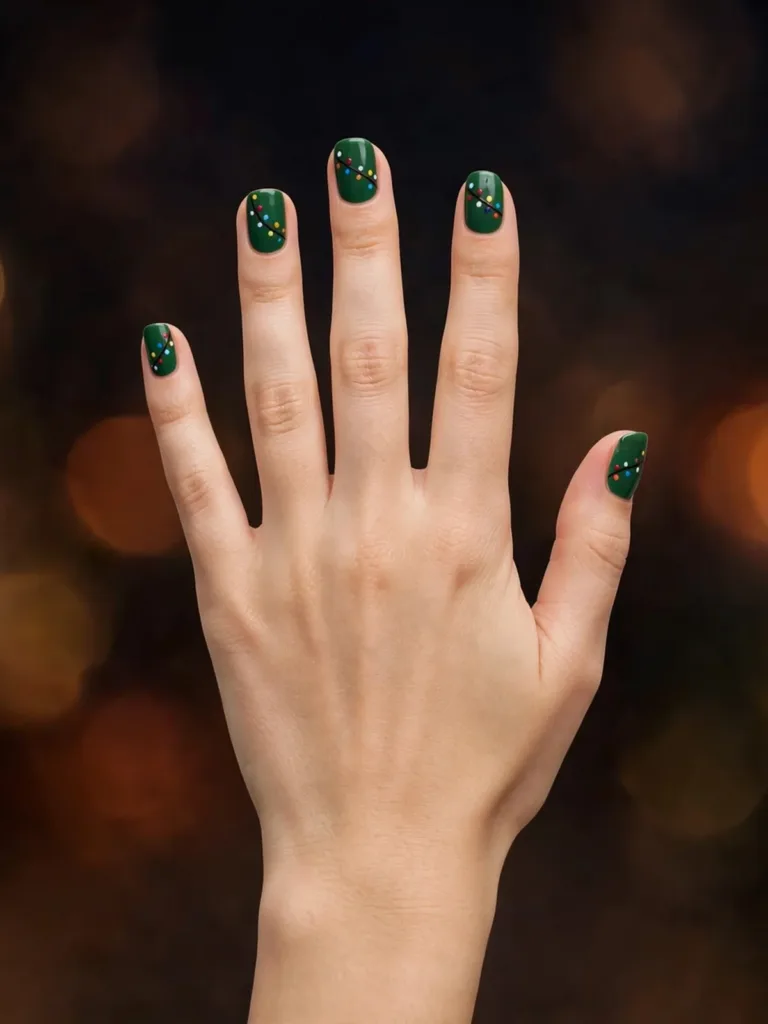
Multicolor Christmas lights tangled across a deep green base look festive and fun. Paint a thin dark cord snaking across each nail. Dot colorful bulbs along it with a dotting tool: red, yellow, blue, and white. The messier the cord, the more realistic the tangle, so this design rewards a relaxed hand. Keep the bulbs small and evenly spaced for the best effect. This is a strong conversation starter at parties because everyone recognizes the tangled-lights struggle. Finish with a glossy top coat for a lit-up shine.
Best for: playful personalities and party nails.
Ask your nail tech for: tangled string lights with multicolor bulbs on green.
14. Green Glitter Bomb
Sometimes the simplest design wins the room. A full set of emerald-green glitter polish catches every party light. It needs no art skills at all. Layer green glitter over a matching green base for full coverage. Or sponge the glitter on for a denser finish. Few grinch nails stretch across two holidays this easily. This design crosses over beautifully to New Year’s Eve, which stretches your manicure’s value across two holidays. Choose a fine glitter for elegance or a chunky glitter for drama. Two coats plus top coat give the smoothest, longest-lasting finish.
Best for: glitter lovers and New Year’s crossover.
Ask your nail tech for: full-coverage emerald glitter on all nails.

15. Red-to-Green Ombré
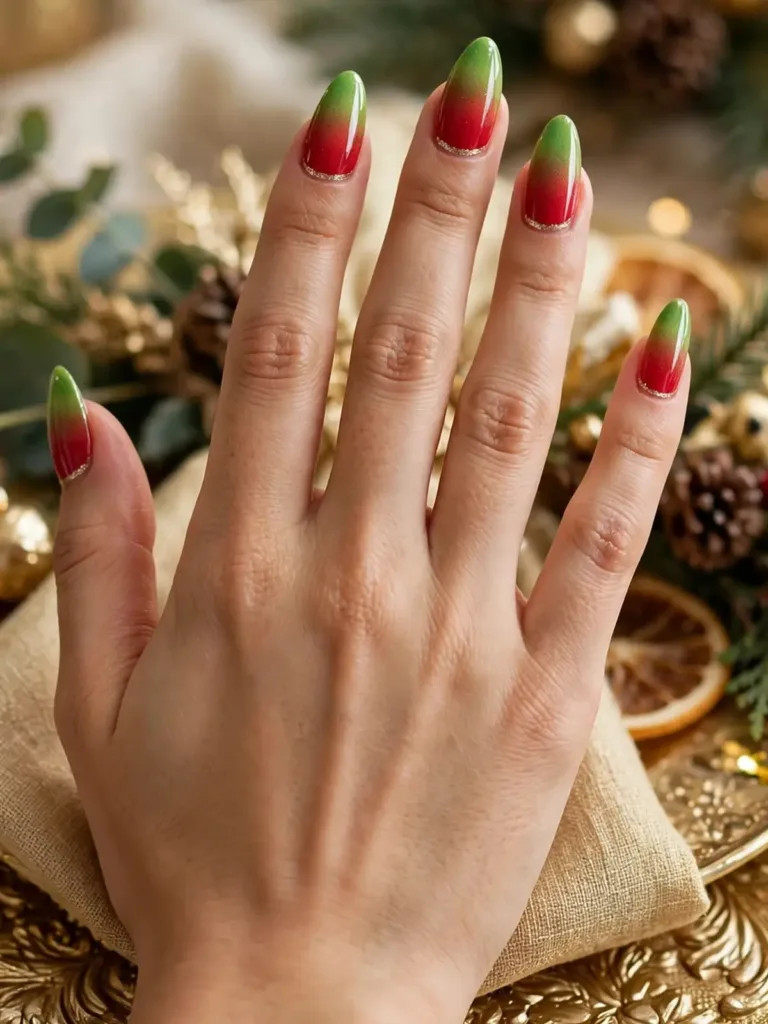
Candy-apple red melting into Grinch green creates a striking gradient that needs no characters. The ombré technique uses a makeup sponge to blend the two shades. Red sits at the cuticle and fades to green at the tip. The blend hides regrowth well, so this design stays attractive for weeks. Add a thin gold stripe at the color transition for a polished finish. Or keep the gradient clean for a modern look. This suits medium to long nails best, since the gradient needs length to show the full blend.
Best for: gradient lovers and low-maintenance wear.
Ask your nail tech for: a red-to-green sponge ombré with a gold transition line.
16. Textured Furry Grinch
This advanced technique recreates the Grinch’s shaggy fur in polish. Layer two or three green gels in different shades. Drag the wet product outward with a thick brush to create fur texture before curing. The result has real dimension that flat polish cannot match. Keep the fur texture to one or two accent nails. Paint the rest in smooth solid green so the texture reads as deliberate. Among textured grinch nails, this one photographs best. Professional artists build the fur in thin layers, curing between each, to avoid a bulky finish. The effect photographs beautifully.
Best for: texture lovers and experienced technicians.
Ask your nail tech for: layered drag-brush fur texture in mixed greens.

17. Matte vs Glossy Texture Play
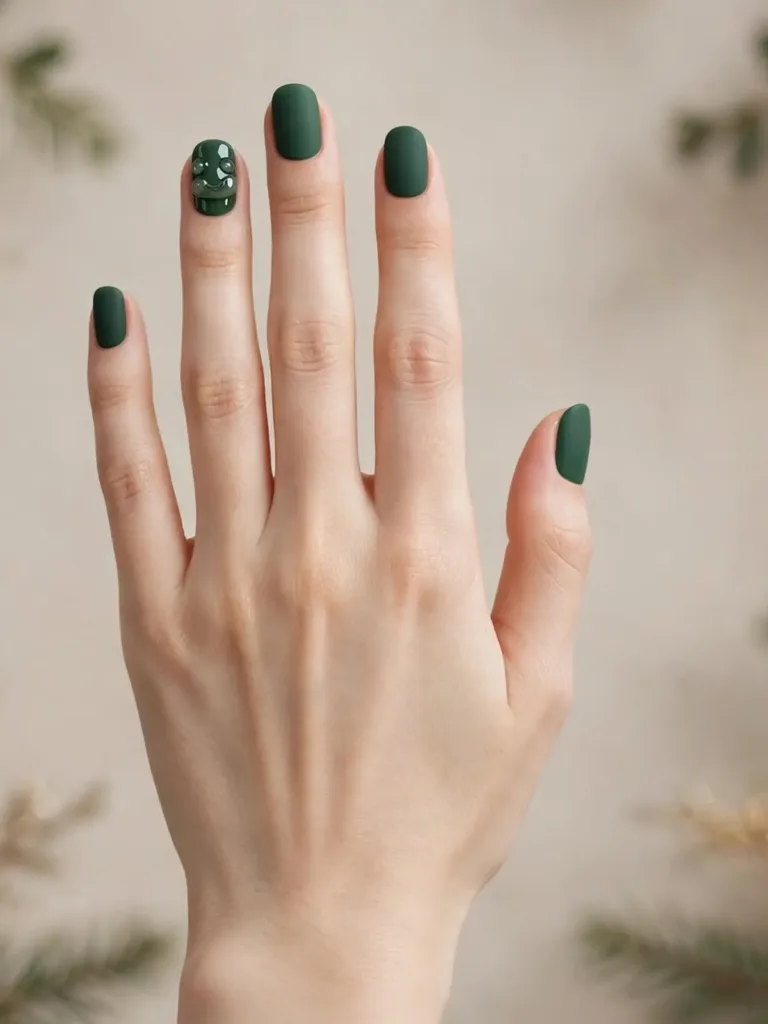
Paint the whole set in Grinch green, then use matte and glossy top coats to create hidden patterns. A glossy Grinch face or heart on a matte green base reveals itself only when the light hits it. This subtle effect suits anyone who wants the theme without obvious character art. The technique is simple. Paint the design in regular polish and seal everything with matte top coat. Then re-draw the motif in glossy top coat. These grinch nails keep their secret until the light hits. The contrast is striking in person and nearly invisible in flat photos, which makes it a delightful surprise.
Best for: subtle statements and office-safe drama.
Ask your nail tech for: glossy motifs over a matte green base.
18. Gift-Wrap Stripes
Bold diagonal stripes in red, white, and green mimic festive wrapping paper. Paint each nail with a different stripe direction or width for a wrapped-gift effect. Add one Grinch face accent to anchor the theme. The stripes are forgiving because slight wobbles read as hand-drawn charm. Use a striping brush and let each color dry before adding the next to keep the lines crisp. This design suits short to medium nails. It looks especially good on squoval shapes, where straight edges echo paper folds.
Best for: bold pattern lovers and squoval shapes.
Ask your nail tech for: red, white, and green gift-wrap stripes.
19. Snowflakes on Grinch Green
Dove-white snowflakes scattered over Grinch green create a crisp winter contrast. Use a stamping plate or a fine brush to paint simple six-armed flakes in varying sizes across the set. The white-on-green pairing is one of the most photogenic here. It nods to the snowy Mount Crumpit setting. Few grinch nails photograph better than this crisp pairing. For extra dimension, add a tiny rhinestone at the center of the largest flake on each hand. If you want more winter inspiration beyond the Grinch theme, these snowflake Christmas nails offer elegant seasonal alternatives.
Best for: winter minimalists and stampers.
Ask your nail tech for: white snowflakes stamped over Grinch green.

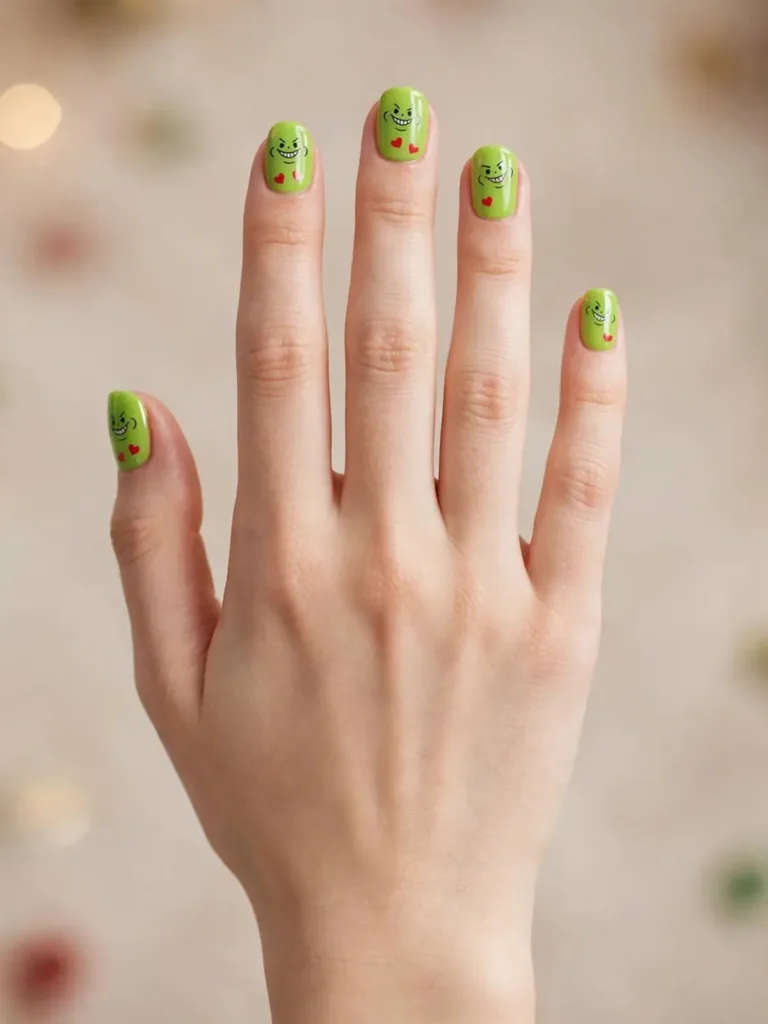
20. Grinch Sticker Shortcut Set
No freehand skill is needed for this beginner route. Grinch nail sticker and decal sheets provide tiny faces, hearts, and quotes that apply in minutes. Start with a green base, then peel and position each decal. Press out air bubbles from the center outward. Seal with two layers of clear top coat to lock the edges down. These grinch nails prove beginners can join the fun. Apply the stickers in the evening so they set overnight for the longest wear. This approach delivers a detailed-looking set for a fraction of salon cost and time. The results genuinely fool most onlookers.
Best for: total beginners and budget-friendly sets.
Ask your nail tech for: Grinch decal application over a green base, sealed with top coat.
FAQ Section
How Do I Paint the Grinch’s Face Step by Step?
Sketch the nose, lips, and brow lines first with dark green or black gel paint. Then fill the head shape and drag wet product outward with a thicker brush for fur texture. Cure between layers. Professional tutorials recommend outlining before filling for the cleanest result.
What If I Cannot Draw at All?
Use Grinch sticker or water-decal sheets, a stamping plate, or press-on sets with printed Grinch art. Apply decals over a dry base, press out bubbles, and seal with top coat. Stamping and stickers need no drawing skill and look convincingly detailed.
What Exact Green Should I Ask For?
Grinch green is a vivid yellow-green between lime and emerald. For the cartoon look, choose a bright lime crème; for a moodier set, pick a deep emerald. Bring a reference photo so your technician matches the exact shade you picture.
Which Nail Shapes Suit Grinch Nail Art Best?
Hand-painted faces need medium to long almond or coffin nails for enough canvas. Stripes, glitter, French tips, and decals work on any length, including short square and squoval shapes. Match the design complexity to your nail length.
How Long Will Christmas Nail Art Last?
Gel polish with detailed art typically lasts two to three weeks with proper top-coat sealing. Nail wraps last about seven to ten days, longer with a top coat. Book one to two weeks before Christmas so the set looks fresh on the day.
Can Grinch Nails Look Office-Appropriate?
Yes. Choose the minimalist outline on nude, matte green with glossy hidden motifs, or Grinch-green French tips. These keep the theme readable without bright character art, so they pass conservative dress codes while staying festive.
Pick Your Grinch, Book Early, Enjoy December
Grinch nails prove that holiday manicures can be playful without looking childish. Choose one design that matches your skill level, nail length, and calendar. Save a reference photo before your appointment. Book early in December, since the best technicians fill their holiday slots fast. Go full Whoville or keep it to a single sly smirk. Either way, these grinch nails will carry you through every party and photo. They will look just as good on Christmas morning.