24 Daring Skull Nails Worth Copying This Halloween

Ever saved a dozen skull nail photos, then wondered if any of them would actually work on your own nails? Most of what shows up looks built for long stiletto or coffin shapes, acrylic extensions, and a serious salon budget.
Skull nails turn a plain manicure into a small piece of Halloween art, and the trend covers more ground than those photos suggest. A newer style called x-ray nails shows faint bone shapes under a sheer base, like a scan of your own hand, and it works on short, natural nails just as well as long ones.
This guide covers 24 skull nail designs built for every nail length and skill level, plus the exact steps for two of the easiest styles, honest salon and DIY pricing, and how to keep the design looking sharp until Halloween night.
What Makes Skull Nails Different From Basic Halloween Nail Art
Most Halloween nail art leans on color: orange, black, and a few spiderwebs. Skull nail art works differently. It treats the nail like a tiny canvas for one strong image.
Why One Bold Image Beats a Busy Design
The skull becomes the focal point, not a background pattern. That focus separates a good skull manicure from a busy one. A single, well-placed skull on an accent nail often reads better in photos than five nails loaded with glitter and charms. Swapping a full loud set for one clean skull accent tends to make the whole hand look more finished.
How X-Ray Nails Take the Idea Further
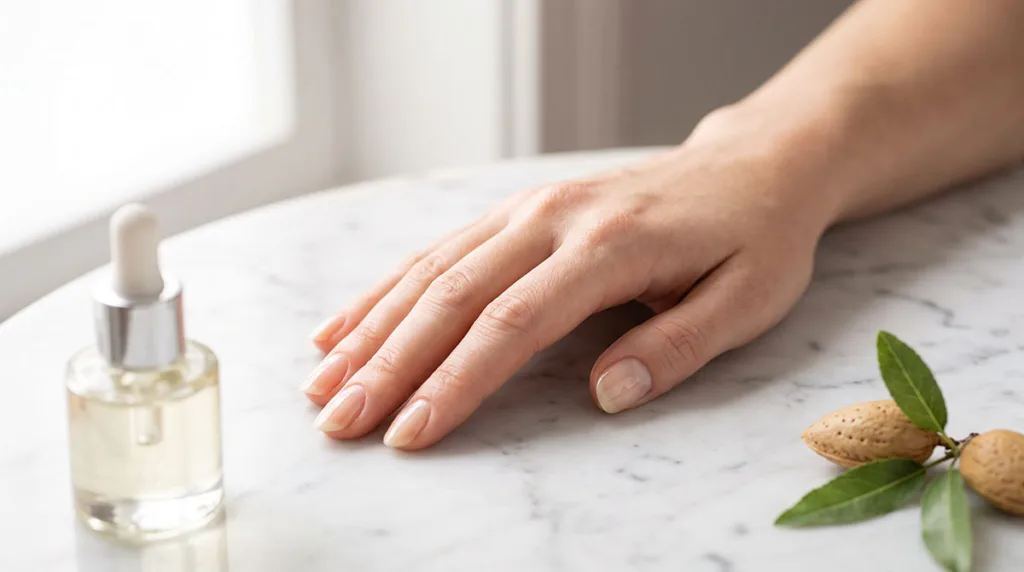
X-ray nails push this idea further. Instead of drawing a skull on top of polish, the artist paints a faint bone structure under a sheer white or grey layer. It looks like your finger bones are visible through the skin. This trend works because it feels new next to years of the same classic skull art. Most galleries only show this trend on long stiletto or coffin nails, too. The shape guide below covers every length, short nails included.
Which Nail Shape and Length Works Best
You can wear skull nail art on almost any shape. The shape just changes how much detail fits.
Long Coffin and Stiletto Nails
Long coffin or stiletto nails give an artist the most room. A full skull with shading and teeth detail fits comfortably on that surface. This is why most salon photos favor long shapes.
Short Square and Round Nails
Short square or round nails work fine for a single, simplified skull. Stick to one clean shape per nail instead of a detailed, multi-part design. A small skull on an accent nail, paired with plain polish on the rest, looks intentional rather than cramped.
Almond and Oval Nails
Almond and oval shapes sit in between. They fit a medium-sized skull with a little shading, without needing the extra length that stiletto or coffin shapes provide.
Press-On Sets for Very Short Nails
Press-on sets solve the space problem entirely if your natural nails are very short or if you just want a fast option. The design already comes shaped and printed, so your own nail length doesn’t limit the detail at all.
24 Skull Nail Designs to Try This Halloween
Each of these styles fits a different skill level, nail length, and budget. Pick two or three that match how much time you want to spend, then jump to the full description below.
| # | Design | Best For |
| 1 | Classic Black-and-White Skull | Beginners, any occasion |
| 2 | Glow-in-the-Dark Skull | Night parties |
| 3 | Glitter and Rhinestone Skull | Costume parties |
| 4 | 3D Acrylic Skull | Salon visits, dramatic looks |
| 5 | Floral Skull | Work-friendly edge |
| 6 | Day of the Dead Sugar Skull | Detailed, colorful looks |
| 7 | French Tip With Mini Skull Accent | Professional settings |
| 8 | Negative-Space X-Ray Skeletal Nails | Subtle, eerie detail |
| 9 | Colorful Cartoon Skull | Kids, playful looks |
| 10 | Gothic Dark-Tone Skull | Moody, dramatic looks |
| 11 | Minimalist Single-Accent Skull | Low commitment |
| 12 | Short-Nail and Press-On Skull | Short nails, fastest option |
| 13 | Red-and-Gold Skull | Evening, glam events |
| 14 | Pastel Skull | Soft, everyday wear |
| 15 | Animal-Print Skull | Textured, bold look |
| 16 | Ombre Skull | Depth without extra detail |
| 17 | Marble Skull | A one-of-a-kind look |
| 18 | Chrome Skull | High-shine, camera-ready |
| 19 | Matte-and-Gloss Skull | Subtle, considered contrast |
| 20 | Skull With Spiderweb Accent | A two-nail Halloween story |
| 21 | Two-Tone Split Skull | A simple design that looks advanced |
| 22 | Skull With Bats or Crows | Haunted-house theme |
| 23 | 3D Charm Skull | Skipping the painting step |
| 24 | Candy Corn Skull | Playful, seasonal color |
1. Classic Black-and-White Skull

This is where most people start, and for good reason. Paint a white or nude base, then use a thin brush to draw a simple black skull outline. No shading needed. The contrast does all the work. It photographs well under any lighting and pairs with literally any outfit. If you’re new to nail art, master this one first before trying anything fancier.
2. Glow-in-the-Dark Skull

Take any skull design you like and top it with UV-reactive polish or a glow top coat. Under normal light, it looks like a regular black or grey skull. Flip off the lights or step under a blacklight, and the whole design lights up green or blue. This works best for parties or trick-or-treating after dark. One warning: glow polish fades faster than regular polish, so keep a bottle on hand for touch-ups.
3. Glitter and Rhinestone Skull
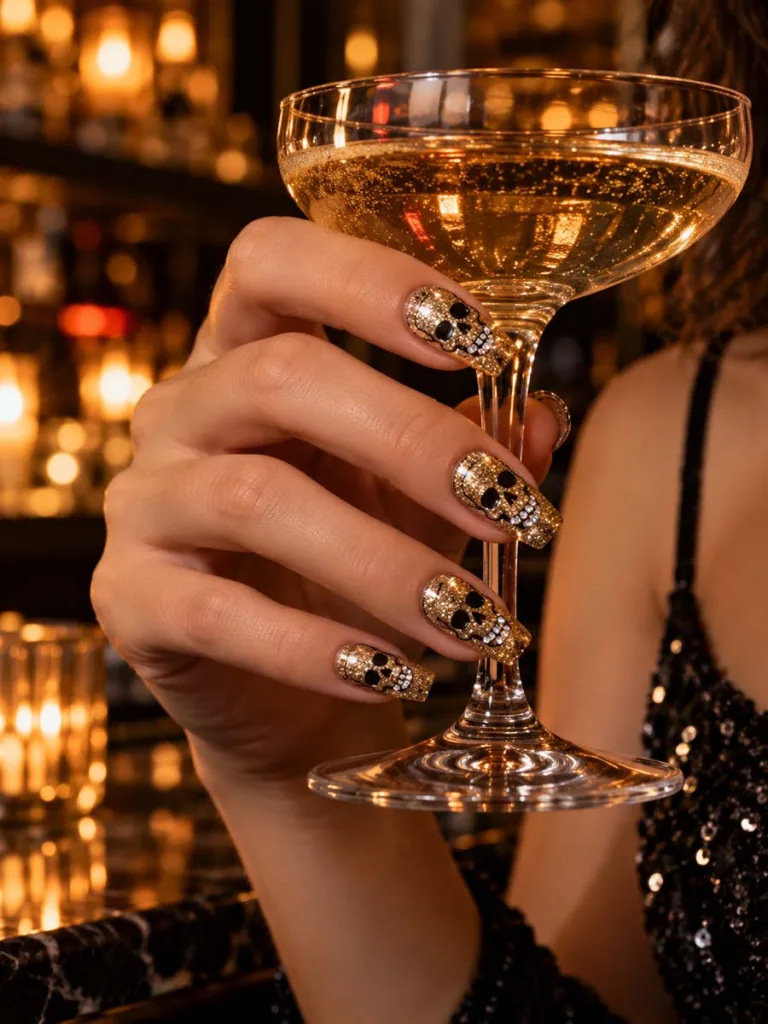
Outline a skull shape, then fill the background or the skull itself with fine glitter. Add a few small rhinestones along the jawline or eye sockets for extra sparkle. This design catches light from every angle, a strong pick for a costume party or a night out. Keep the glitter contained to one or two nails, though. Too much sparkle across a full set gets messy fast and chips unevenly.
4. 3D Acrylic Skull

A 3D skull is sculpted, not painted. The artist builds up acrylic powder over a form to create a raised, textured skull with real depth. It looks far more dramatic than a flat design, almost like a tiny sculpture sitting on your nail. This one takes real skill and the right tools, so it’s best left to a salon. Expect it to add extra time and cost to your appointment, and treat it gently since raised pieces can snag.
5. Floral Skull

Pair a skull with small painted flowers. Roses work well, wrapped around the edges or growing out of the eye sockets. The flowers soften the skull’s harsh lines without losing the Halloween edge. It reads as more artistic than scary, wearable at work or school without looking like a costume. Stick to one or two flower colors so the design doesn’t compete with itself.
6. Day of the Dead Sugar Skull

Inspired by Día de los Muertos, this design covers the skull in bright, detailed patterns: flowers, swirls, and dots in pink, orange, teal, and gold. Every sugar skull looks different, which is part of the appeal. This style takes more time to paint than a plain black skull because of all the small details. Budget extra minutes if you’re doing it yourself, or expect a longer salon appointment.
7. French Tip With Mini Skull Accent

Keep a classic white French tip on most nails, then paint one tiny skull near the cuticle of a single nail, usually the ring finger. This gives you Halloween spirit without committing your whole hand to a spooky theme. It’s the move if your nails need to look professional most days but you still want a seasonal touch in October.
8. Negative-Space X-Ray Skeletal Nails

This is the design behind the x-ray nails search trend. Instead of painting a skull on top of polish, you paint faint bone shapes under a sheer, milky base, so it looks like your actual finger bones are visible through the skin. It reads as subtle from a distance but genuinely eerie up close. Keep the bone lines thin, since anything too bold breaks the illusion.
9. Colorful Cartoon Skull

Skip the realistic detail and paint a rounded, friendly skull shape instead. Think big eye sockets and a simple smile. Use bright colors like hot pink, turquoise, or yellow instead of black and white. This version reads as fun, not scary. It works for a kids’ Halloween party or for anyone who wants the skull motif without the gothic edge.
10. Gothic Dark-Tone Skull
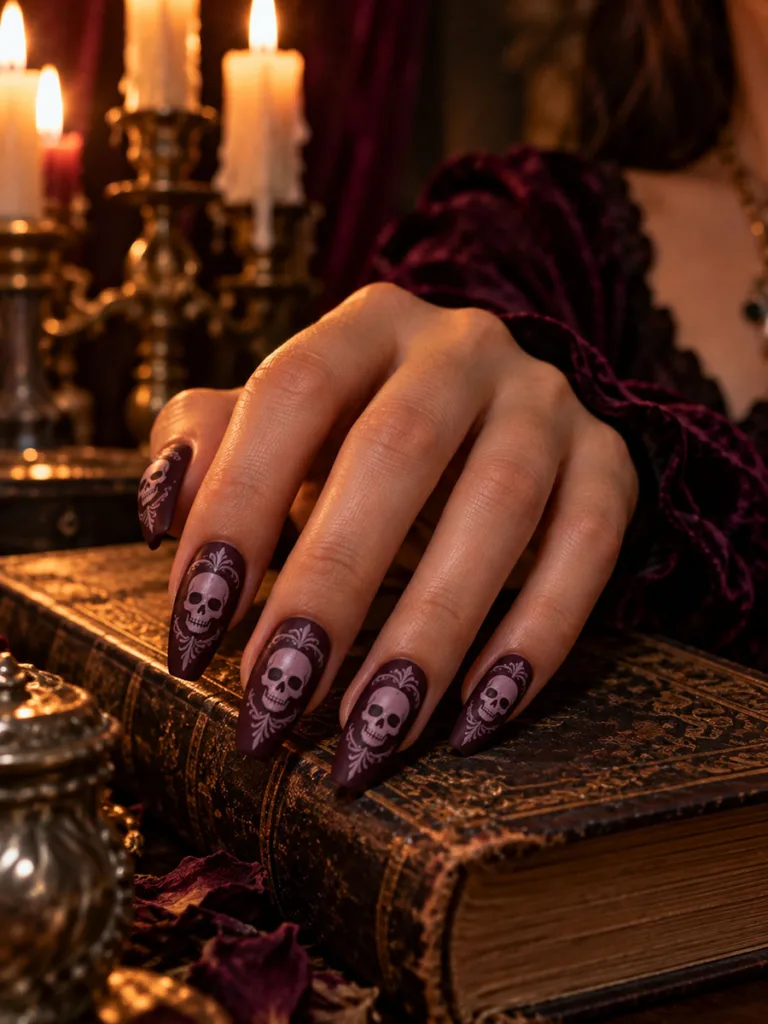
Swap the usual white background for deep purple, burgundy, or black polish, then paint the skull in a lighter shade so it still stands out. The dark base gives the whole look more mood and drama. This style pairs naturally with a matte top coat instead of glossy, which mutes the shine and leans into the gothic aesthetic even further.
11. Minimalist Single-Accent Skull

Paint every nail a plain, neutral color, then add one small skull to a single nail, usually the ring finger. This is the easiest way to wear the trend if you’re not ready to commit to a full set of skulls. It also tends to look more polished in professional settings, since the rest of the hand stays understated.
12. Short-Nail and Press-On Skull

If your natural nails are short, pre-made press-on sets solve the detail problem instantly. These come pre-painted and pre-shaped, so you get intricate skull art without needing steady hands or a growing-out period. Press-ons also cost less than a salon visit and go on in under 20 minutes. Nothing else on this list is faster.
13. Red-and-Gold Skull

Start with a bold red base, then paint the skull in gold powder or gold leaf for a glam, jewelry-like finish. The warm metallic against the deep red makes the skull look almost regal instead of gothic. Save this one for an evening event or a costume party, somewhere you want the look to read as dressed-up, not casual.
14. Pastel Skull

Trade the usual black-and-white palette for soft pink, lavender, or baby blue, then outline the skull in a slightly darker shade of the same color. The result is a gentler, less intense take on the trend. It works especially well if you love the skull motif but find the classic gothic colors too harsh for your everyday style.
15. Animal-Print Skull
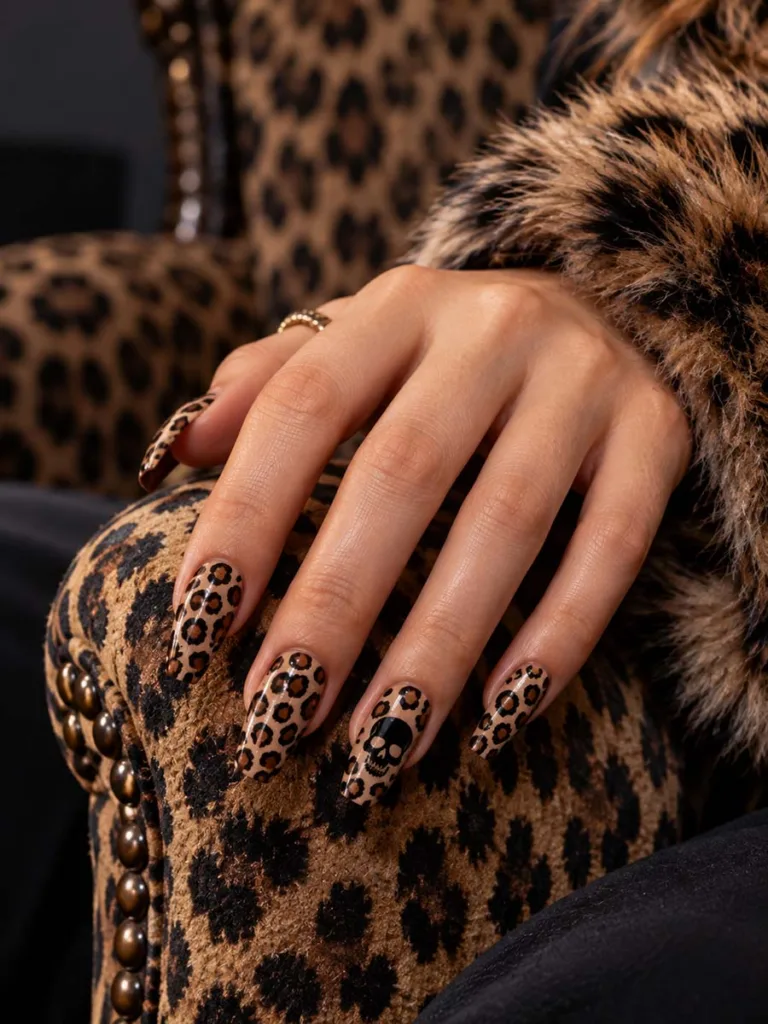
Layer a skull design over leopard spots or snake scales instead of a solid background. The print adds texture and visual interest without needing extra colors or embellishments. This one takes a bit more patience to paint since you’re working with two patterns on one small surface, but the payoff is a design that looks more complex than it actually is.
16. Ombre Skull

Blend two polish colors from dark at the cuticle to light at the tip, then paint a solid skull silhouette over the gradient. The fading background gives the skull more depth without adding extra detail work. Purple-to-black or orange-to-black combinations both work well for a Halloween-specific look, while black-to-grey keeps things more subdued and easy to wear.
17. Marble Skull

Create a marbled base using a water-marble technique or marble nail stickers in black, white, and grey, then trace a skull outline over the swirled pattern. The organic, unpredictable lines of the marble make every nail look a little different, even within the same set. That gives the whole manicure a one-of-a-kind feel no two people will share.
18. Chrome Skull
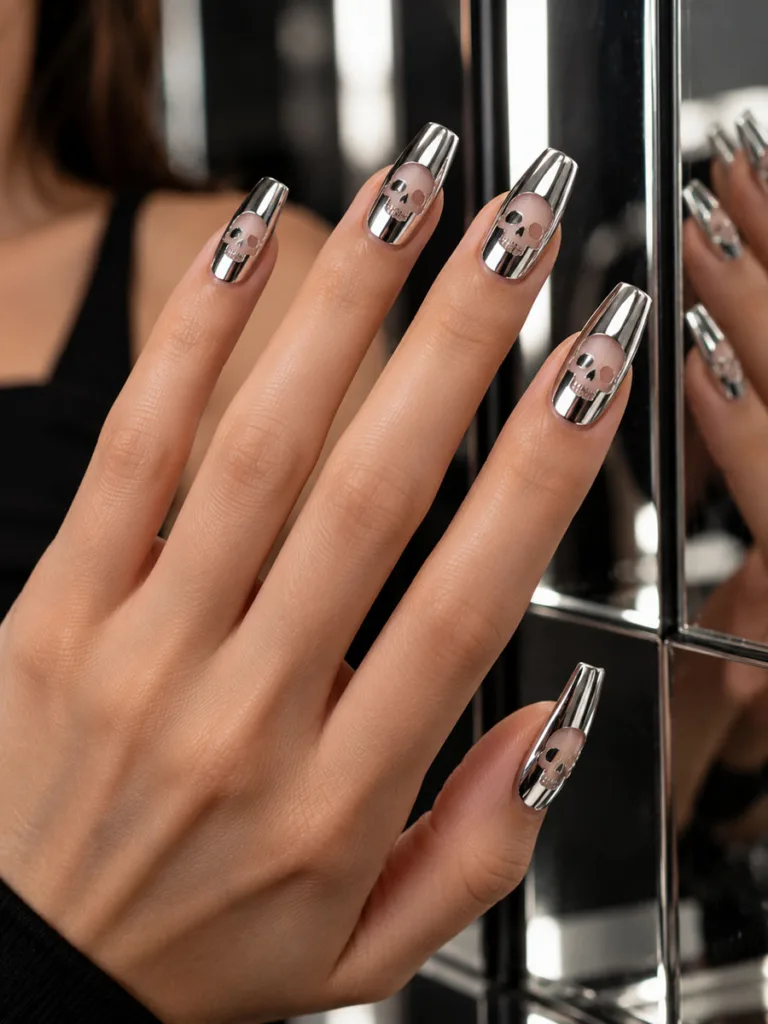
Apply a full mirror-chrome powder over the entire nail first, so the surface looks like polished metal. Then cut the skull shape out in negative space, leaving bare or plain-polished nail showing through where the design sits. The mirror finish catches every light source. It’s the most reflective, camera-ready option here.
19. Matte-and-Gloss Skull

Paint the entire nail in matte black polish, then apply a glossy top coat only to the skull shape itself. The shine-versus-matte contrast makes the skull stand out without needing a single extra color. It’s a subtle trick, but it reads as more expensive and considered than a plain black skull on a plain black base.
20. Skull With Spiderweb Accent
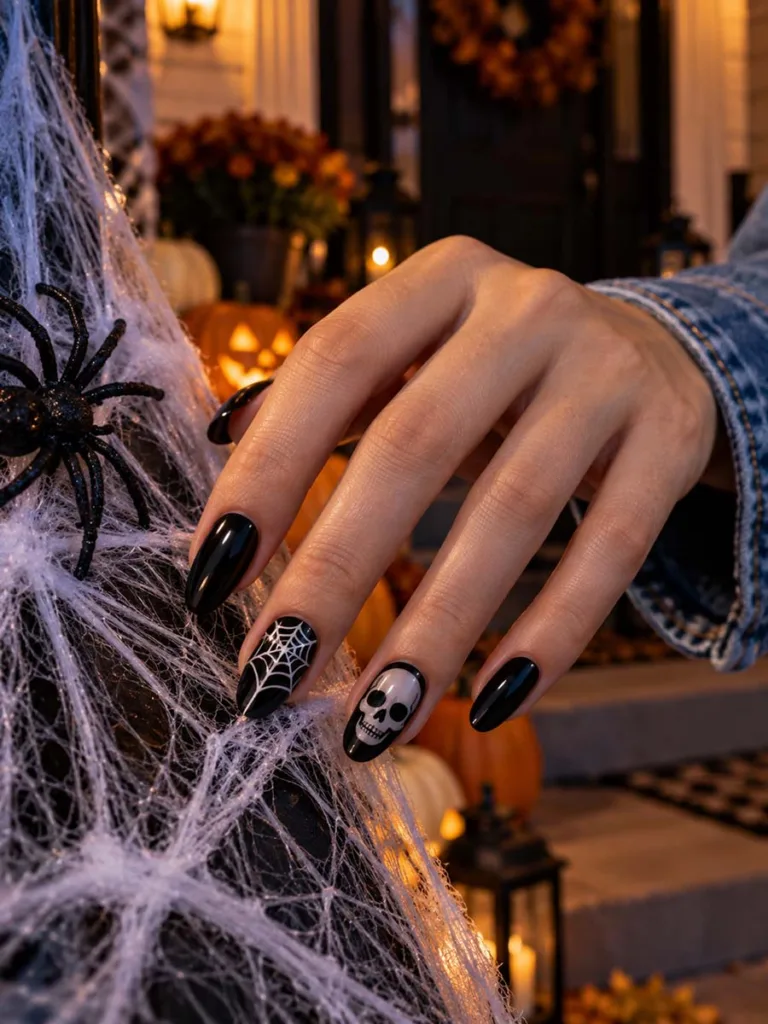
Paint a skull on one nail and a delicate spiderweb on the nail next to it, connecting the two Halloween icons across your hand instead of cramming them onto a single nail. Thin white or silver lines work best for the web, since a heavy web can overpower the softer, more detailed skull design beside it.
21. Two-Tone Split Skull
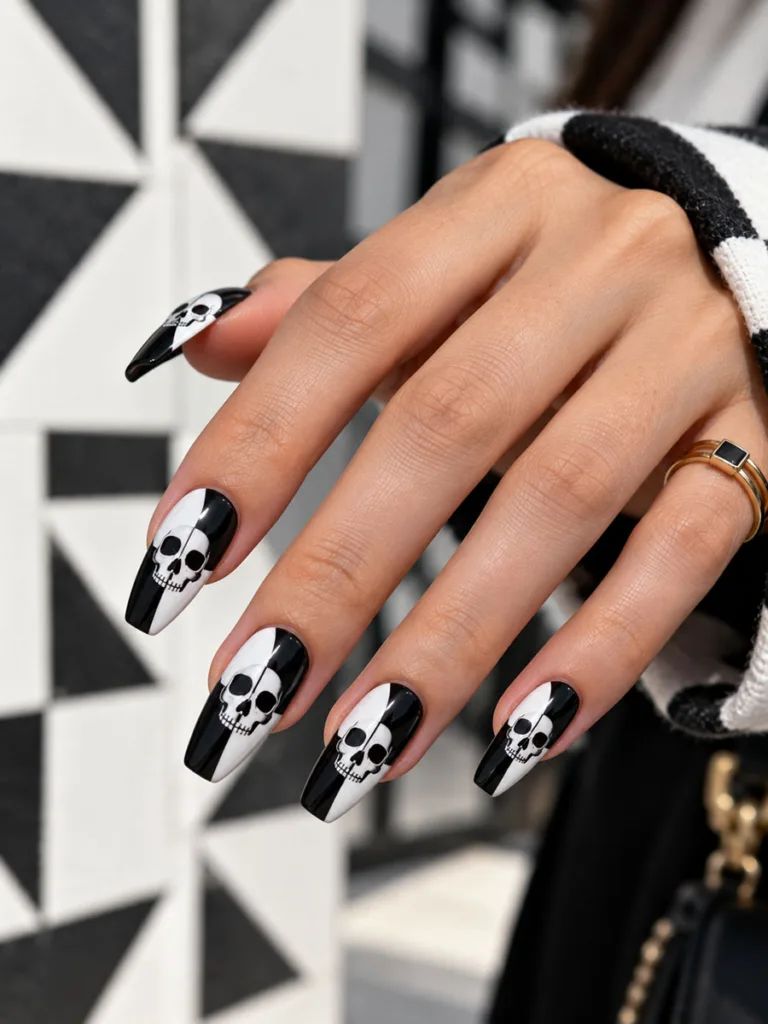
Split the nail diagonally into two different colors. Black and white is the classic combination, then paint the skull crossing directly over the dividing line. The skull appears to straddle both colors at once. That adds visual tension to an otherwise simple design, and makes it look harder to pull off than it actually is.
22. Skull With Bats or Crows

Add a small skull alongside a few tiny painted bats or crows flying across the nail. This combination tells more of a story than a skull alone. Think a tiny haunted house scene, condensed onto one nail. Keep the bats or crows small and simple. A solid silhouette works fine, so they don’t distract from the skull as the main focal point.
23. 3D Charm Skull

Skip painting a skull altogether and instead apply a sheer or milky base, then finish with tiny dangling skull charms attached near the tip of each nail. You get the skull motif through jewelry instead of paint. Good news if fine detail brushwork isn’t your strength. Charms do need a stronger top coat to stay attached through daily wear.
24. Candy Corn Skull

Paint each nail in the classic orange, yellow, and white candy corn stripes, then add one small white skull over the white section near the tip. This design plays the sweet, cartoonish side of Halloween against the skull’s edgier symbolism. It’s an easy way to work seasonal color into a design that might otherwise feel purely gothic.
How to Do Skull Nail Art at Home, Step by Step
You don’t need salon tools for either of the two easiest styles: classic black-and-white skulls and x-ray nails.
Classic Black-and-White Skull, Step by Step

- Apply a base coat and let it dry fully.
- Paint one or two coats of white or nude polish as your background.
- Use a thin detail brush or a dotting tool to draw an oval skull shape in black.
- Add two small black ovals for eye sockets and a triangle for the nose.
- Draw short lines for teeth across the bottom of the skull.
- Seal everything with a glossy top coat.
X-Ray Nails, Step by Step

- Apply a sheer white or grey “milky” base color, two thin coats.
- Once dry, use a fine brush and pale grey or white polish to sketch simple bone shapes down the center of the nail, mimicking finger bones.
- Add faint joint lines where the bones would bend.
- Keep lines thin. A cluttered bone pattern looks messy instead of realistic.
- Finish with a matte or semi-gloss top coat, since high shine can wash out the fine detail.
Both designs take 20 to 40 minutes per hand once you get comfortable with a detail brush. Practice on paper first if your lines look shaky.
Salon vs. DIY: Cost, Time, and Skill Level
Cost is usually the first question people ask. These are typical ranges, not fixed prices, since your actual cost depends on your city and your salon’s rates.
Salon Pricing and What You Get
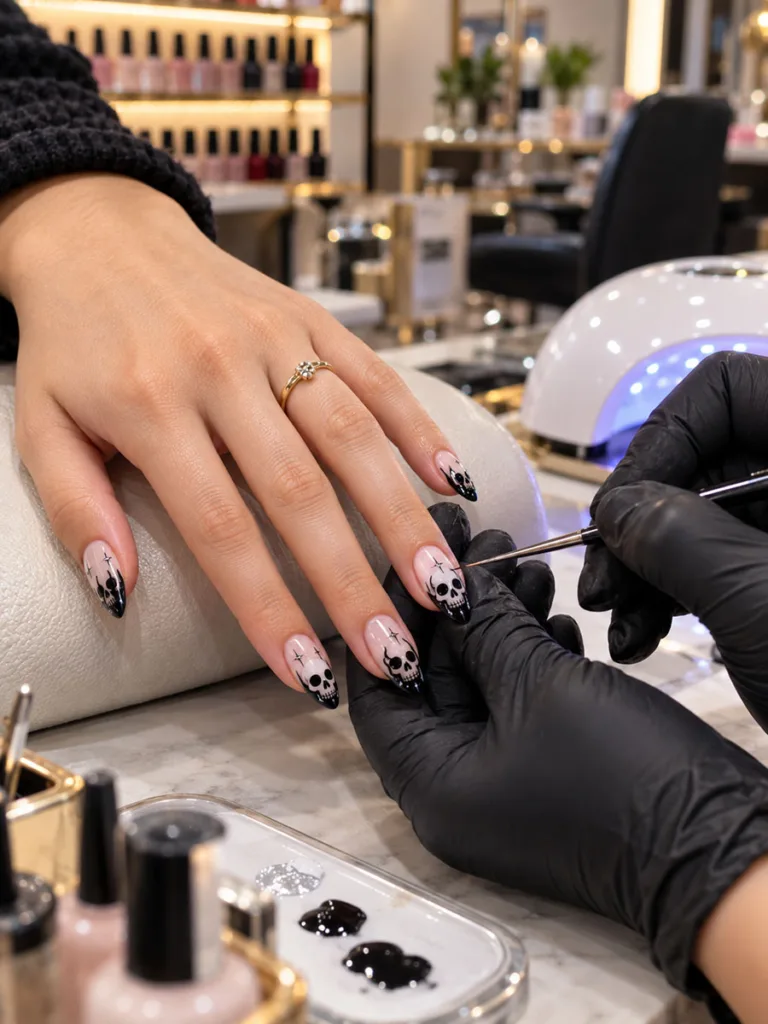
A salon skull manicure with hand-painted detail runs $45 to $90, depending on your city and whether you add gel or acrylic extensions. 3D sculpted skulls and full sets with rhinestones sit at the higher end of that range. Call ahead and ask, since pricing varies more for custom nail art than for a standard manicure.
DIY Costs and Time

Doing it yourself costs far less. A detail brush, a dotting tool, and two or three polishes add up to under $20 at a drugstore or craft store, and you can reuse them later. The tradeoff is time, not money. A salon artist finishes a full set in under an hour. Your first home attempt will likely take longer while you get used to the brush.
When to Book a Salon Instead
If you want 3D elements, chrome powder, or airbrushed x-ray nails, book a salon appointment. Those techniques need tools and practice that go beyond a basic home kit. Ask to see an artist’s past skull or x-ray work before booking. Fine detail varies a lot between artists, and checking their portfolio first avoids a design that misses your reference photo.
Aftercare and Removal Tips
A few habits keep skull nail art looking sharp instead of chipped by week two.
Daily Habits That Make It Last
Wear gloves for dishes and cleaning. Water and harsh soap break down top coat fastest, right at the tip, and that’s where chipping starts first. Reapply a thin top coat every three to four days to protect fine detail work like x-ray bone lines or 3D skulls. Keep cuticle oil on hand for the full two to three weeks. Dry cuticles lift polish faster than almost anything else, and that lifted edge is usually where a design chips.
How to Remove 3D or Glow-in-the-Dark Pieces
For glow-in-the-dark or glitter top coats, avoid acetone-based removers on bare skin around the nail. They can dry out your cuticles fast. For 3D acrylic skulls, don’t pick or pry them off. File down the raised design gently, then soak the nail in acetone wrapped in foil, the same way you’d remove any acrylic set. Forcing off a 3D piece can damage your natural nail underneath.
Common Mistakes to Avoid
These three mistakes come up again and again, whether it’s a first attempt at skull nail art or a tenth.
Skipping the Base Coat
The biggest mistake is skipping the base coat. Skull designs rely on contrast, and unprotected polish stains the nail. That dulls the contrast within a week.
Overcrowding the Design
Another common error is overcrowding the design. Tiny roses, rhinestones, and glitter piled on at once read as a blur from arm’s length. Stick to one or two accents per nail, not five.
Rushing the Top Coat
Finally, rushing the top coat causes smudging. Let hand-painted lines dry for a full two minutes before sealing. This matters most on x-ray nails, where the lines are thin and easy to drag.
Frequently Asked Questions
1. Do skull nails work on short nails?
Yes. Short square or round nails work well for single-accent skulls, French tip skulls, and press-on sets designed for shorter lengths.
2. How long do skull nails last?
A hand-painted design with regular top coat touch-ups lasts about two to three weeks, similar to any standard gel manicure.
3. Are skull nails appropriate for school or work?
Simpler styles, like a small black-and-white skull on one accent nail, read as subtle enough for most school and office settings.
4. How do I remove glow-in-the-dark or 3D elements safely?
File down raised 3D pieces first, then soak nails in acetone. Avoid picking, which can peel layers off your natural nail.
5. What is the difference between skull nails and x-ray nails?
Skull nail art paints a full skull shape on the nail. X-ray nails show a subtler bone outline under a sheer base, like a scan.
Conclusion
Skull nails give you a Halloween look that ranges from cute to genuinely eerie, and every version on this list works on any nail length or budget. Short, round nails handle a simple accent skull just as well as long coffin nails handle a full x-ray nails set. Salon prices run $45 to $90, while a home kit costs under $20 and takes about 20 to 40 minutes once you get the hang of it. Pick one design, gather a basic detail brush and two polish colors, and try the classic black-and-white skull steps above this week before Halloween plans fill your calendar.