12 Nightmare Before Christmas Nails That Steal the Show

Ever scroll through dozens of Halloween nail pins, save half of them, then forget every single one by November? Skeleton nails and pumpkin French tips start to look identical from board to board, and most get soaked off before the candy is even gone.
Nightmare before Christmas nails solve that problem. Jack Skellington’s gothic detail and classic holiday color work together on one manicure, so it carries you from a Halloween party straight into December photos without a repaint in between. After ten years painting this exact theme every fall, it’s the one request that keeps clients coming back long after October ends.
This guide skips the repetitive photo scroll. You get 12 real designs, honest nail shape advice, salon scripts, and the aftercare steps most guides forget to mention.
Why Nightmare Before Christmas Nails Work So Well
Most Halloween nail art gets worn once and soaked off by November. This style covers two holidays with one manicure instead. That’s rare, and it’s why demand for it climbs every fall.
A Two-Season Color Palette
Jack Skellington and Sally give nail artists a rare gift: two color palettes in one theme. Black, white, and orange cover Halloween. Red, green, and silver cover Christmas. A single set of nails can carry both without looking mismatched.
That crossover appeal is why the design stays popular well past October 31. Clients book it for Christmas parties, holiday work events, and winter photo shoots. In my own salon bookings, requests for this style spike twice a year, once before Halloween and again in early December. That two-season demand sets this theme apart from most seasonal nail trends, which fade the moment the holiday passes.
More Characters Than a Plain Pumpkin
The characters themselves also give artists more to work with than a plain pumpkin or spider web. Jack’s pinstripe suit, Sally’s patchwork dress, and Zero the ghost dog each offer a distinct visual pattern. A nail tech can rotate through several looks across one set of ten nails instead of repeating a single motif. That variety is what keeps the manicure interesting from thumb to pinky.
Salon, DIY, or Press-On: How to Get the Look
You have three real ways to wear Jack Skellington nails. Each fits a different budget and comfort level, so the right choice depends on how much control you want over the final result.
Book a Salon Appointment
Book a salon appointment if you want hand-painted detail on every nail. A skilled nail tech can freehand Jack’s face, Sally’s stitches, or a full Halloween Town skyline. Bring a clear reference photo, since verbal descriptions rarely capture the exact line work you want. Say the words “Nightmare Before Christmas,” and most experienced techs will know exactly what you mean. It’s one of the most requested themes every fall.
Try Press-On Nails
Try press-on nails if you want the look in under 20 minutes with zero drying time for hand-painted art. Several brands now sell pre-designed sets built around this theme, with the artwork already painted or printed onto the nail. Press-ons also protect your natural nails, since there’s no filing, soaking, or acrylic product involved. That matters if your nails are already thin or damaged.
DIY the Look Yourself
Go the DIY route if you enjoy nail art as a hobby and want to practice a new skill. A dotting tool, a thin striping brush, and a handful of polishes cover most designs on this list. Start with a simple accent nail before you attempt a full set of hand-painted faces. Faces take the most practice to get symmetrical.
A basic kit costs less than you’d expect, too. Look for striping brushes, a dotting tool with two or three tip sizes, black and white acrylic paint, and a fast-drying top coat. Most beauty supply stores stock everything for under $25 combined. The same tools work for other holiday designs later in the year.
A handful of core techniques cover almost every design on this list, so it’s worth practicing these once rather than relearning them design by design:
- Always start with a clear base coat, and let each layer dry before you add the next. Skipping this is the top reason hand-painted designs peel early.
- For any face (Jack’s skull, the Mayor’s expressions), use a fine-tip brush to paint two elongated oval shapes for eye sockets first, then build the nose and mouth around them. Uneven lines look more authentic here, so don’t aim for perfect symmetry.
- For spiral or swirl patterns, start with a single dot in the center of the nail and paint one continuous line outward, widening the gap slightly with each loop, rather than drawing separate rings.
- For patchwork or stitched looks, outline uneven sections in thin black first, fill each with a different muted color, then add short black dashes along the seams once the color is dry.
- For any glow-in-the-dark element, paint the design in regular polish first, let it dry completely, then trace over it with a thin layer of glow-in-the-dark top coat. Charge it under a bright light or in sunlight for a minute or two before it needs to glow.
- Finish every design with a glossy top coat once it’s fully dry, both to protect the detail work and to help it resist chipping.
Best Nail Shapes and Lengths for This Design
Shape matters more than most tutorials admit. It changes how much detail you can realistically fit on each nail.
Coffin and Almond Nails for Detailed Art
Coffin nails give you the longest, flattest canvas, which suits detailed faces and full-scene designs like the spiral hill silhouette. Almond nails work well for single-character accents, since the tapered tip frames a small painted face nicely without distorting the proportions.
Short and Square Nails Work Too
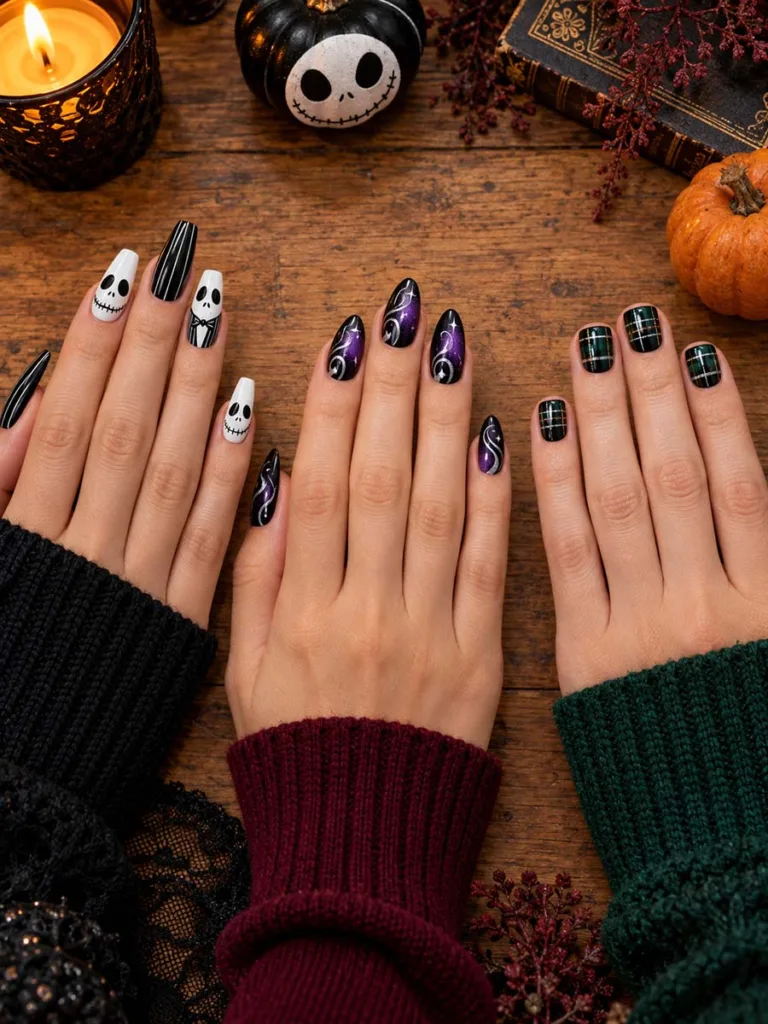
Short and square nails are not a limitation here, whatever some tutorials imply. A short square shape shows off bold graphic elements, like stripes, plaid, or a simple silhouette, better than long nails do. The flat surface reads cleanly from a distance. Length changes how much fine detail fits on each nail. It doesn’t change whether the design works.
12 Jack Skellington Nail Designs to Try
These 12 ideas come from real client requests and the competitor pages and galleries we researched for this guide. Each one is different from the rest, not the same design with the color swapped.
1. Classic Jack Skellington Face

This is the design everyone asks for first. You paint a hand-drawn skull face on a white or bone-colored base, using thin black lines for the eyes, nose, and stitched mouth. Jack’s face in the film was never perfectly even, and a slightly wobbly line looks more authentic than a stiff, symmetrical one. Wear it as a full set of ten matching faces, or as one bold accent nail with the rest kept plain.
Best for: first-timers who want the most recognizable design in the set.
2. Santa Jack

Take the classic skull face above and add a small red-and-white Santa hat on top instead of leaving the head bare. It’s a simple swap, but it instantly shifts the mood from spooky to festive. This design bridges Halloween straight into December without you needing a whole new manicure. I paint it most often in late October for clients who want their nails to carry through both holidays without a repaint.
Best for: anyone who wants one manicure that lasts through both holidays.
3. Sally’s Patchwork Accent Nail
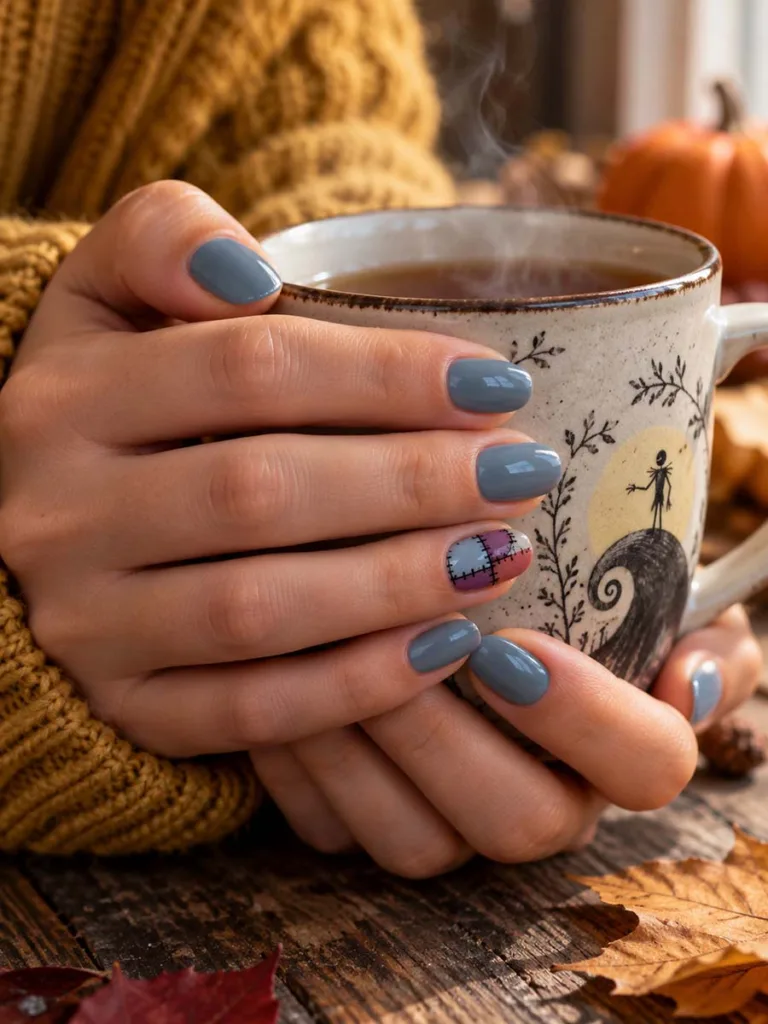
Sally’s dress is made of mismatched fabric, and that’s exactly what you recreate here on a single accent nail. Mix muted blues, purples, and dusty reds into uneven patches. Then connect each patch with thin black stitch lines, like real seams. It reads as detailed without needing a steady freehand face, which makes it a solid first project if you’re new to character nail art.
Best for: beginners easing into character nail art without painting a face.
4. Zero the Ghost Dog

Zero is Jack’s ghost dog, and he makes a surprisingly pretty nail design on his own. Paint a pale, translucent dog silhouette against a navy night sky. Add a small glowing orange nose as the one bright spot on the nail. Dot a few tiny stars around him. It’s quiet and a little eerie, and it stands out from the louder, face-heavy designs on this list.
Best for: a quieter, less literal take on the theme.
5. Spiral Hill Silhouette

The opening scene of the film shows Jack standing on a spiral hill, and that image translates beautifully onto a nail. Paint the hill in solid black, then build a swirling gray-and-white spiral behind it, like a hypnotic backdrop. This one needs a steady hand for the spiral lines. It looks striking as a base accent or a ring finger feature nail.
Best for: steady hands and one detailed statement nail.
6. Candy-Cane Striped Jack

Jack wears a pinstripe suit throughout the film, and swapping those stripes for red-and-white candy cane colors is an easy win. Paint clean diagonal stripes across all ten nails. It reads as festive from a distance, but anyone who knows the film spots the reference right away. This is one of the fastest designs on this whole list to finish.
Best for: a fast design with almost no freehand risk.
7. Gothic Plaid

Sometimes you want the mood of the film without painting an actual character. A black, white, and green plaid pattern does exactly that, and it’s one of the simplest gothic nail designs on this list to pull off. The green ties it to Christmas without looking like a typical holiday manicure. This design also holds up well on short nails, since plaid lines are easy to see even at a small scale.
Best for: short nails and anyone who wants mood without a character.
8. Glow-in-the-Dark Bats and Moon

Paint a navy or black base, then add small bats and a crescent moon using glow-in-the-dark polish. Under normal light, it looks like a subtle night scene. Under a black light or in a dark room, the whole design lights up. Clients love this one for Halloween parties, since it turns into a completely different look once the sun goes down.
Best for: Halloween parties and other after-dark events.
9. Minimalist Spooky Accent Nail

Not every client wants ten fully painted nails, and that’s fine. Paint one tiny bat or pumpkin on an otherwise plain manicure, and you get the theme without the commitment. This is the design I recommend most to office workers or to anyone trying character nail art for the very first time. It’s subtle, it’s fast, and it still gets noticed.
Best for: offices and first-time character nail art.
10. French Tip with a Jack Silhouette

A classic French manicure gets a small twist here. Instead of the usual white line at the tip, paint Jack’s silhouette small and clean along the edge of each nail. It keeps the rest of the manicure neutral and work-appropriate. This one’s a favorite for clients who love the theme but need something they can still wear to a conservative office.
Best for: conservative workplaces that still want a nod to the theme.
11. Black-to-Purple Ombre with Silver Swirls

Blend a black base into deep purple using a makeup sponge for a soft gradient. Once it’s dry, add delicate silver swirls on top, echoing the pattern on Jack’s suit without painting an actual face. It’s an easy design for anyone still building confidence with a striping brush. The gradient alone does most of the visual work here.
Best for: building confidence with a striping brush.
12. Chrome Halloween Town Sky

Halloween Town has this shifting, dreamlike sky in the film, and a holographic or chrome polish captures that mood surprisingly well. Apply the chrome finish as your base, then add one silhouette accent nail, maybe Jack or the spiral hill, to ground the design. It photographs beautifully under different lighting, which makes it a popular request for holiday party season.
Best for: holiday parties and photos under changing light.
Pick two or three from this list before your appointment. Bringing options gives your nail tech room to match the design to your nail shape, your nail length, and how much time you have booked.
Wearing This Look on Short Nails or If You Bite Your Nails
Short nails and bitten nails are not a reason to skip this trend. Simple shapes carry the look better than you’d expect.
Why Small Nails Still Work
Bold, simple designs read better on a small canvas than tiny, cramped details do. You may have an easier time than someone with long nails. Stick with a single accent nail, a graphic stripe pattern, or a small silhouette instead of a full face. Those simpler shapes hold up at any length.
Press-Ons and Gel Overlays Solve Length
Press-on nails also solve the length problem directly, since many sets come in short and medium lengths. That means you get the art without growing out your natural nails first. A nail tech can also apply a soft gel overlay to add a few millimeters of length before painting, without the commitment of full acrylics or a heavy soak-off later.
Cost, Time, and Aftercare Tips
Budget and time vary a lot depending on which route you pick. The table below covers both, and the section after it covers keeping the art intact once it’s done.
How Much It Costs and How Long It Takes
| Option | Typical Cost | Typical Time |
| Salon (hand-painted) | $45 to $90 | 60 to 90 minutes; longer for faces on all ten nails |
| DIY | Under $20 for polish and tools | 45 minutes to an hour for a first attempt |
| Press-on | $10 to $25 | 15 to 20 minutes |
More detail, or a pricier city, pushes salon cost toward $90. Press-ons are the fastest option by a wide margin, since there’s no dry time for hand-painted art.
Aftercare Habits That Make It Last
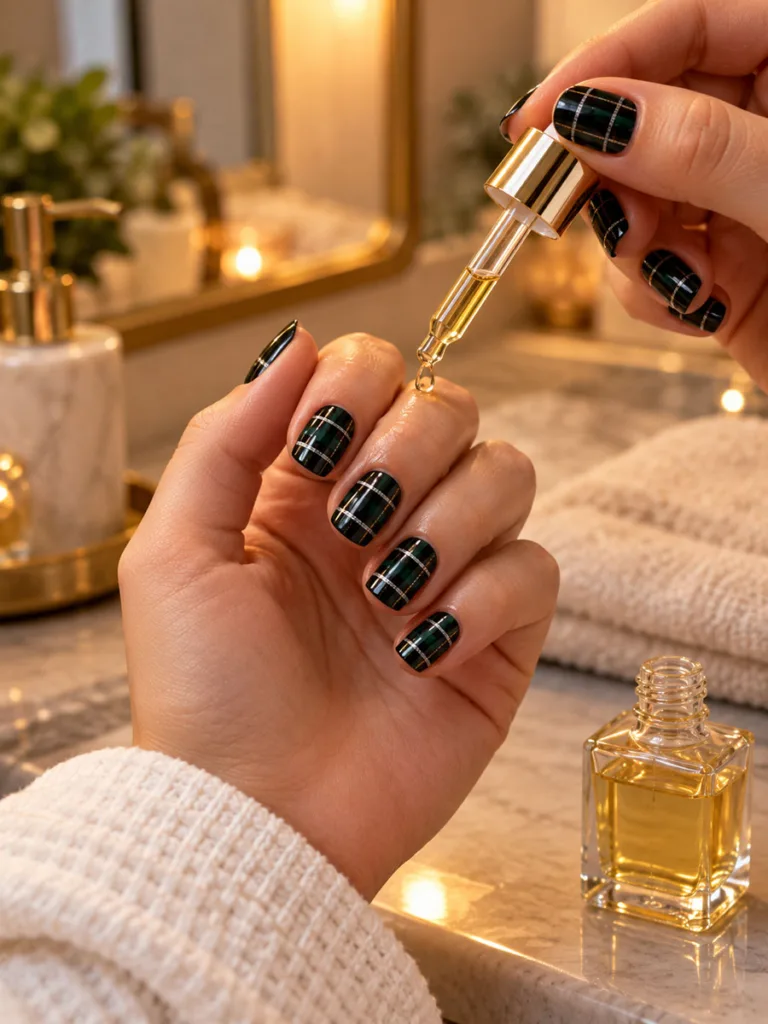
Once your nails are done, a few habits keep the art looking sharp for as long as possible:
- Apply a fresh top coat every three to four days to protect painted details from chipping and scuffing.
- Avoid soaking your hands in hot water for long periods, which can lift press-ons and soften gel edges early.
- Use cuticle oil daily to keep the surrounding skin healthy while the polish or gel is on your nails.
- Remove gel or acrylic sets with proper soak-off methods at a salon or with an at-home kit. Never peel or pick at the art, since this can damage your natural nail underneath and slow healthy growth.
One mistake I see often: clients skip a base coat under detailed hand-painted work, then wonder why the design stains their natural nail after removal. A thin, clear base coat protects your nail bed. It also makes the whole set easier to remove cleanly, whether a salon tech does it or you do it yourself at home.
FAQ Section
1. How do I ask a nail salon for this look?
Bring a reference photo and say “Nightmare Before Christmas nail art” or “Jack Skellington nails.” Most experienced techs recognize the style immediately and can suggest which designs fit your nail shape.
2. Do these designs work on short nails?
Yes. Simple accent nails, stripes, and small silhouettes look sharp on short or square nails, and no extra length is required to pull off the theme.
3. Is there a kid-friendly version?
Choose a single small Jack Skellington face or a bat accent instead of a full gothic set. Non-toxic, peel-off polish works well for younger nail fans and removes easily.
4. What if I want the theme without anything scary?
Try the candy-cane striped Jack or the Santa Jack design from the list above. Both lean festive over frightening, so they suit family gatherings too.
5. How long does the nail art last?
Gel and acrylic versions last two to three weeks with a fresh top coat. Press-on sets typically last one to two weeks with careful, everyday wear.
Conclusion
Nightmare before Christmas nails give you a two-season style that outlasts one Halloween night. It works on long coffin nails, short square nails, and everything in between, and it still looks sharp for Christmas photos weeks after Halloween ends. Pick one design from the list above, decide between salon, DIY, or press-on, and book your appointment or grab your polish this week before the best salon slots fill up. Bring a reference photo to your appointment, and feel free to mix two or three designs across one set.