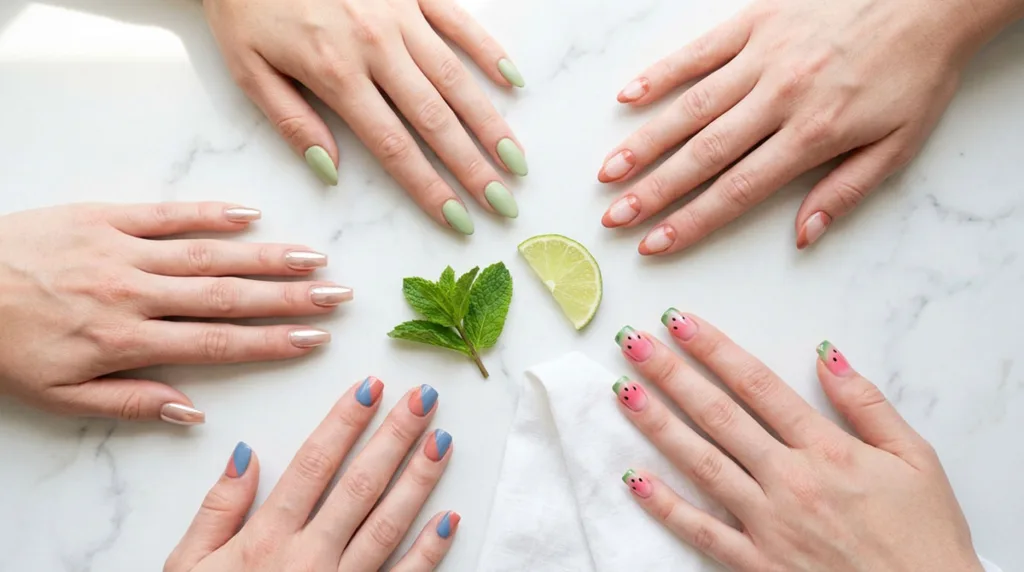
Valentine’s Day Nails: 25 Cute Ideas You Can DIY at Home
I went from paying $65 at the salon every February to doing my own Valentine’s Day nails at home for under $12. People keep asking who my nail tech is.
The real secret is not talent. It’s knowing which designs look complex but only take about an hour to recreate. Most nail posts online show you a hundred photos but skip the part where they tell you how to actually do it.
Below, I’ve organized 25 Valentine’s Day nails by color and style. You’ll find designs for short nails, long nails, minimalist tastes, and bold looks. There’s also a step-by-step guide so you can go from blank nails to finished nail designs for Valentine’s Day tonight.
Best Colors for Valentine’s Day Nails
Not every valentine’s nail art look has to be red and pink. The right color depends on your style, your plans, and how long you want the design to feel wearable.
- Red — timeless, confident, and easy to dress around
- Pink—the widest range, from barely-there blush to loud hot pink
- Nude and white—lets the nail art carry the look without competing with your outfit
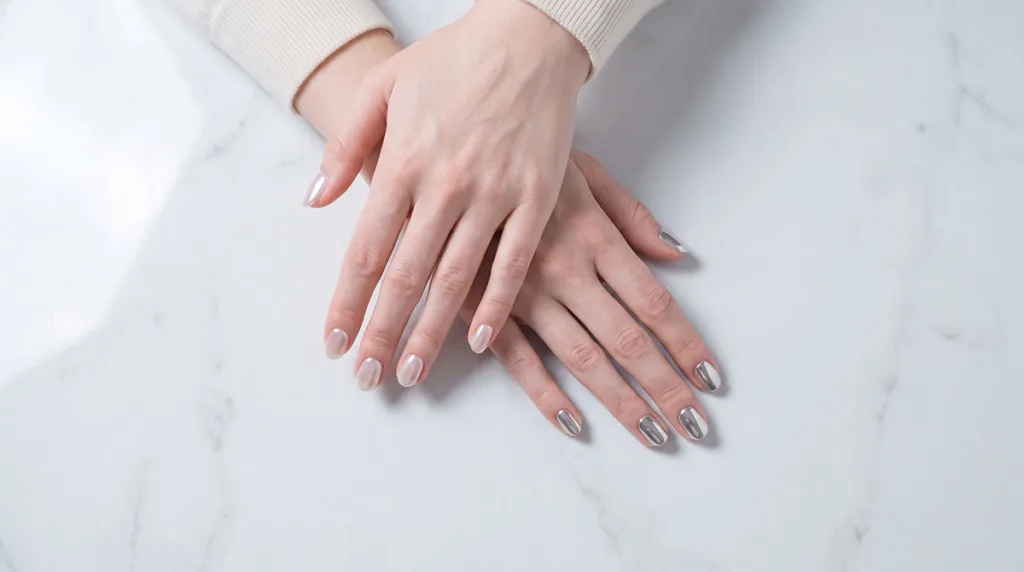
- Chrome and glazed—the biggest trend right now; shiny, modern, and striking in any light
- Dark shades (oxblood, burgundy, plum)—romantic through depth rather than holiday theme, so you can wear them past February 14
All 25 Valentine’s Day nails below use one of these palettes.
Red Valentine’s Day Nails
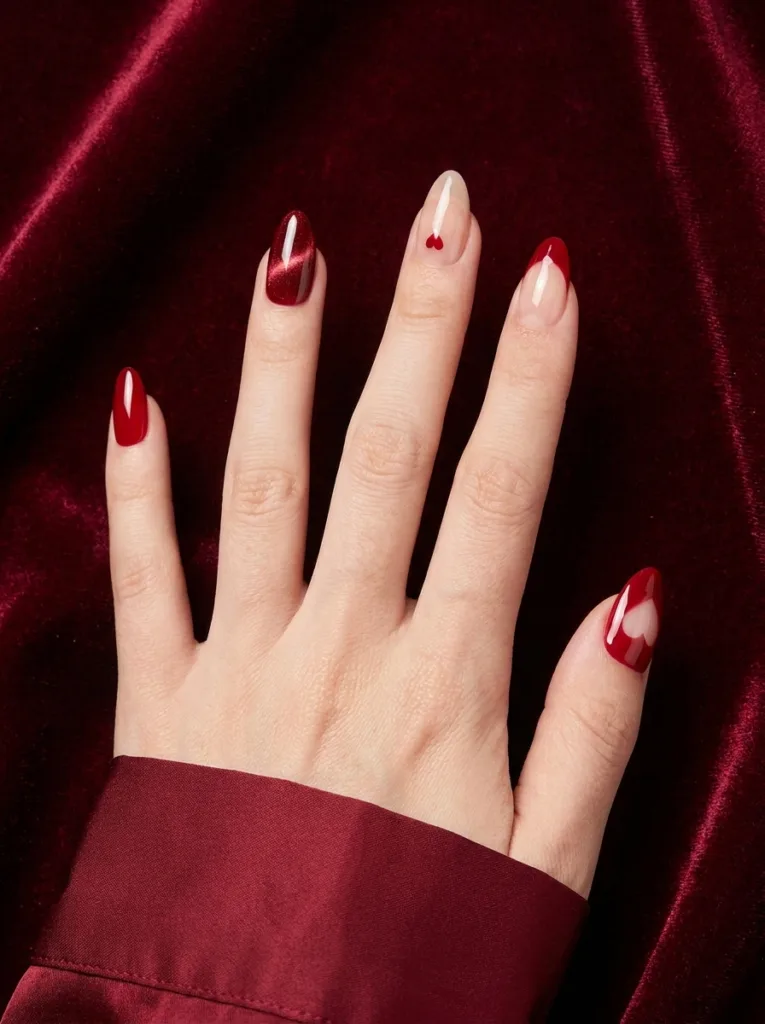
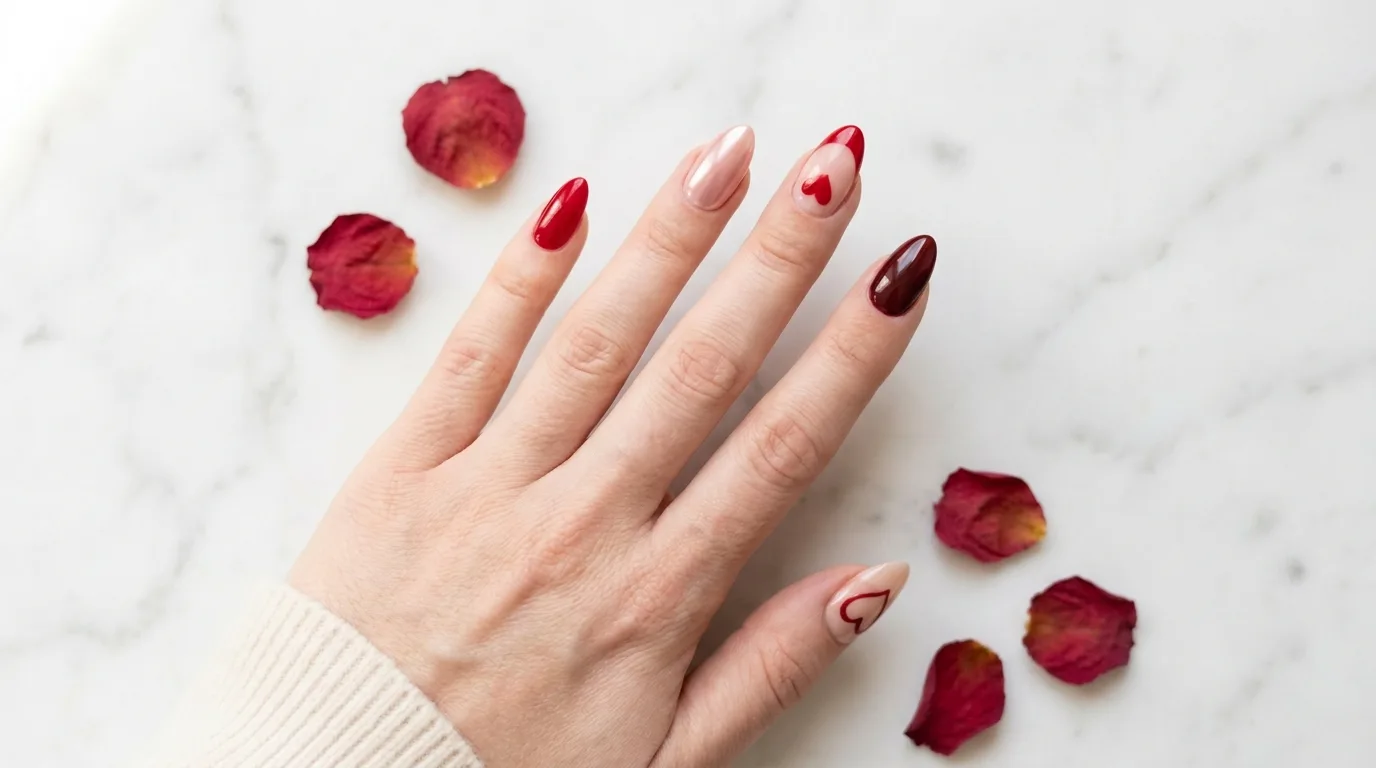
Red is the original Valentine’s Day nail color, and it still earns the most compliments. The key is choosing one detail to make your red Valentine’s Day nails feel intentional rather than last-minute. A heart accent, cat-eye shimmer, or matte topcoat all work.
1. Classic Cherry Red
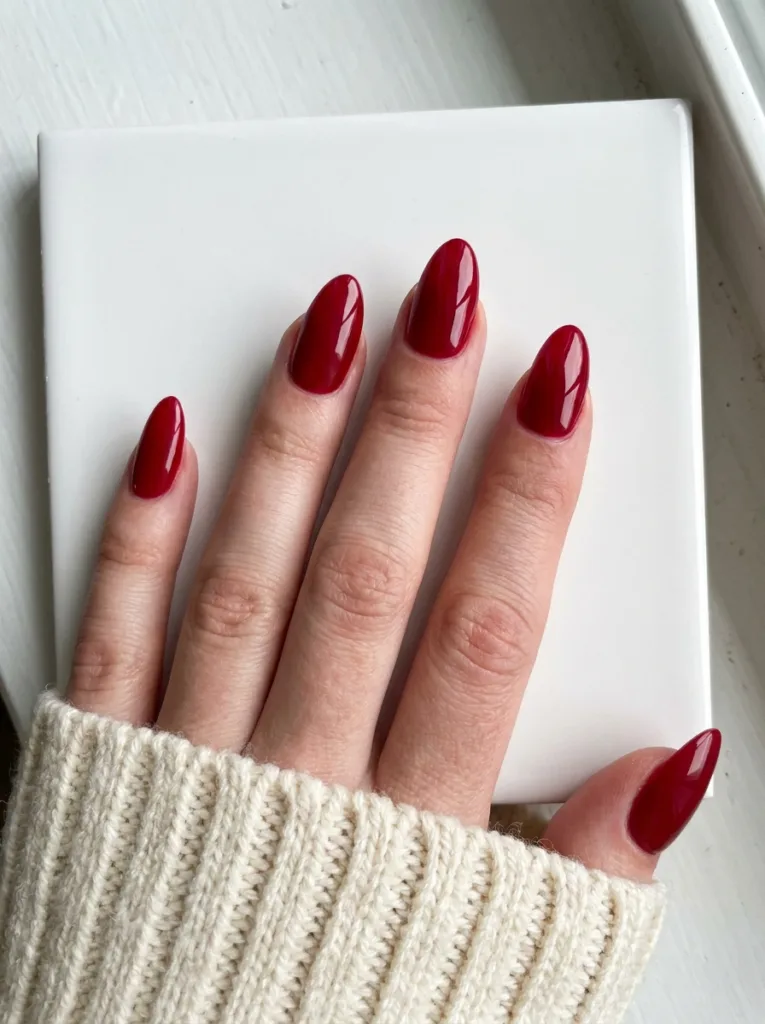
A glossy cherry red on almond nails or oval nails is the most universally flattering choice. OPI Big Apple Red and Essie Not Red-y For Bed both deliver a rich, chip-resistant finish. Apply two thin coats rather than one thick one—thin layers dry faster, self-level better, and are far less likely to streak. If your red looks patchy after the first coat, that’s normal; the second coat fills everything in.
2. Red Velvet Cat-Eye
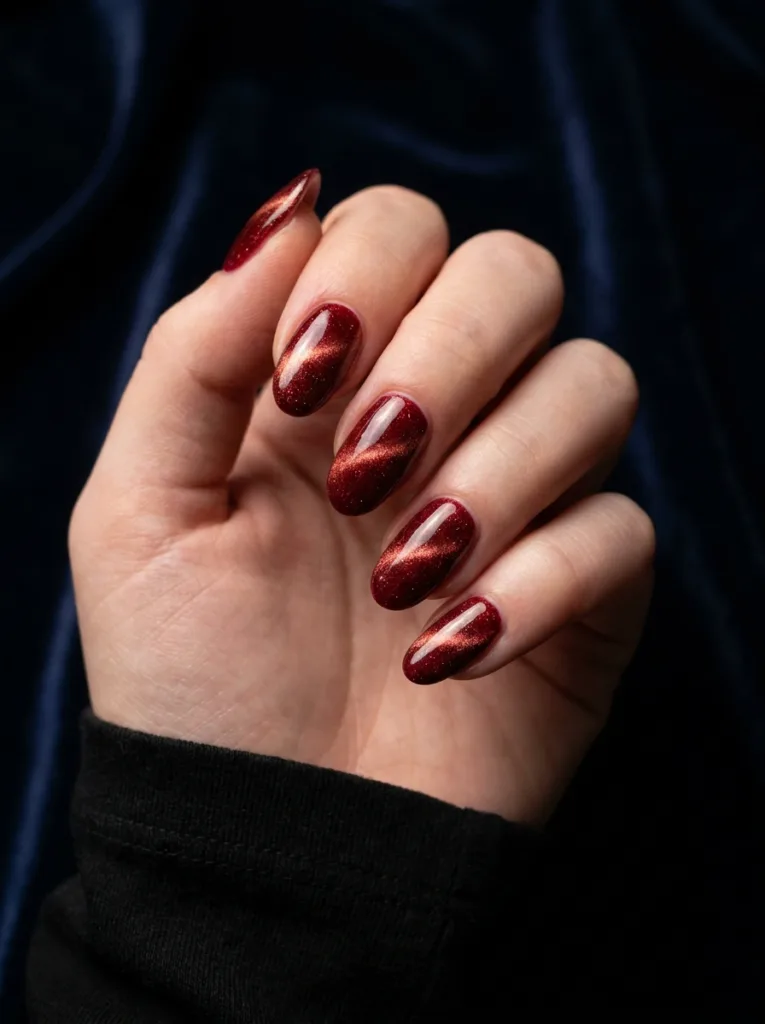
Apply a magnetic gel polish in red, then drag a magnet across the surface while the gel is still wet. Pull the magnet straight across horizontally, from one side of the nail to the other, holding it about 2mm above the surface without touching. The velvet texture it creates looks like something done in a high-end salon. Hold the magnet in place for 10 full seconds per nail before curing—moving it too quickly gives a faint effect instead of a sharp line.
3. Red Heart Accent on Nude
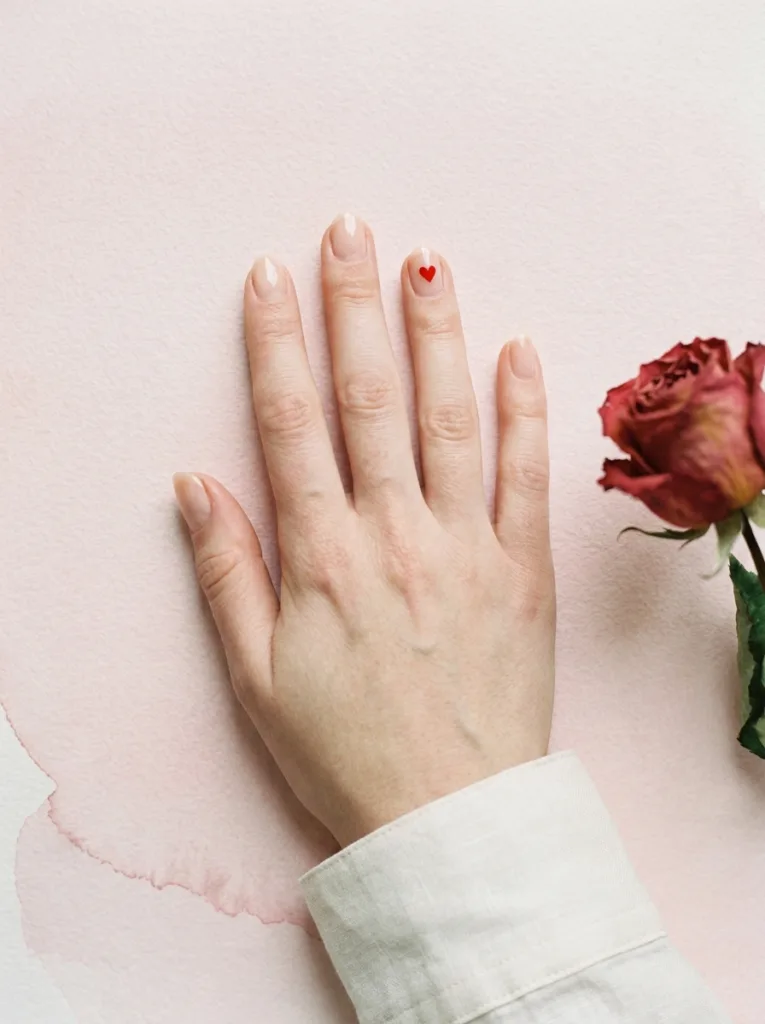
Paint all nails in a nude base coat, then add a single red heart to the ring finger. Use a dotting tool or the rounded end of a bobby pin dipped in red polish. Make two small dots side by side that touch at the center, then drag both downward into a V. Keep the heart about 4 mm wide—any larger and it starts to look like a blob rather than a heart. This is the easiest heart nail design on this list.
4. Red French Tips
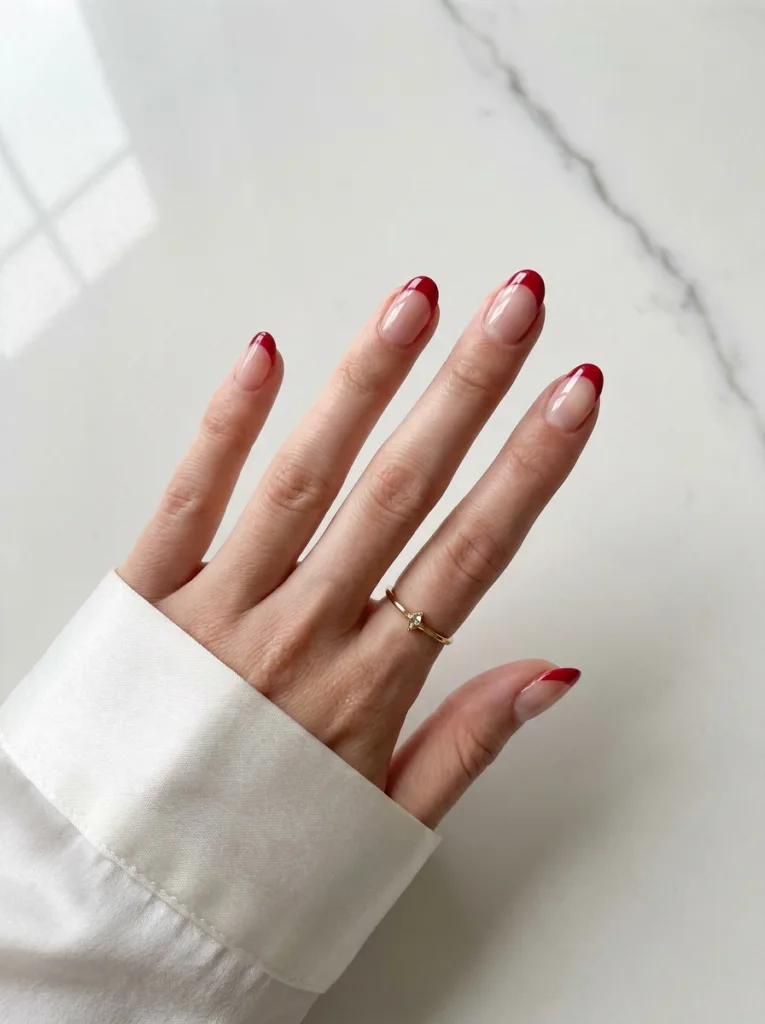
Swap white tips for cherry red using a French tip guide or tape. Aim for a tip width of 2–3 mm—wider than that starts to look dated. Apply the red, let it dry, then peel the tape before the polish fully cures. Pulling the tape off while the polish is still slightly wet gives a cleaner edge than waiting for it to harden. Seal with a top coat right away.
5. Negative Space Red Heart
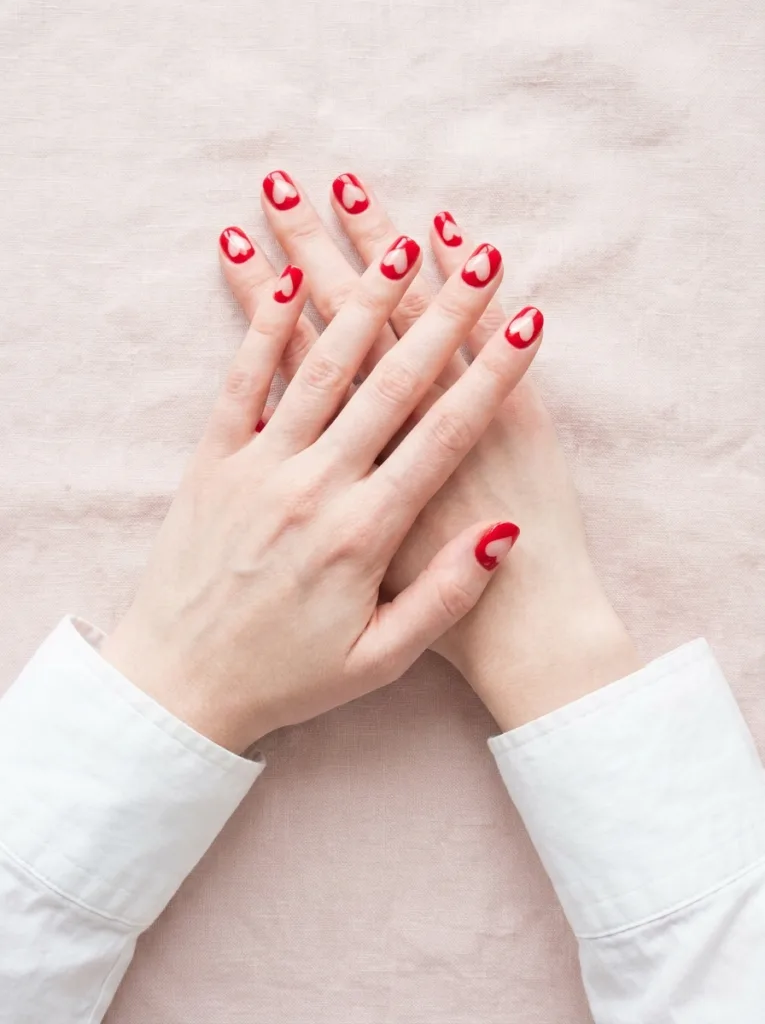
Apply red polish around a heart-shaped area left bare in the center of each nail. Cut two small diagonal strips of tape, cross them at the top center of the nail to form a V-shaped mask, and then paint the red around the edges. Remove the tape after about 60 seconds while the polish is still slightly wet — waiting too long causes the edge to crack when you lift the tape. Your natural nail becomes the heart.
Pink Valentine’s Day Nails
Pink Valentine’s Day nails are having a moment. The shade range means you can go quiet and romantic or loud and playful within the same color family. Match your pink to your skin tone: blush flatters warm undertones, hot pink photographs best on deeper skin, and milky pink looks beautiful on everyone. Pink Valentine’s Day nails also photograph better in natural light than almost any other shade.
6. Blush Pink Glazed
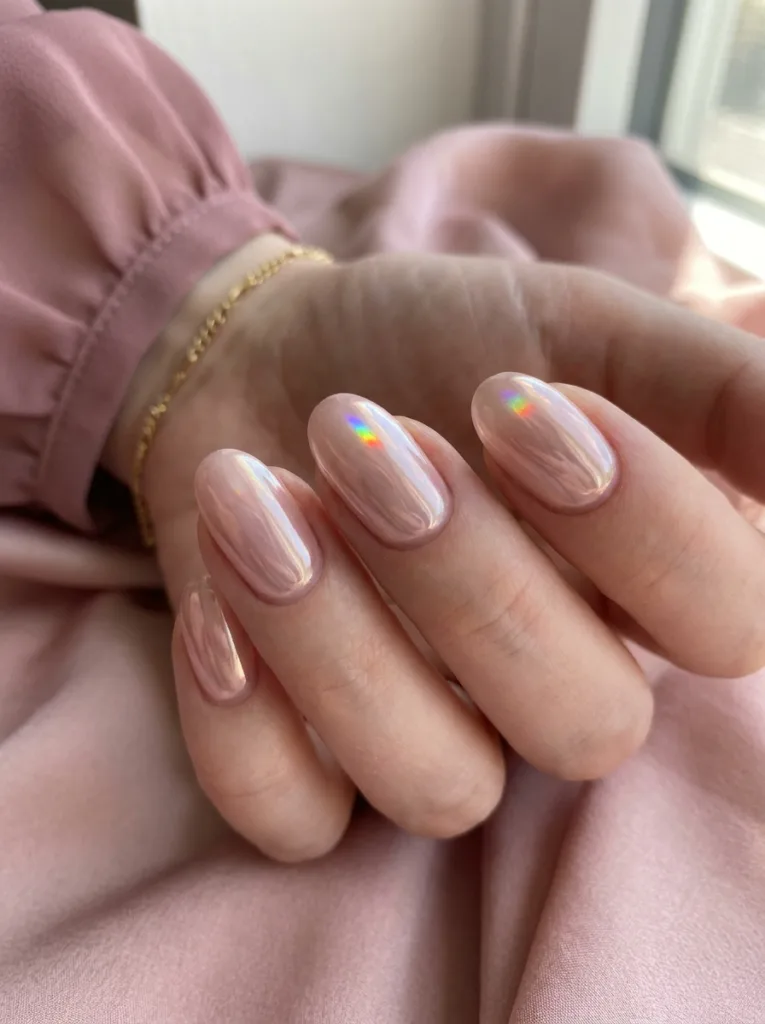
The most-searched nail look of 2026. Apply two thin coats of a sheer blush gel polish, then seal with a chrome-effect or high-gloss top coat. For the best glass-like reflection, apply the topcoat in a single slow stroke from cuticle to tip without going back over it—a second pass drags the finish and dulls the shine. No art required; the glassy surface does everything.
7. Hot Pink Bold
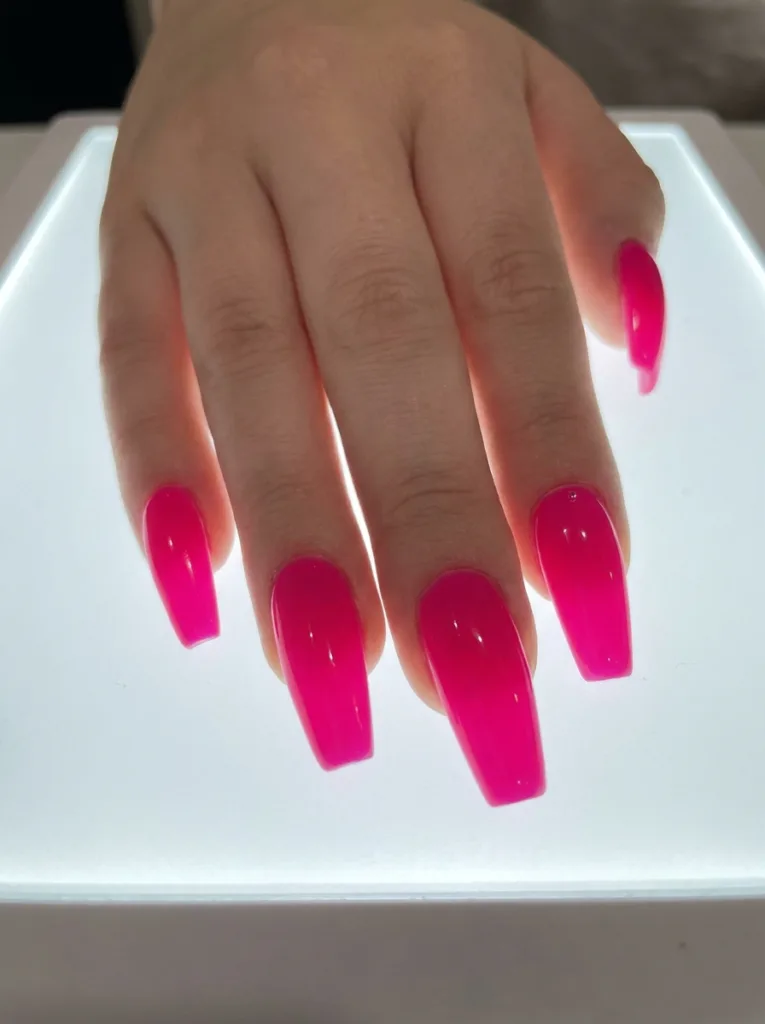
A single clean coat of saturated hot pink on coffin nails or square nails is a statement on its own. If your hot pink looks sheer or uneven after one coat, apply a thin white base coat first — it neutralizes the nail and gives the pigment something solid to sit on, so you get full opacity in one layer. Barbie-pink shades from Zoya and Sally Hansen photograph cleanly for Pinterest.
8. Milky Pink with Micro Hearts
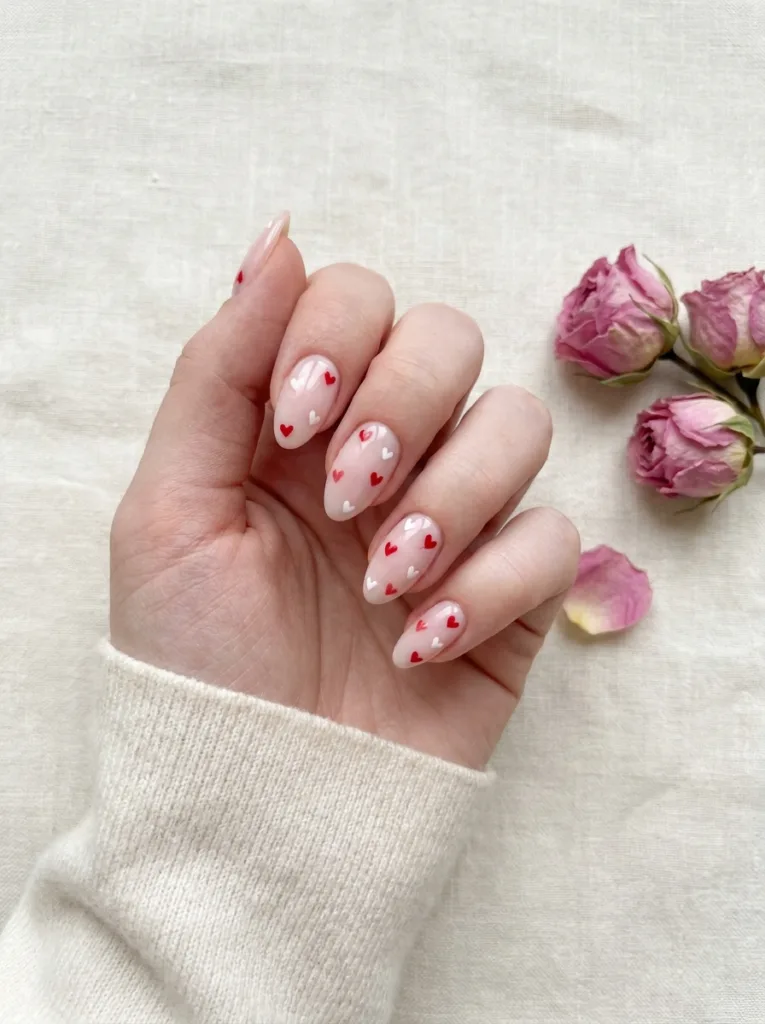
Use a size 000 liner brush or a clean toothpick to paint tiny hearts in white or red over a milky pink base. Dip just the very tip into the polish—too much polish on the brush causes the hearts to spread and lose their shape. Space them randomly, vary the sizes between 2mm and 5mm, and aim for 4–6 hearts per nail. This gets the most saves on Pinterest because it looks intricate but takes under 15 minutes.
9. Pink Chrome
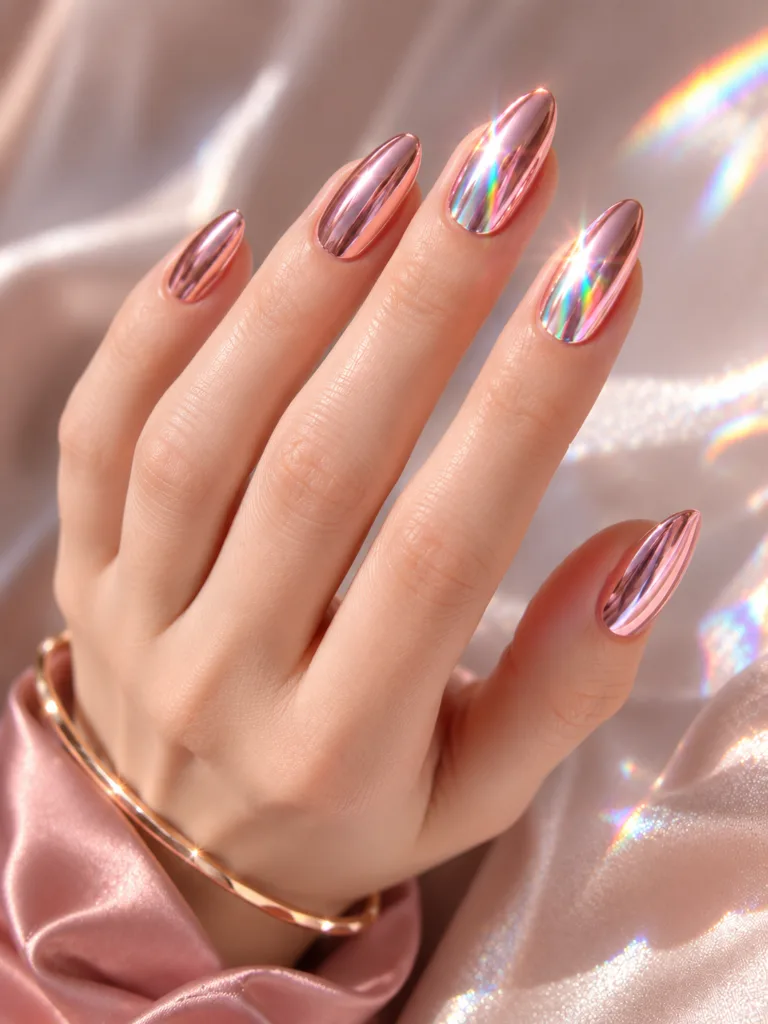
Apply a pink chrome powder over a fully cured gel base—the gel must be completely set or the chrome won’t reflect evenly. Rub the powder in small circular motions using an eyeshadow sponge or silicone applicator, working from the center of the nail outward. The mirror-like finish catches light at every angle and looks especially striking on almond nails with a bit of length.
10. Pink Ombre
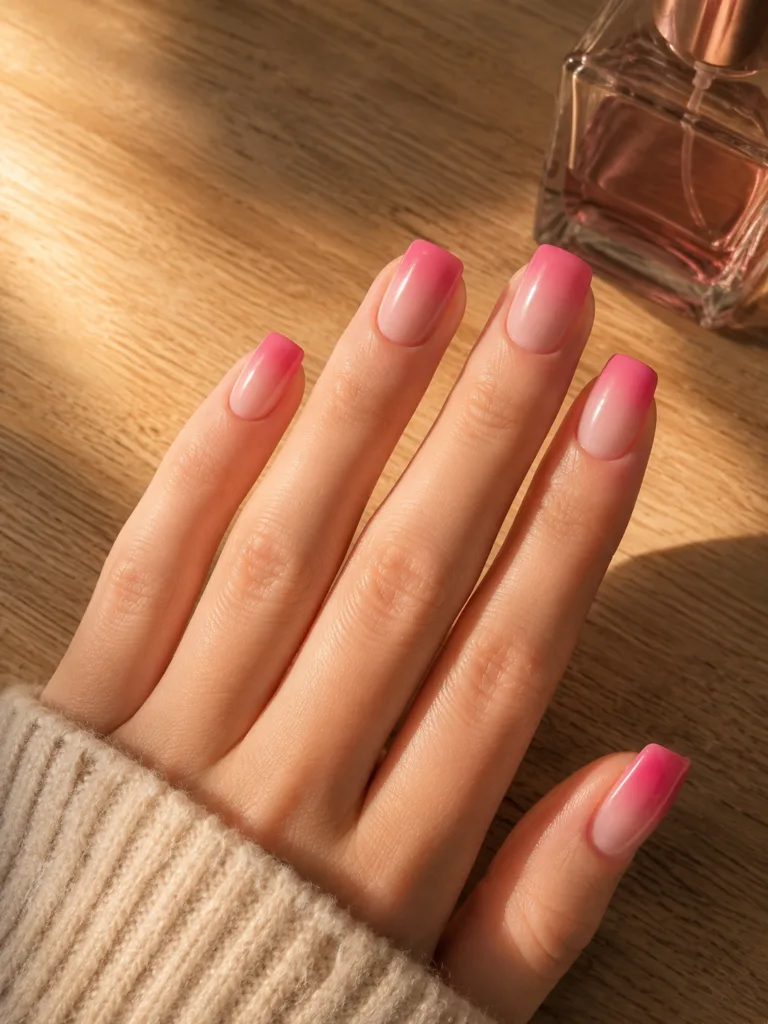
Paint blush pink on the bottom two-thirds and hot pink on the top third, overlapping them in the middle while both are still wet. Then dab a makeup wedge over the overlap zone repeatedly until the blend smooths out. Work on one nail at a time so the polish doesn’t dry before you blend. Clean the skin edges with a flat brush dipped in polish remover. The whole process takes about 20 minutes.
French Tip Valentine’s Day Nails
French tip nails are the most wearable valentine’s nail art option because they suit any length or shape. The 2026 update: change the tip color, texture, or art style rather than keeping the classic white.
11. Heart Outline French Tips
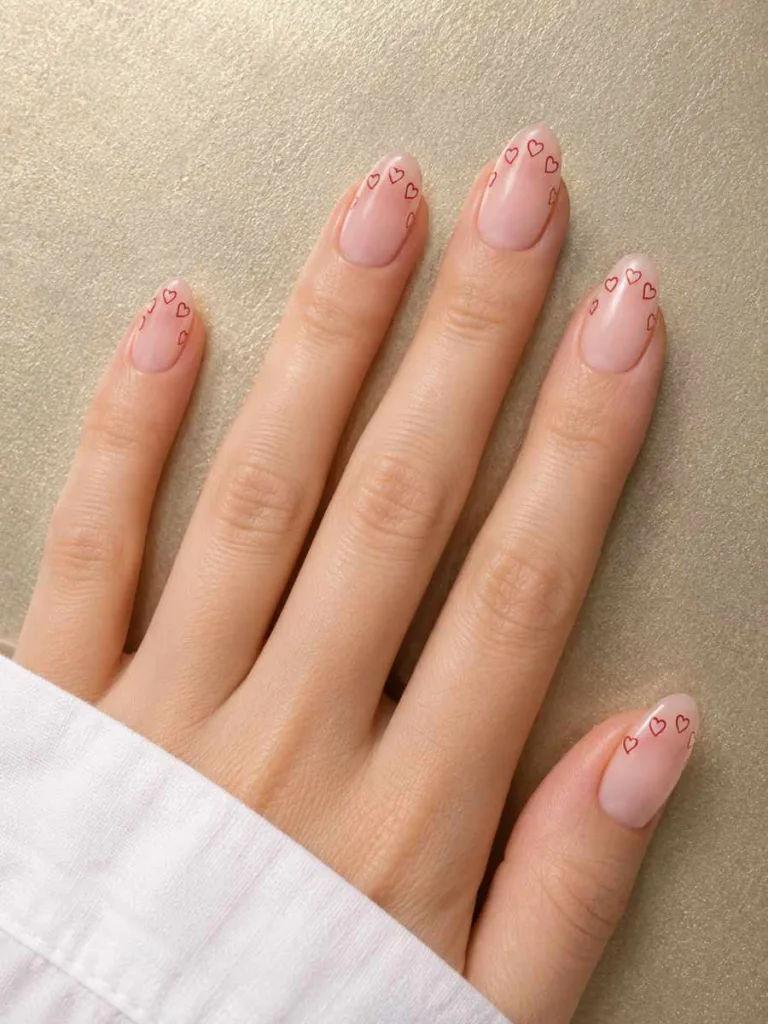
Replace the straight white tip with a row of tiny red heart nail designs painted across the tip of each nail. Aim for 3–5 hearts per nail, arranged in a loose arc that follows the natural curve of the tip. Use a size 000 liner brush and paint each heart as two small C-strokes that meet at the bottom. The result looks delicate and hand-painted, and it reads more modern than a straight French tip.
12. Blush French with Gold Line
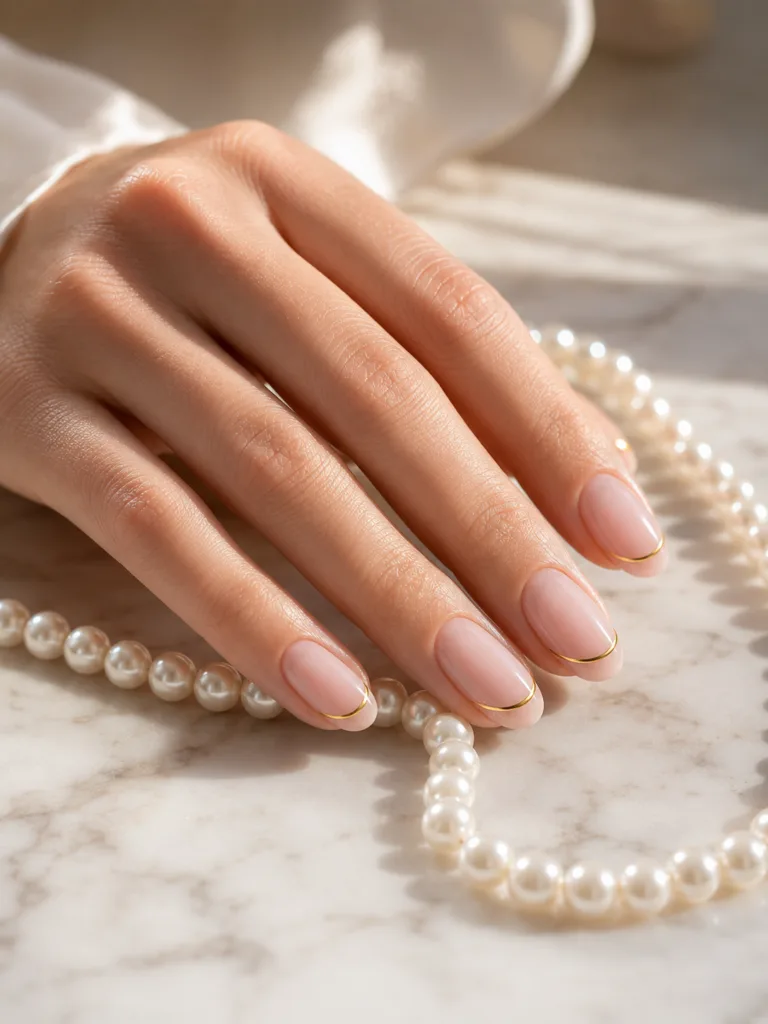
Apply a sheer blush tip and add a single thin gold line where the tip meets the nail bed. Use a nail striping brush or a piece of gold nail tape pressed along the smile line, then sealed with top coat. The gold line should be about 1 mm wide—thicker than that and it competes with the blush rather than framing it. Quiet, editorial, and appropriate for work or a Valentine’s dinner.
13. Red French Tips
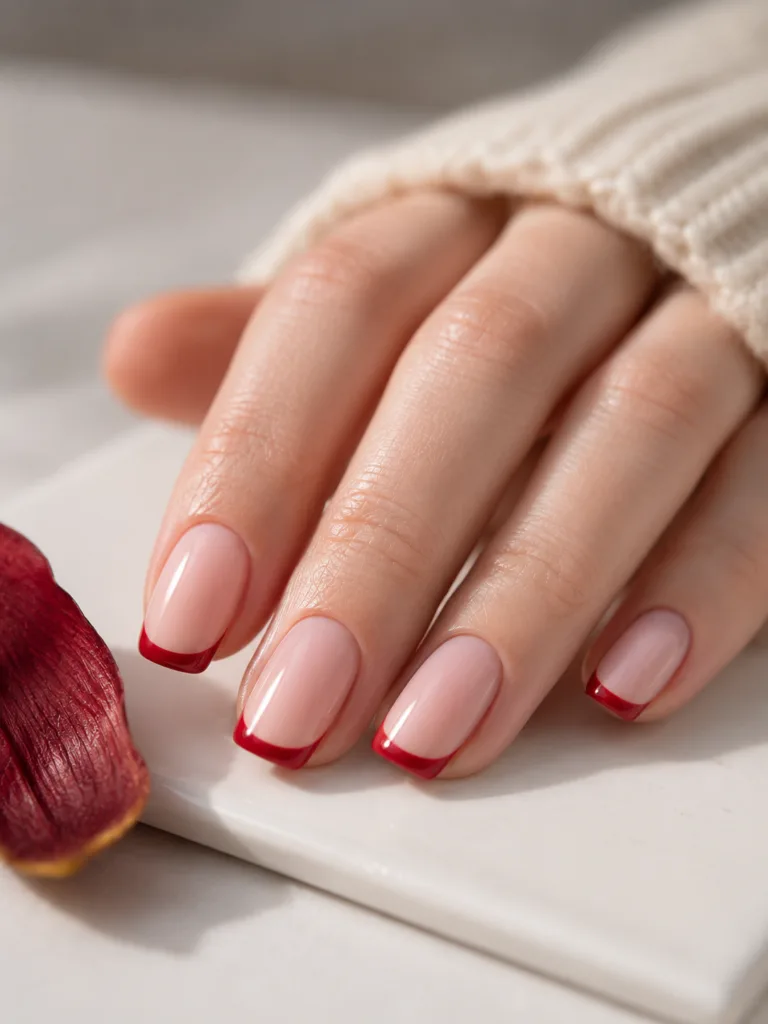
Replace white tips with cherry red. A French tip guide keeps the line straight, but tape works just as well — press a strip along the smile line, paint the tip red, and remove the tape before the polish dries. Red tips look best at a 2–3 mm width. Going wider pushes the design back toward the 1980s rather than 2026.
14. Reversed Negative Space French
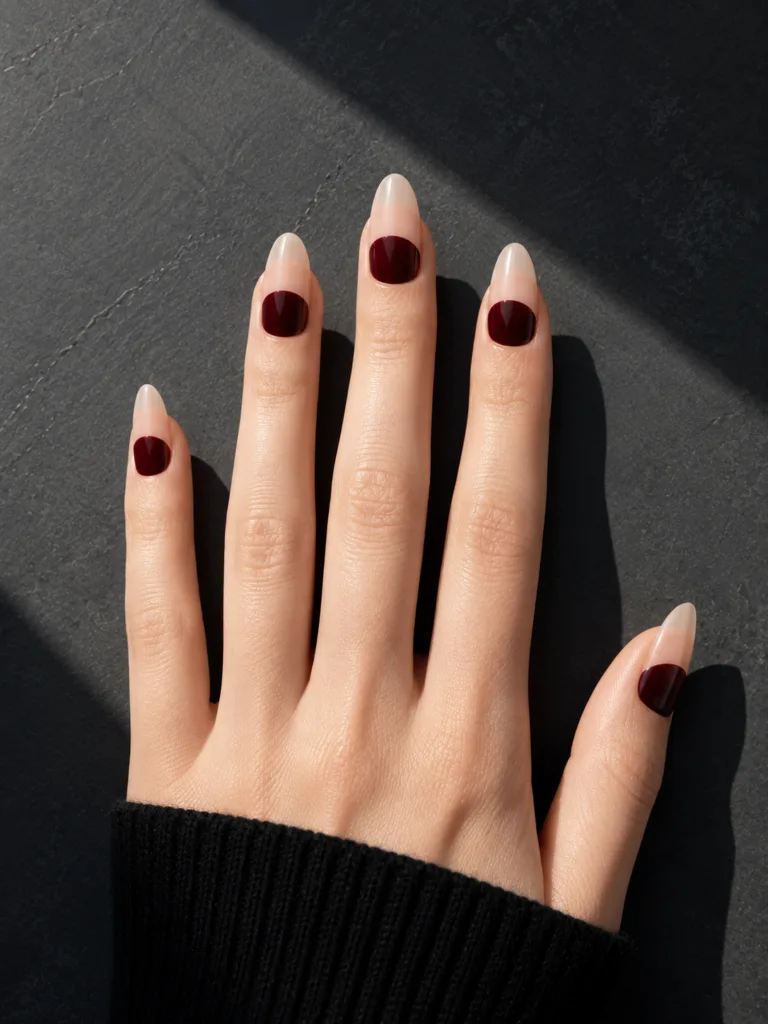
Leave the tip of the nail bare and apply your chosen color to the base only. Dark colors like burgundy, navy, and forest green create the most striking contrast against the bare tip. Nude and blush also work well for a subtler version. The bare tip highlights the natural nail’s shape and creates a clean architectural effect that looks most intentional on almond or oval nails.
15. Lace French
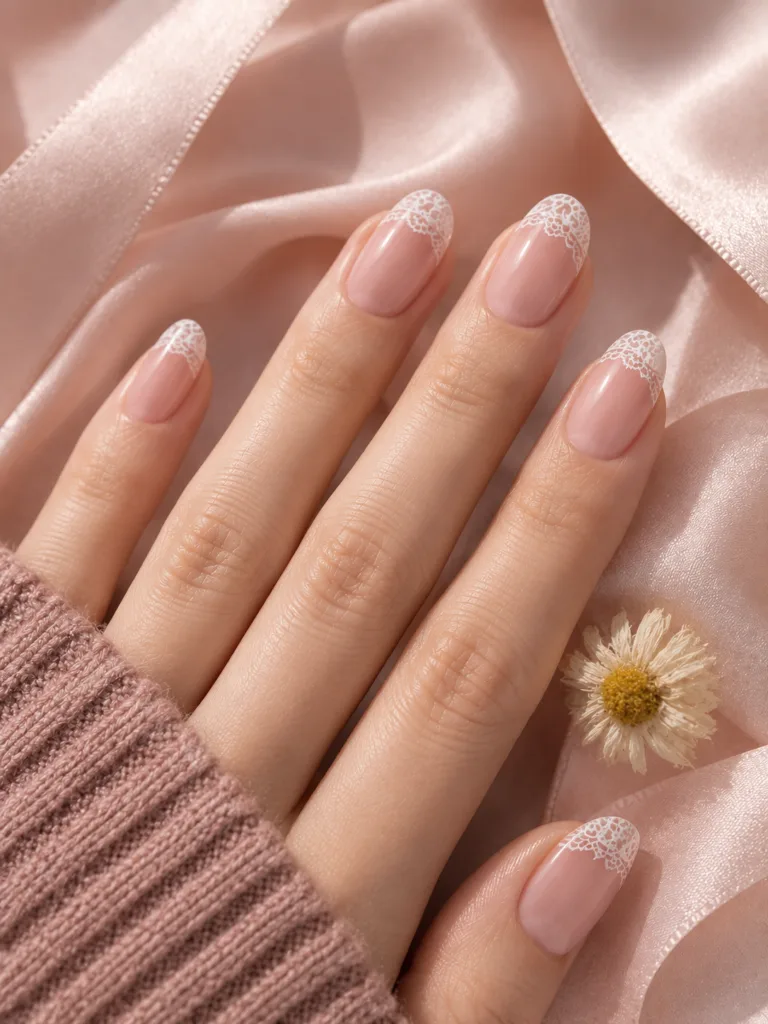
Apply a sheer base, then trim a lace nail foil strip slightly smaller than the nail tip before pressing—this keeps the edges clean without any overhang to deal with. Press the foil firmly into the wet top coat and hold for 5 seconds. Lace nail foil is widely available on Amazon and beauty supply sites for under $5 a pack. The textured result reads as hand-done and photographs beautifully against both light and dark backgrounds.
Minimalist Valentine’s Day Nails
Not every Valentine’s Day nail has to announce itself. These five designs are work-appropriate, easy to execute, and feel romantic without going full Valentine’s theme. They work on short nails just as well as long ones.
16. Tiny Heart Outline on Nude
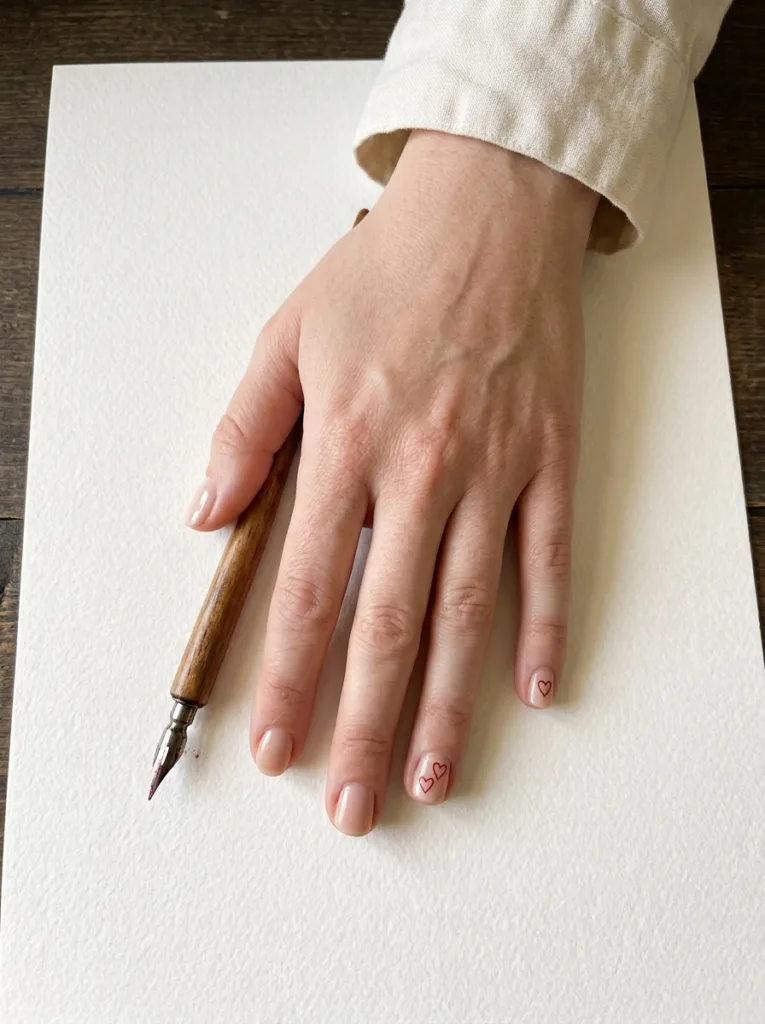
One or two small heart outlines on a clean nude base coat. A bobby pin or dotting tool dipped in red or white polish is all you need — make two small dots that touch at the center, then drag both downward into a V. Keep each heart around 3–4mm wide. Larger than that, and the design loses the dainty quality that makes it work. The simplest design on this list and the most office-appropriate.
17. Love Letter Initial
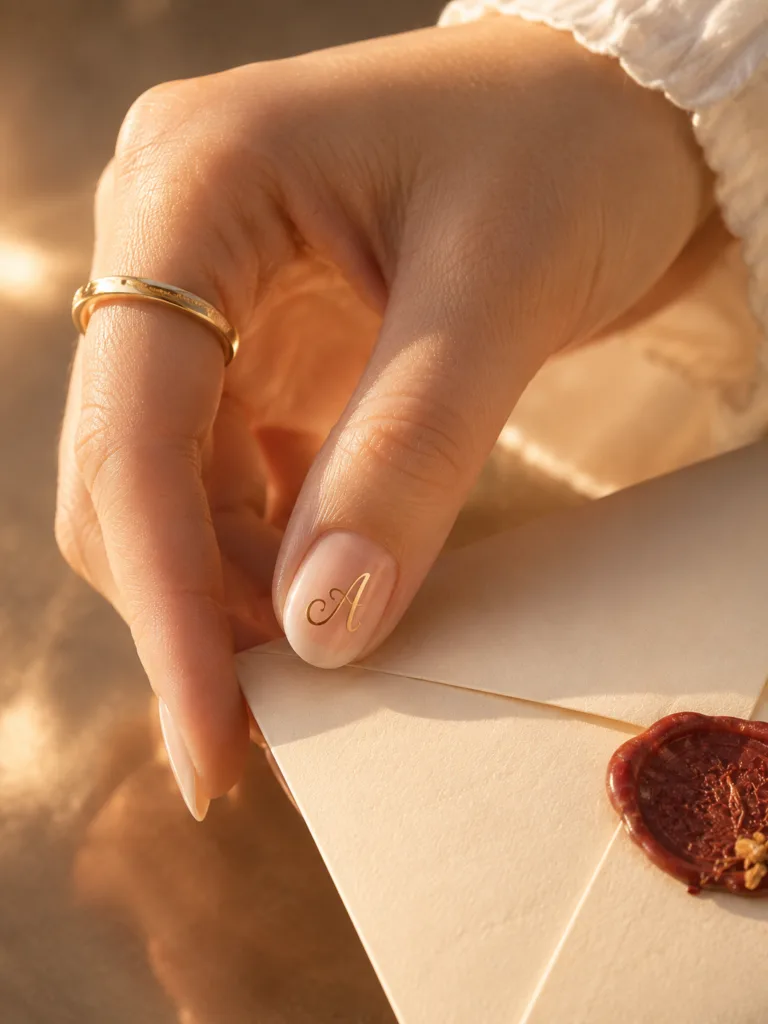
Paint your own initial (or someone else’s) in a single cursive stroke on the thumb using a size 000 liner brush and red or gold polish. Keep the letter about 4–5mm tall. Practice the exact letter shape twice on paper before touching the nail—the motion needs to feel automatic because you only get one clean attempt before the polish starts to set.
18. Lipstick Kiss Print
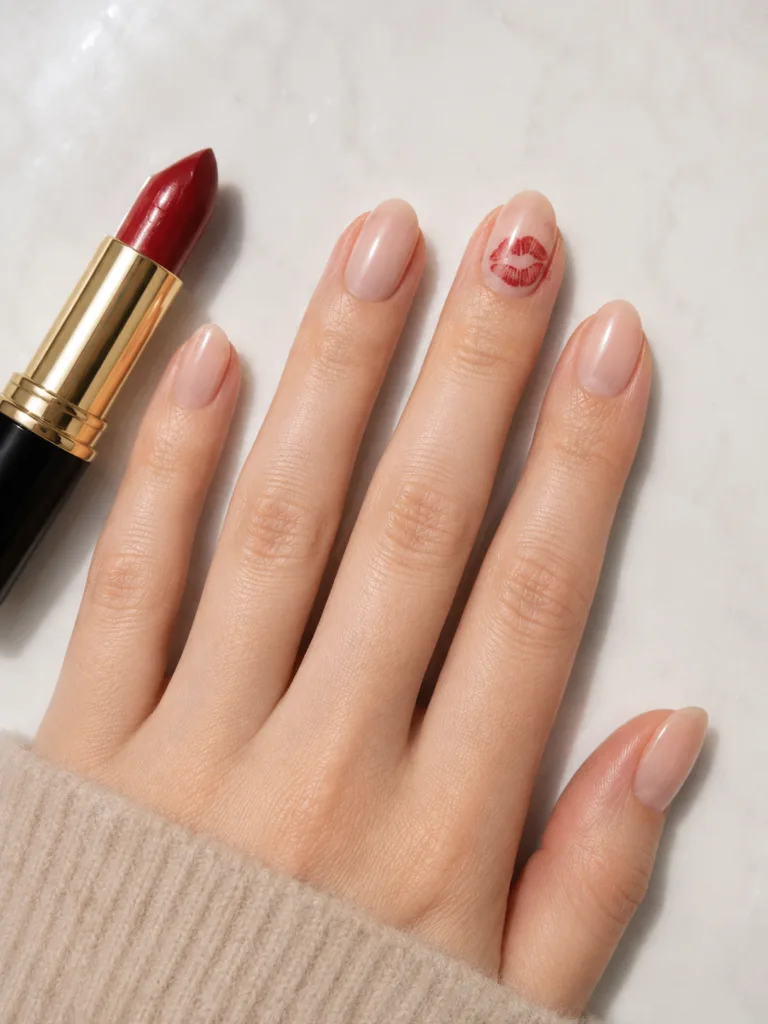
Press red lipstick onto your lips, then blot once on a tissue to remove the excess so the print isn’t too loaded. Press lightly onto a nail painted white or nude, hold for one second without sliding, then remove straight up. Seal with a top coat immediately before the print smudges. Each kiss prints slightly differently, which is part of what makes this design feel personal rather than generic.
19. Vintage Polka Dots
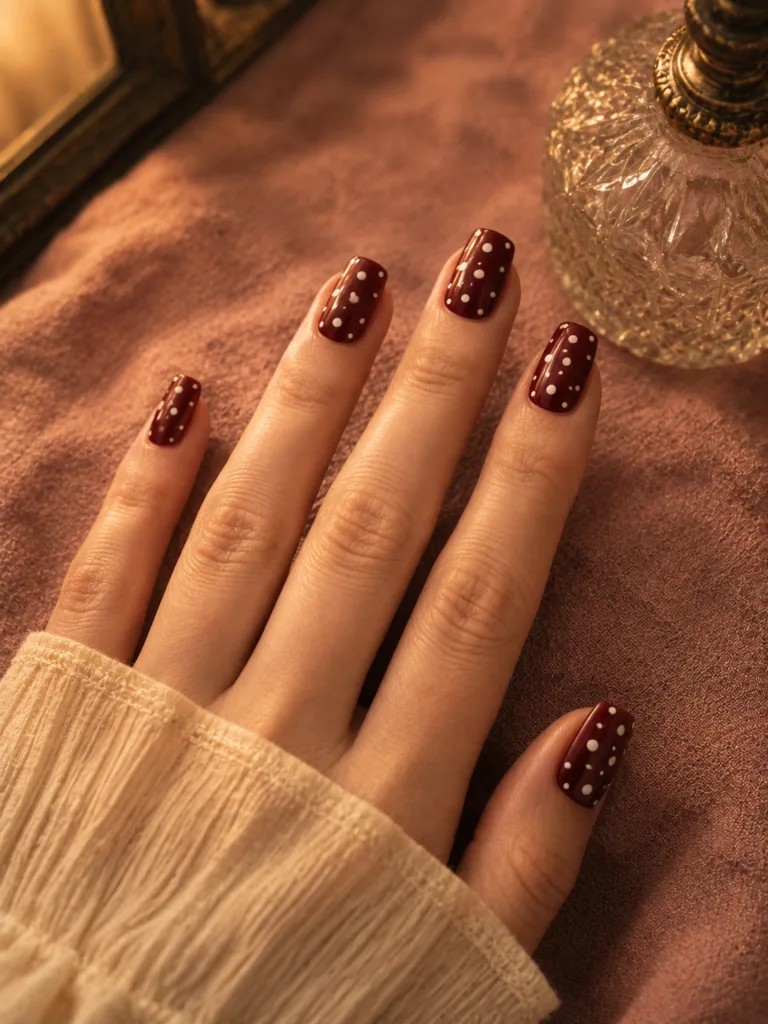
White dots on a burgundy base, or vice versa, using a dotting tool. Aim for 5–7 dots per nail in a loose scattered pattern, and avoid perfectly even spacing — organic loose,ment is what gives this design its vintage fespacing—organicoking like a grid. Vary between two dot sizes if you have tools for it; the mix of large and small reads as more intentional.
20. Negative Space Heart
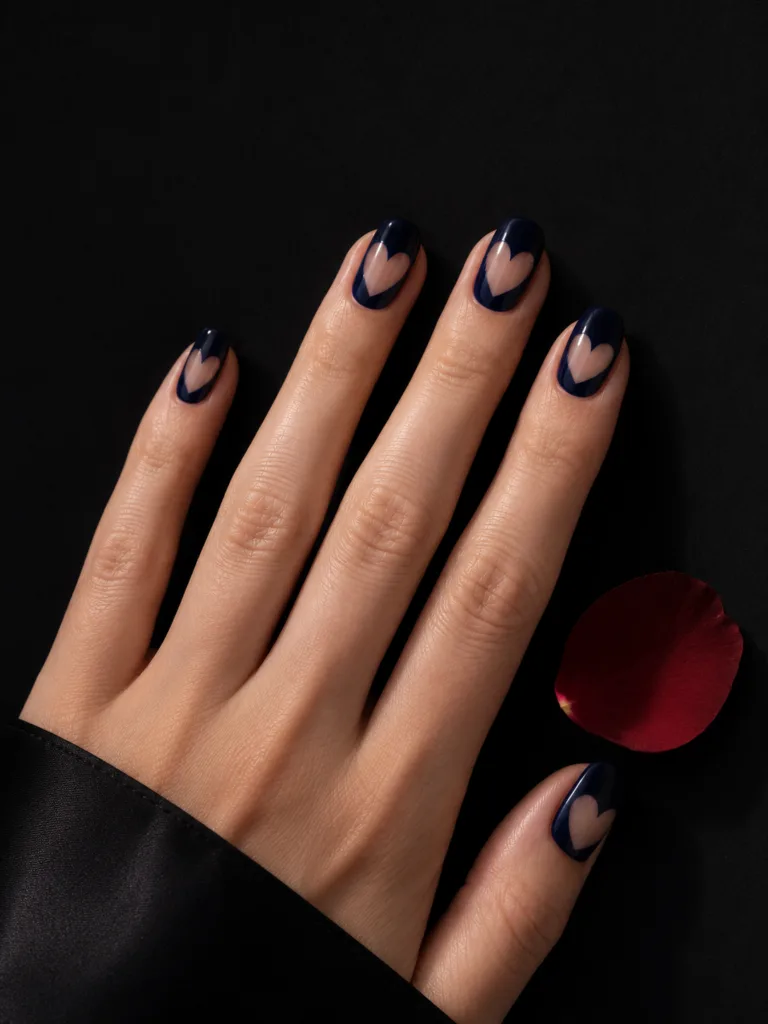
Use two binder reinforcement rings overlapped at a slight angle as a masking template — one ring alone makes a rounder shape, but the overlap creates a more proportional heart. Stick them onto the nail, apply polish around them, let it dry for 60 seconds, and then peel them off. Your natural nail shows through as the heart. Works best over a solid dark or nude base rather than a sheer color.
Dark and Bold Valentine’s Day Nails
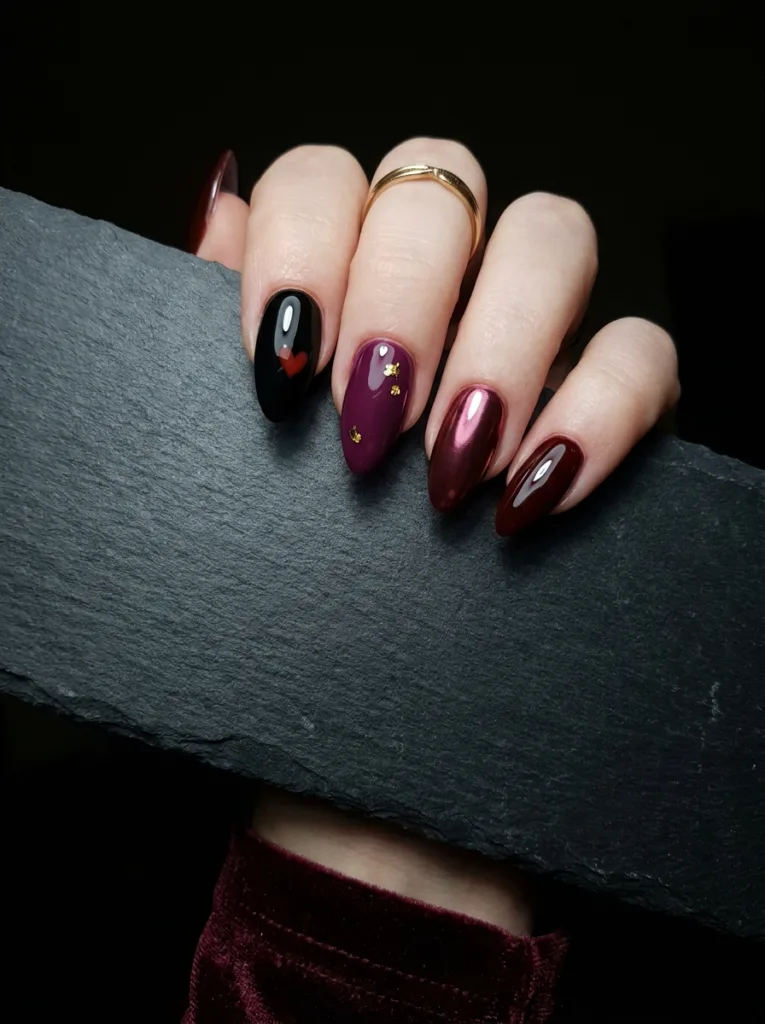
Dark nail designs for Valentine’s Day are for women who want romance expressed through depth and texture, not red hearts on pink nails. These Valentine’s Day nails feel luxurious, wear well into spring, and don’t look out of season after February 14.
21. Oxblood Solid
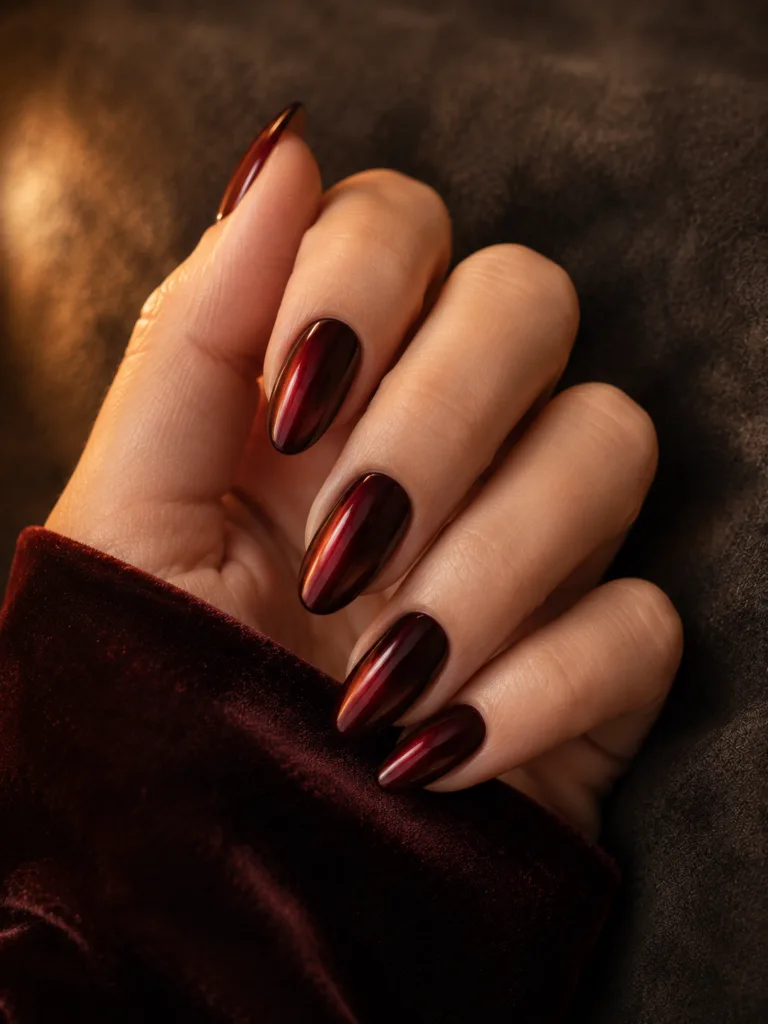
A deep red-brown oxblood shade in gel polish is one of the most flattering nail colors for any skin tone. It shifts between dark red and warm brown depending on the light—under warm indoor lighting, it reads more red; under daylight, it reads more brown. Both are equally flattering. It looks expensive on almond or coffin nails with zero art required. Zoya Ellie and ORLY Velvet Noir are both excellent choices.
22. Black with Red Heart Accent
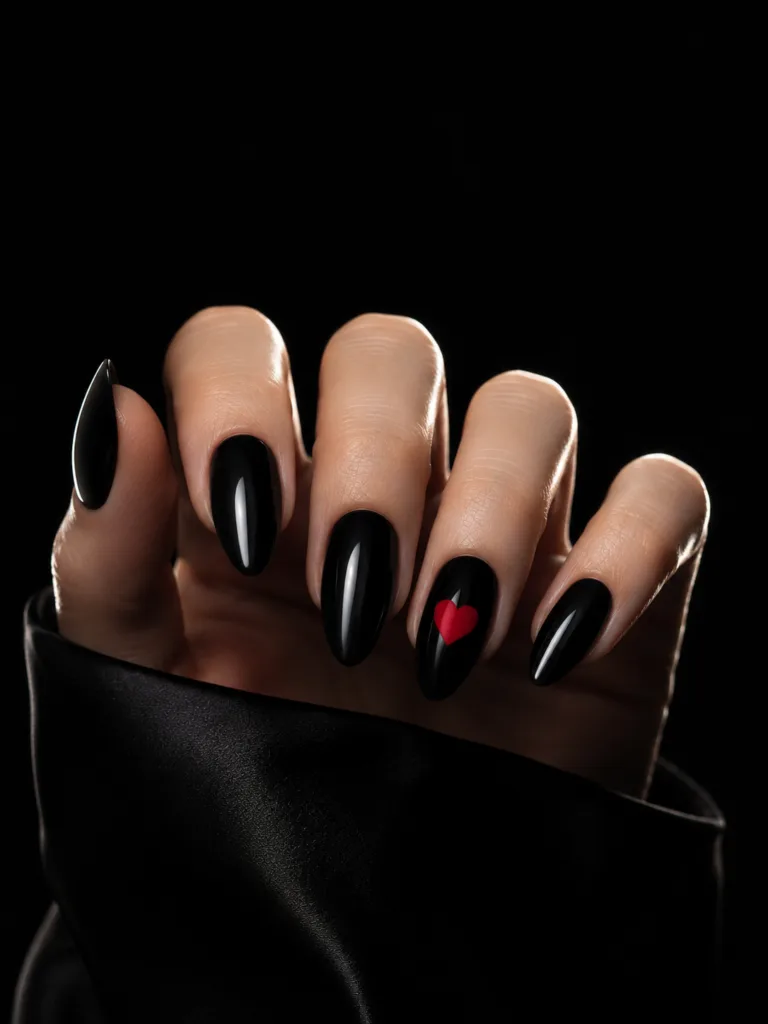
Black gel polish on all nails, with one red heart centered on the ring finger only. Use a dotting tool for the heart rather than a brush—the rounded tip of a dotting tool gives cleaner dot-to-V construction at a small scale. The contrast between solid black and a single red heart is the entire design. Maximum visual impact, minimum technique.
23. Plum with Gold Foil
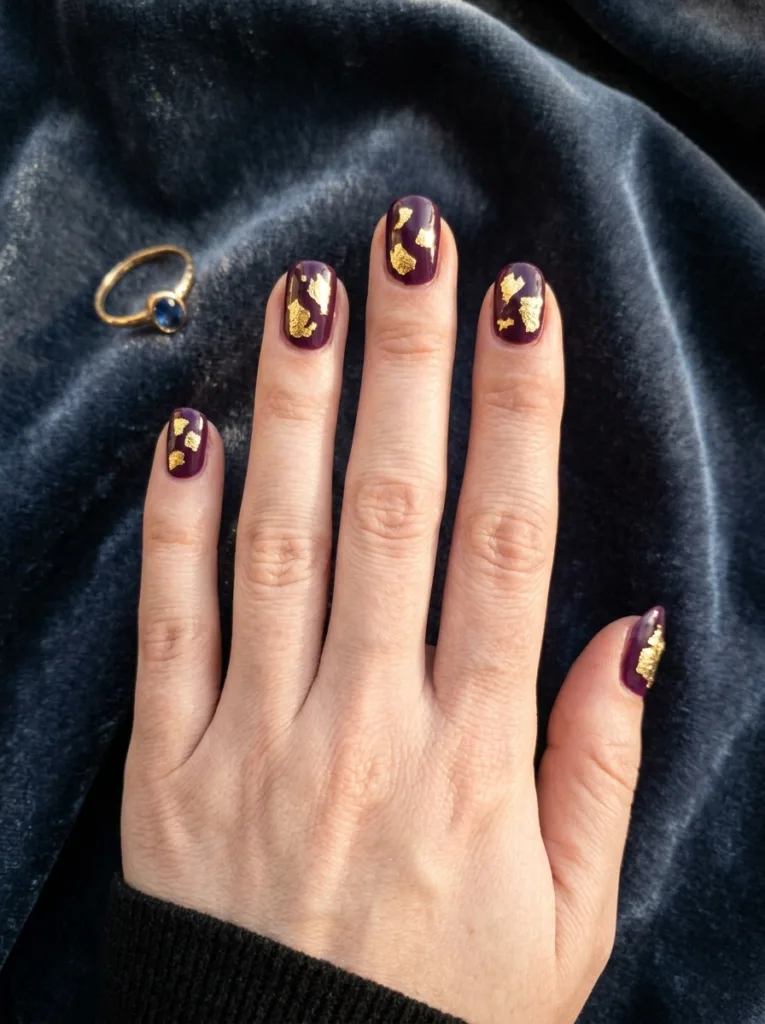
Apply a jewel-toned plum base, then cut the gold transfer foil into small irregular pieces before pressing—roughly 3mm x 5mm works well. Press no more than two or three pieces per nail into the slightly sticky top coat; covering more than 30% of the nail surface tips it from editorial into overdone. The foil adheres in slightly different directions on each nail, which creates the organic 3D effect that makes this look nothing like DIY.
24. Dark Cherry Chrome
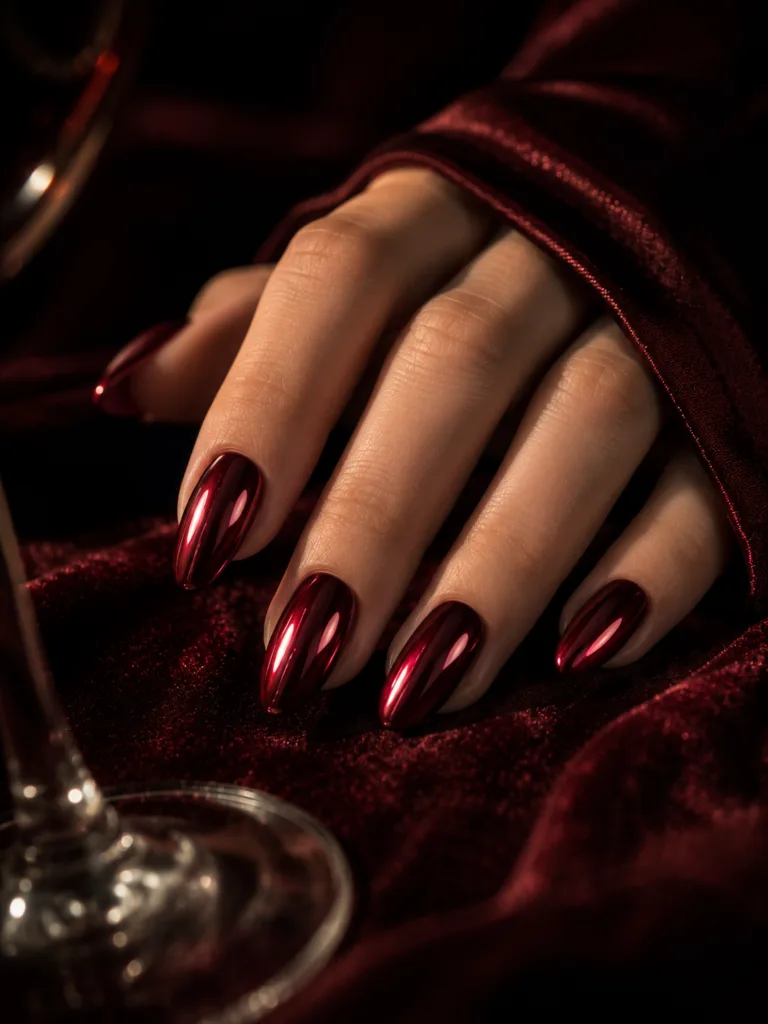
Apply a deep cherry or wine-toned polish, then buff on a chrome powder using a silicone applicator in small circular motions, working from the center of the nail outward to the edges. The moody metallic finish looks like polished garnet when done evenly. Apply a top coat after the chrome to lock it in—chrome powder without a seal coat scratches and fades within a day.
25. Burgundy Glazed
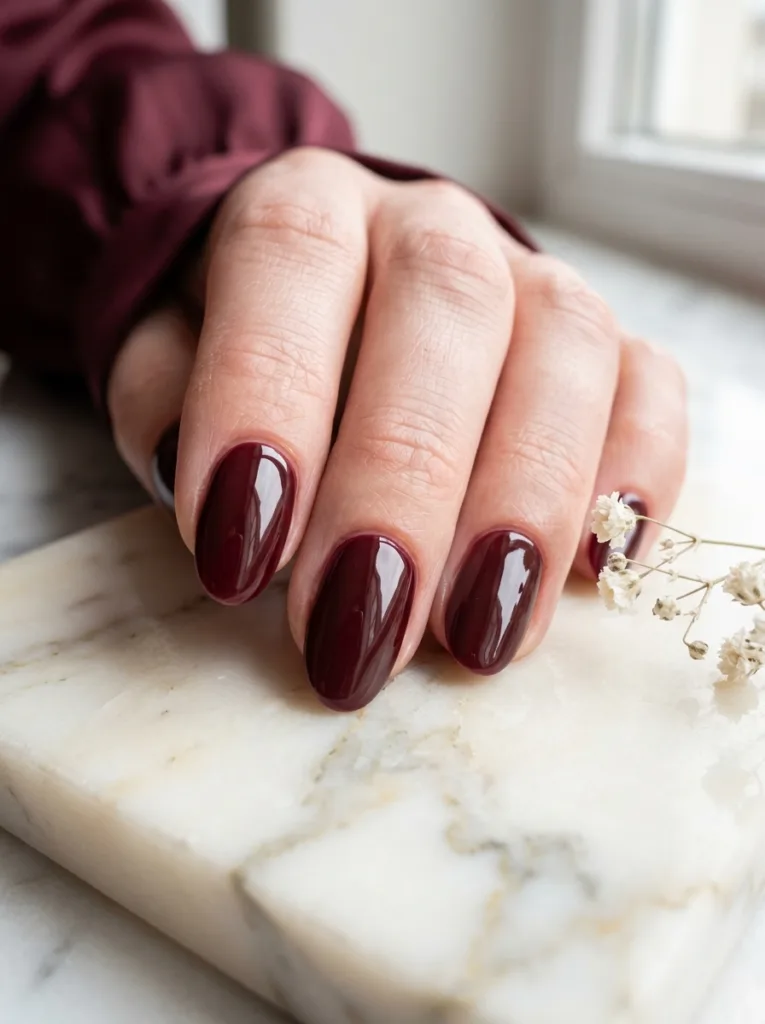
Burgundy with a high-gloss ceramic top coat, applied in two separate layers rather than one thick one—two thin top coat layers build a deeper, more glass-like surface than a single heavy application. Wait 60 seconds between each top coat layer. The reflection is so clean that each nail looks like a piece of colored glass. Seche Vite or HK Girl both deliver this effect over any burgundy base.
How to DIY Valentine’s Day Nails at Home
The difference between professional-looking nails and ones that chip in two days is almost never skill. It’s prep and top coat. These same steps work for any Valentine’s Day nail design in this list.
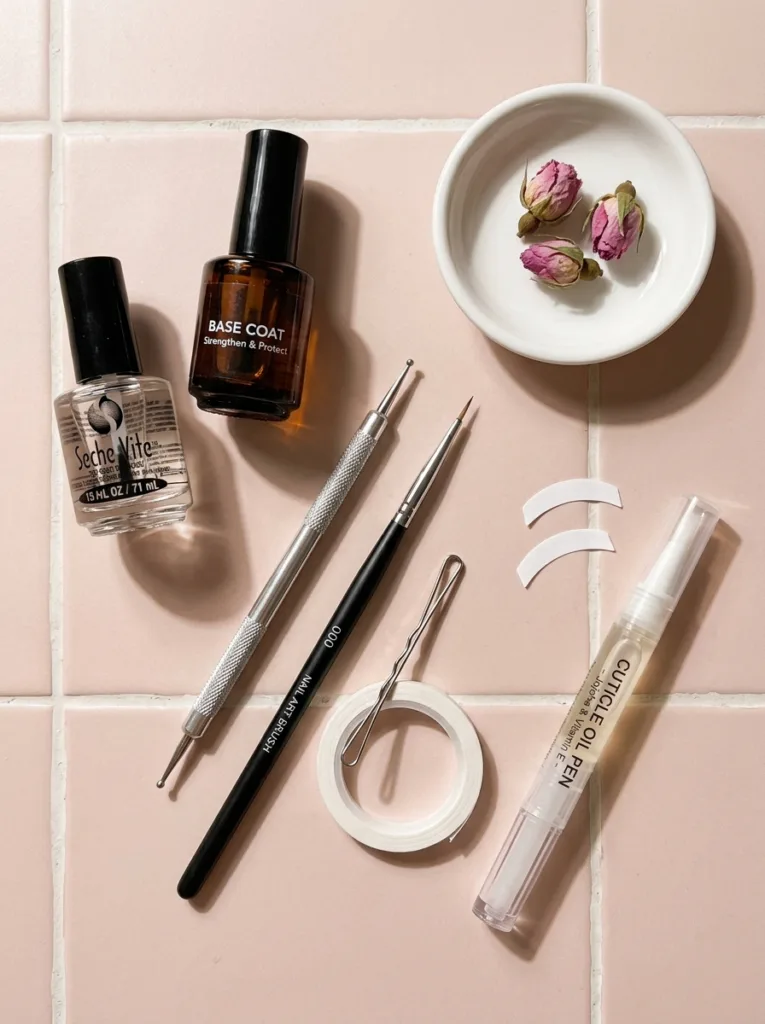
What You Need
You don’t need a full kit. These basics cover every design in this list:
- Base coat (prevents staining, helps polish stick)
- Your chosen nail polish color
- Top coat (Seche Vite or HK Girl for best results)
- Dotting tool ($3) or a clean bobby pin—does the same job
- Fine nail brush ($4) for hearts and linework
- Painter’s tape or French tip guides for clean tip lines
- Cuticle oil applied after everything dries for a finished look
Step-by-Step Process
- Remove any old polish fully. Wash and dry hands completely.
- Push cuticles back gently with an orange stick.
- Lightly buff the nail surface to remove the natural shine — this gives polish something to grip.
- Apply a thin base coat. Wait at least 90 seconds before the next step.
- Apply your first color coat thinly. Wait two minutes.
- Apply a second color coat. Wait two more minutes.
- Add your nail art detail while the base is still slightly tacky—art sticks better to a semi-wet surface than a fully cured one.
- Apply top coat over the entire nail surface, including the very tip edges.
- Once fully dry, apply cuticle oil around each nail.
Common Mistakes to Avoid
Skipping the base coat causes staining and early lifting. Applying thick coats makes bubbling more likely and extends dry time. Not sealing the tip edges with top coat causes chips within the first day. And applying cuticle oil before the polish is dry prevents the color from curing properly.
Reapply a fresh thin layer of top coat every two to three days to extend wear.
How Long Do Valentine’s Day Nails Last?
How long your Valentine’s Day nails stay intact depends on your formula and how well you prep.
| Formula | Typical Wear Time | Notes |
| Regular nail polish | 5–7 days | Use Seche Vite to push to 7–10 days |
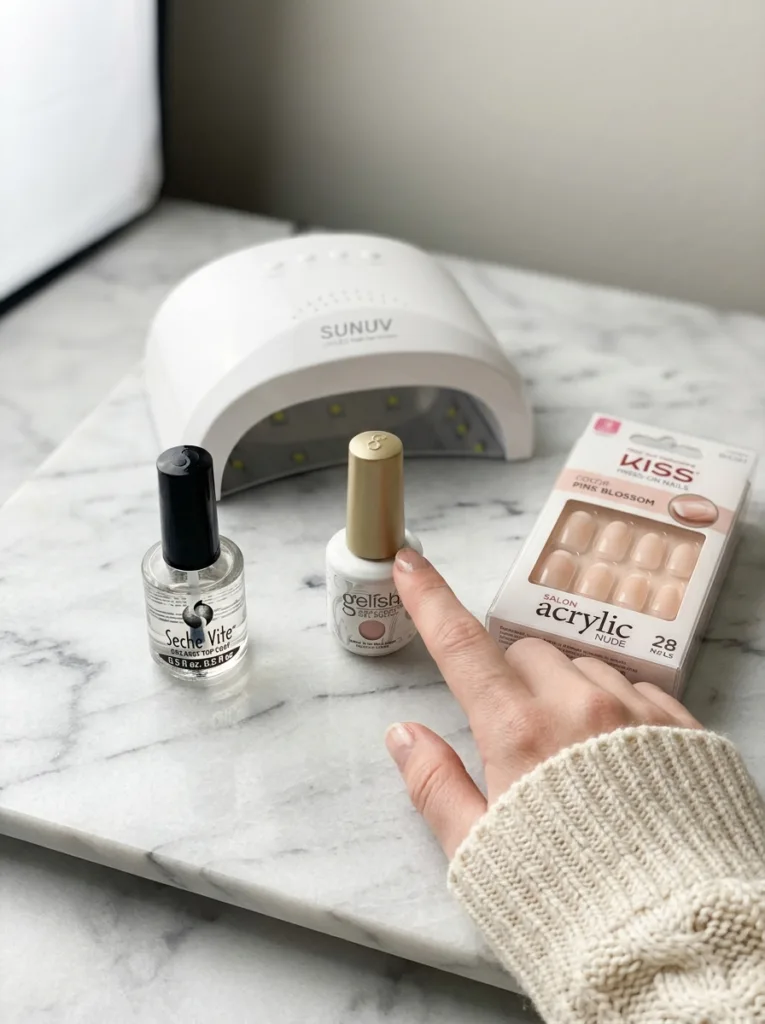
| Gel nail polish | 2–3 weeks | Requires UV or LED lamp to cure |
| Press-on nails | 1–2 weeks | Use nail glue, not adhesive tabs |
For any Valentine’s Day nail formula, avoid prolonged water exposure in the first hour after application. Reapply top coat every few days to keep the finish fresh.
Home gel kits from brands like Beetles or Modelones cost under $30 and pay for themselves after two uses compared to salon pricing.
FAQ
What is the best nail color for Valentine’s Day?
For Valentine’s Day nails, red and pink are the most classic choices. Red signals passion; pink reads as sweet and flirty. If you want a design that wears well past February, burgundy or blush pink glazed nails transition into everyday wear without looking seasonal.
How do you make a heart on your nails without tools?
Dip the rounded end of a bobby pin into polish. Press two small dots side by side while wet. Drag both downward together to form a V shape. Practice once on paper before applying it to your nail.
What nail shape is best for Valentine’s Day?
Almond and oval shapes are the most romantic and suit both short and long nails. Coffin works well for bolder, more dramatic designs. Square nails photograph cleanly for minimalist looks.
Conclusion
Twenty-five Valentine’s Day nails, organized by color and style, all doable at home without a salon appointment or an expensive kit. You’ve got options from classic cherry red to blush chrome-glazed, minimalist heart outlines to dark jewel-toned finishes. Pick one design from this list. Gather your polish, a base coat, and a top coat. Set aside 45 minutes tonight. Your Valentine’s Day nails can be finished and dry before you go to sleep. Save this post and share it with someone who needs nail ideas this February.
For more nail design ideas, please visit VelvetBoard.