22 Dark Celestial Nails With Midnight Moonlit Charm
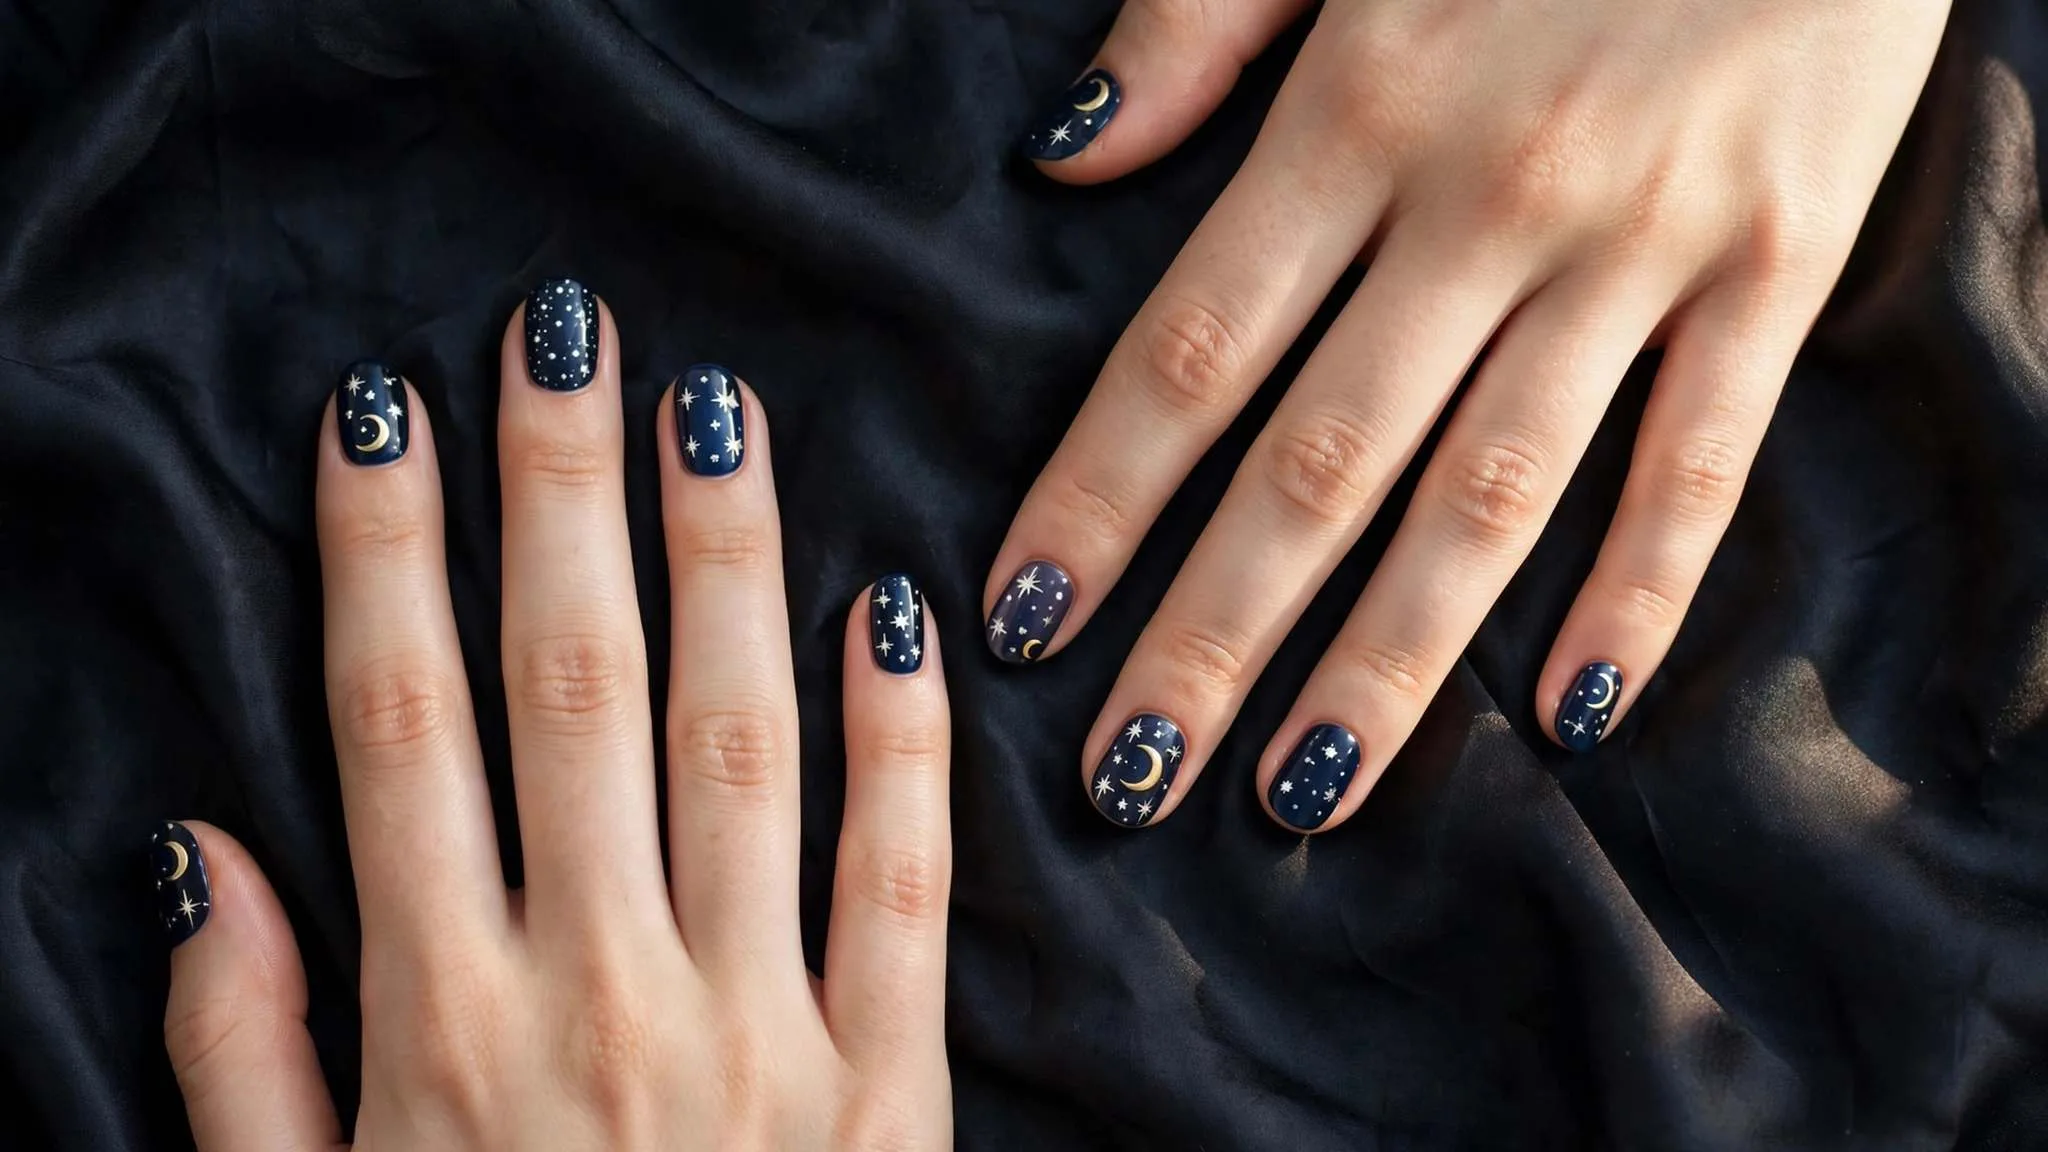
Dark celestial nails turn a simple manicure into a miniature night sky. This list gives you 22 polished ways to wear the look. Deep black, midnight navy, and smoky plum bases set the scene. Gold crescents, scattered stars, and fine constellation lines add the light. The finish feels moody and grown-up, never costumey.
Each design below comes with salon ask lines so you can describe exactly what you want at your appointment. You will also find cost notes, guidance on which designs are easier to try at home, and wear tips. A few designs need a steady hand or a stamping plate. Most translate well to press-ons too.
Start with the classics if this is your first starry set. Jump to the bolder picks when you want more drama. Either way, book the extra time. Fine line work cannot be rushed.
Classic Crescent Moon Accents
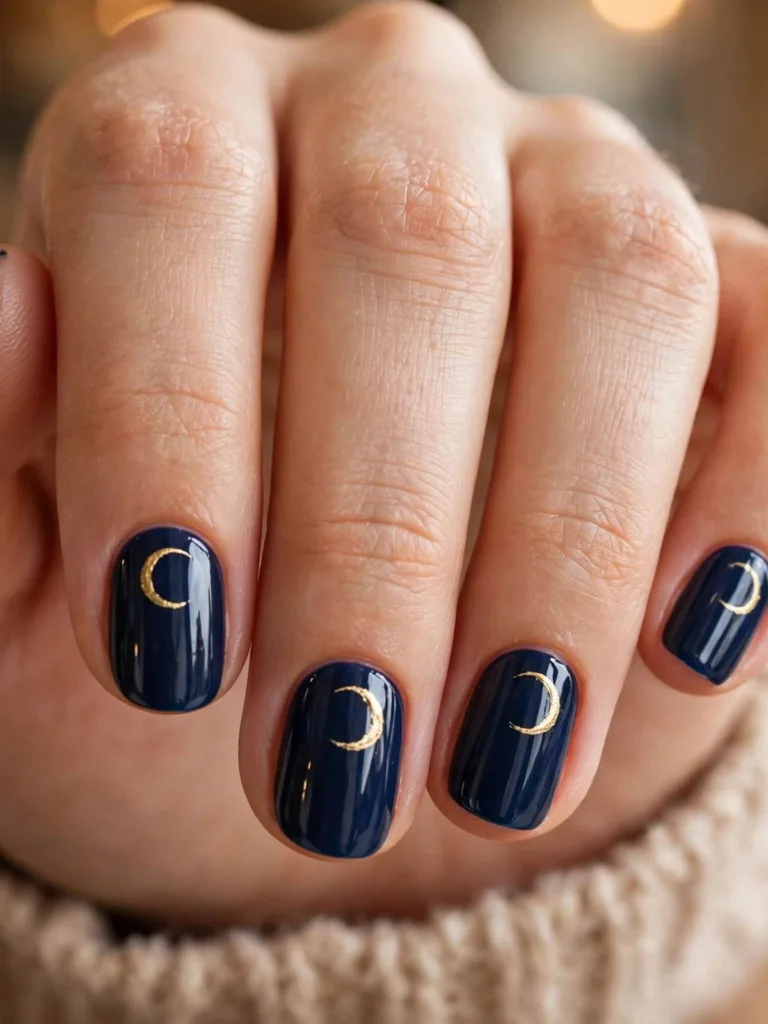
A single gold crescent on a deep navy base is the quietest entry point into dark celestial nails. The design leaves most of each nail dark and bare. That contrast makes the moon read brighter from across the room. It suits short nails and office dress codes alike. Pair it with gold rings and the whole look pulls together.
For a DIY version, you need only a dotting tool and a steady wrist. Paint the crescent freehand with metallic gold polish. Salons often reach for a stamping plate instead, which gives crisper edges in less time. Ask for a glossy top coat to make the gold pop.
Best for: first-timers and minimalists who want a hint of the night sky.
Ask your nail tech for: “Deep navy gel base with one hand-painted gold crescent moon per nail.”
Midnight Galaxy Nebula

This is the full nebula effect: midnight blue melted into violet and teal with a sponge. The colors blur at the edges like real gas clouds. Tiny white dots become stars once the base dries. A makeup sponge does the blending work, so the messier it looks mid-process, the better the result.
For true midnight galaxy nails, gel polish holds this design best. The layers stay workable longer for blending. Seal everything with a glitter top coat for extra depth. For more night-sky inspiration in this vein, browse our starry night nails roundup.
Best for: anyone who wants midnight galaxy nails with maximum cosmic drama.
Ask your nail tech for: “Sponged galaxy blend in navy, violet, and teal with dotted white stars.”
Gold Constellation Lines

Thin gold lines connect scattered dots into real constellations across a black base. Orion, Cassiopeia, and the Big Dipper all fit on a nail. Among constellation nail designs, this one feels smart and deliberate. It rewards a tech with a fine liner brush and a patient hand.
Keep the dots spaced so the lines stay readable. “You want enough space between the dots for line work,” says Hannah Johnson of Wild Oleander in Brooklyn. She shared the tip in Brit + Co’s constellation nail art tutorial. That spacing advice keeps small nails from looking crowded.
Best for: astrology lovers who want their own sign mapped out.
Ask your nail tech for: “Black base with gold dot-and-line constellations, one per nail.”
Silver Starburst French

A sheer nude base keeps this one office-safe while silver starbursts light up the tips. The starbursts replace the classic white smile line. They catch light when you move your hands. The effect is subtle in daylight and lively at night.
Techs build the bursts with chrome powder or fine silver foil. Almond nails show the shape best, but square tips work too. This is one of the easiest salon versions to maintain. Regrowth shows less on a nude base.
Best for: professionals who want celestial nail art without the drama.
Ask your nail tech for: “Nude base with silver starburst French tips in chrome.”
Cat-Eye Cosmic Swirls

Magnetic polish plus a cat-eye magnet creates shifting bands of light that look like deep space. Deep emerald or blackened teal bases show the effect best. The swirls move as your hand turns. No two nails look exactly alike.
The magnet work takes seconds per nail, so this is a quick salon service. It photographs beautifully under warm light. Skip heavy glitter here. The magnetic shift is the star of the show on its own.
Best for: anyone short on time who still wants a dimensional finish.
Ask your nail tech for: “Dark magnetic cat-eye polish with swirled magnet placement.”
Negative-Space Moon Phases
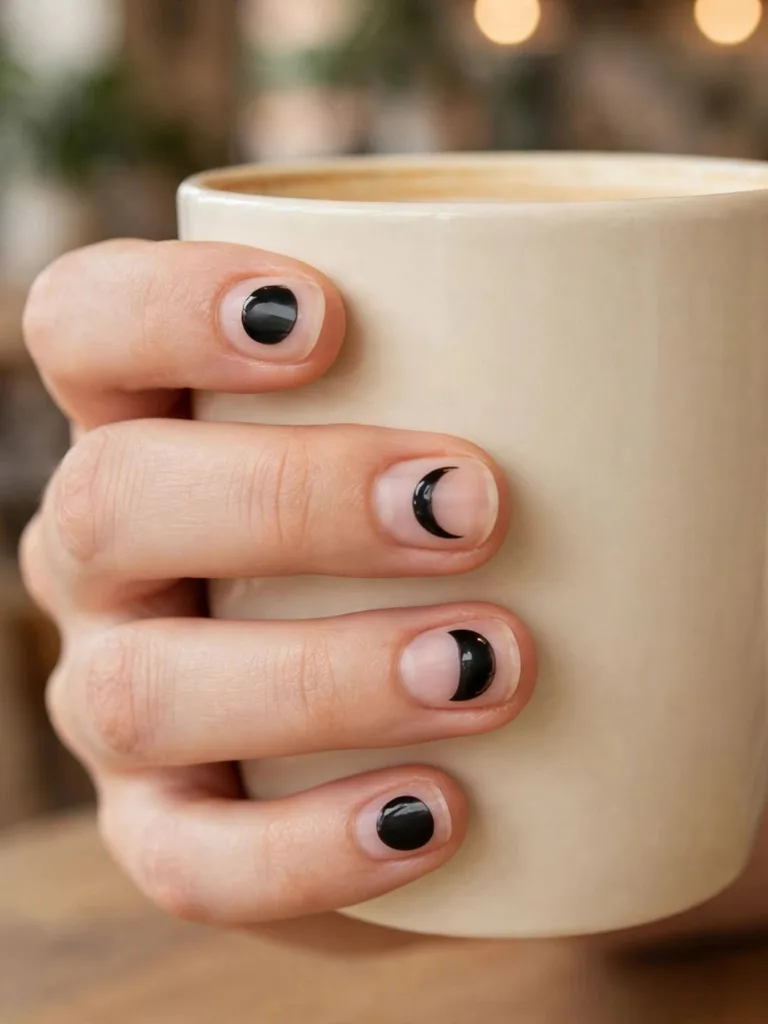
Each nail shows one phase of the moon, from new to full, across a bare natural nail. The phases read as a set only when you line your fingers up. It is clever without shouting. The bare-looking base keeps the design visually light.
Precision matters more than color here. The moons need clean edges to read as phases. A skilled tech paints them freehand with black gel polish. Shorter oval nails keep the phases proportional. Seal with a matte or glossy top coat to taste.
Best for: minimalists who like a concept with a wink.
Ask your nail tech for: “Moon phases in black gel on bare nails, one phase per nail.”
Deep Navy Aura Skies
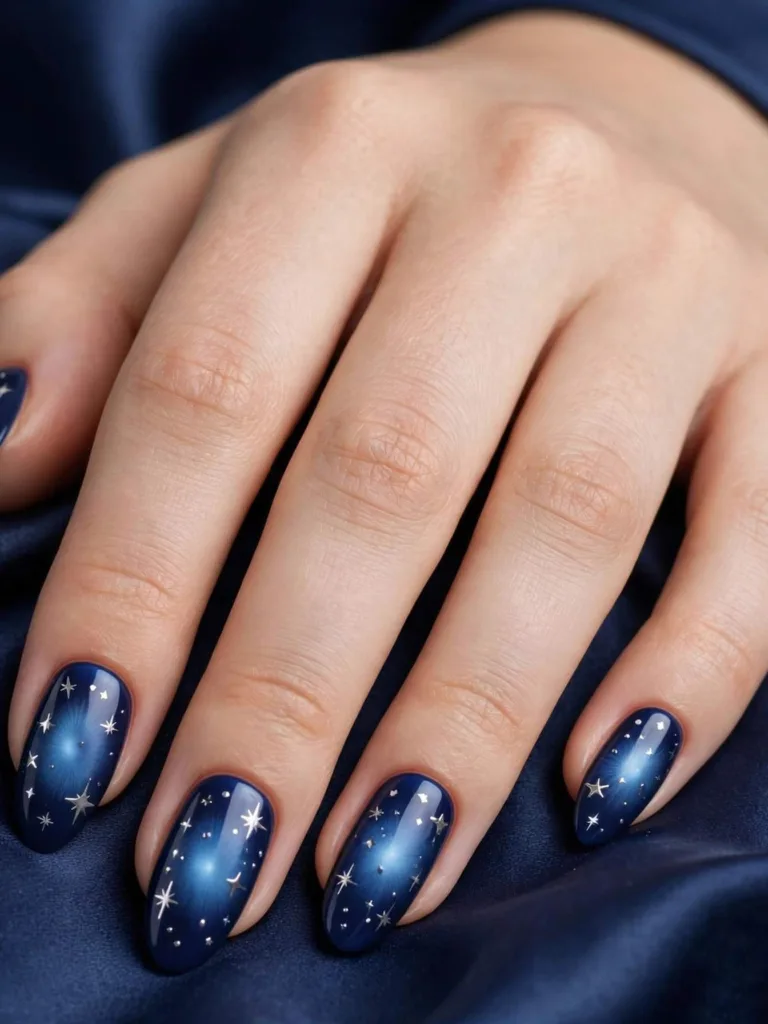
The aura technique airbrushes a lighter halo into a deep navy base. The center glows like a distant planet. The edges stay dark like the space around it. The blend looks soft and expensive. It suits medium to long nails where the gradient has room to breathe.
Salons apply this with an airbrush or a sponge in skilled hands. Gel polish keeps the blend smooth between layers. Add a few tiny stars after the aura cures. They sit on top of the glow like real constellations.
Best for: anyone drawn to soft, hazy color rather than sharp lines.
Ask your nail tech for: “Deep navy base with an airbrushed lighter blue aura center.”
Holographic Star Glitter

Holographic glitter throws rainbow flashes over a near-black base. Indoors it reads as a dark manicure. Sunlight turns it into a light show. Star-shaped glitter pieces add literal sparkle on top. This is the easiest high-impact route to dark starry nails.
It is also the most DIY-friendly design here. Paint two coats of black, add a holographic glitter top coat, and press on star glitters while tacky. Seal with two layers of clear top coat. The glitter sandwich keeps edges smooth for a week or more.
Best for: DIYers and anyone who loves a color-shifting finish.
Ask your nail tech for: “Black base with holographic glitter and star-shaped glitter accents.”
Matte Black Star Maps

A matte top coat turns black polish into velvet, and tiny silver dots become a star map on top. The contrast between flat black and bright dots is sharp. It feels edgy and modern. Longer coffin nails give the map room to spread.
Keep the dots varied in size for a natural sky feel. Uniform dots look stamped and flat. If you love the all-black base, our gothic nails guide goes deeper into dark manicure territory. Matte finishes show oils, so carry a blotting sheet for touch-ups.
Best for: lovers of an all-black manicure with a twist.
Ask your nail tech for: “Matte black base with varied silver star dots.”
Dusk-To-Midnight Ombre

The gradient runs from deep plum at the cuticle to true black at the tip. It mimics the sky just after sunset. A sponge builds the fade in thin layers. Two to three passes give full coverage without bulk.
Scatter fine silver stars over the finished fade. They look like the first stars appearing at dusk. This design flatters every nail length. Short nails get a lengthening effect from the dark tips.
Best for: anyone who wants a gradient with a story.
Ask your nail tech for: “Sponged ombre from deep plum to black with silver star dots.”
Celestial Chrome Shine

Chrome powder buffed over a dark base creates a liquid-metal mirror. Silver chrome reads like moonlight on water. Gold chrome reads warmer, like late sun. Tiny celestial decals float on top of the shine.
Chrome needs a smooth base to look right. Any ridge shows through the mirror. Salons often layer it over gel polish for that glassy foundation. Seal decals under a final clear coat so they survive daily wear.
Best for: mirror-finish lovers who want a high-shine finish.
Ask your nail tech for: “Dark base with buffed silver chrome and celestial decals.”
Zodiac Sign Details

Your sign’s constellation in gold on black makes the most personal dark celestial nails set here. Add the small glyph near the cuticle. Keep the other nails simple with scattered stars. The accent nail carries the meaning.
Look up your sign’s actual star pattern before the appointment. A screenshot helps your tech place the dots accurately. This is a strong birthday or gift-to-self manicure. It starts conversations.
Best for: astrology fans who want a set that means something.
Ask your nail tech for: “Black base, gold constellation of my zodiac sign on the ring finger.”
Shooting Star Trails

Diagonal silver trails streak across a deep blue base like meteors. Each trail ends in a tiny burst. The diagonal lines add motion to the set. It feels energetic rather than calm.
Techs paint the trails with a liner brush in metallic silver. Keep two or three trails per nail at most. More than that turns to clutter. A glossy top coat makes the silver streaks look wet and fast.
Best for: anyone who likes their nail art with movement.
Ask your nail tech for: “Deep blue base with silver shooting-star trails and burst ends.”
Opal Moonstone Shimmer

Iridescent shimmer over deep charcoal gives a moonstone glow. The flash shifts between blue and violet as you move. It is softer than glitter and smoother than chrome. The finish looks almost wet.
Layer the shimmer over a dark gel polish base for the strongest shift. One thin coat is enough. Two coats can mute the base entirely. This is a strong pick for evening events where candlelight does the work.
Best for: anyone who prefers glow over sparkle.
Ask your nail tech for: “Charcoal base with one coat of iridescent moonstone shimmer.”
Black French Tips With Stars

Black tips on a nude base flip the classic French into night mode. Tiny gold stars sit along the smile line. The nude base keeps it wearable. The black tips keep it interesting.
This is one of the most office-friendly dark designs on the list. The nail bed stays natural. Regrowth blends in for weeks. Ask for slim tips on short nails and deeper tips on long ones.
Best for: French-manicure loyalists trying something darker.
Ask your nail tech for: “Nude base with black French tips and tiny gold stars.”
Crystal Comet Tails

A painted comet streaks across a midnight base, and its tail is real rhinestones. The stones flash with every gesture. Keep the crystals to one or two accent nails. Full coverage gets heavy and snags.
Techs set the stones in builder gel so they survive daily life. This is a special-occasion design, not a typing-at-a-desk design. Budget extra appointment time. Stone placement is slow, careful work.
Best for: events, parties, and photos where the nails need to perform.
Ask your nail tech for: “Midnight base with a comet and rhinestone tail on accent nails.”
Deep Plum Supernova

A bright burst blooms at the center of each nail over a deep plum base. The center glows pink and violet like an exploding star. The edges stay dark. The contrast makes the burst look lit from within.
Salons build this with the aura technique or layered sponging. The burst needs a soft edge to read as light, not as a sticker. Almond or oval shapes frame the burst nicely. Square nails can make it look boxed in.
Best for: anyone who wants color and drama in one design.
Ask your nail tech for: “Deep plum base with a bright aura-style burst in the center.”
Tiny Star Decals

Star decals are the fastest route to dark celestial nails at home. Peel, place, seal. The designs range from fine gold outlines to chunky silver stars. Quality varies, so read reviews before buying a sheet.
Seal decals under two coats of clear top coat. Edges lift without that seal. This is the best first project for nervous beginners. Mistakes peel off before the top coat goes on.
Best for: beginners and anyone short on time or budget.
Ask your nail tech for: “Dark base of your choice with sealed star decals.” (Or DIY it at home.)
Sapphire Stardust

Rich sapphire blue carries fine silver glitter like dust in a sunbeam. The glitter stays sparse. Sparse reads expensive; dense reads crafty. The deep blue keeps it firmly in night-sky territory.
Ask your tech to tap the glitter on with a sponge rather than brushing it. Tapping controls the density. A glossy top coat locks the dust in place. This shade pairs beautifully with silver jewelry.
Best for: anyone who wants blue nails with restraint.
Ask your nail tech for: “Sapphire base with tapped-on fine silver glitter, kept sparse.”
Lunar Eclipse Smoke

Smoky grey-black gradients circle a dark disc on each nail. The disc suggests the eclipsed moon. The smoke around it fades into the base. The whole set feels quiet and a little mysterious.
Techs blend this with a sponge or airbrush for soft edges. Hard edges ruin the smoke effect. Keep the disc small and centered. Oversized discs look like polka dots instead of moons.
Best for: minimalists who like their drama understated.
Ask your nail tech for: “Smoky grey-black gradient with a small dark eclipse disc.”
3D Moon Charm Accents

Small metal moon charms anchor one accent nail per hand. The other nails stay simple: dark base, scattered stars. The charm does the talking. Gold charms suit warm bases; silver suits cool ones.
Charms need builder gel or resin to stay put. Regular top coat will not hold them. Your tech should fully cure or set the adhesive as directed before you leave. Avoid using the charms to grip or pry objects, and have loose charms repaired.
Best for: jewelry lovers who treat nails as accessories.
Ask your nail tech for: “Dark set with one 3D moon charm per hand, set in builder gel.”
Celestial Press-On Sets

Press-ons now come pre-painted with full celestial scenes. Moons, constellations, and nebula blends arrive ready to wear. Application and removal times depend on the set and adhesive. Follow the maker’s instructions; warm water and oil will not release every nail glue. Never force a press-on off.
Buy a sizing kit first for the best fit. Gaps at the sidewalls give press-ons away. Quality sets last up to two weeks with proper prep. They are also the cheapest way to test-drive dark celestial nails before booking salon art.
Best for: commitment-phobes and anyone skipping the salon.
Ask your nail tech for: nothing. Order a celestial press-on set in your size instead.
How To Pick Your Dark Celestial Nails Set

Dark celestial nails are manicures that pair deep night-sky base colors with moon, star, and constellation artwork.
Choose the base in two steps. First pick the depth: true black for maximum contrast, navy for a classic night sky, or plum for warmth. Then pick the metal: silver stars suit cool bases, gold suits warm ones. Keep those two decisions separate and the pairing gets easy.
Match the detail level to your nail length. Fine constellation nail designs need room, so they shine on medium to long nails. Short nails do better with single moons or sparse stars. Also match the design to your week. Raised 3D charms can catch during everyday tasks; smooth chrome and flat painted dots are easier to wear.
On cost: as of fall 2026, recent US pricing guides put a basic manicure at $20 to $55. Hand-painted nail art adds roughly $20 to $60 extra, as a rough US guide. For dark celestial nails, most salon sets land between $45 and $115. Your city, nail length, and detail level move the number. Always ask for an estimate before the appointment.
Tips That Keep The Art Looking Sharp

Dark celestial nails show chips faster than nude manicures. For regular polish, refresh the top coat every two to three days if the product instructions allow it. Gel finishes need their own compatible care routine. Cap the free edge with each coat. That thin sealed rim is what keeps polish from lifting.
Wear gloves for dishes and cleaning. Limit prolonged soaking and avoid picking at lifting decals. Leave cuticles intact instead of cutting or forcefully pushing them back. For everyday nail health basics, the AAD’s nail care guide is worth a read.
Book maintenance or removal according to the product and your nail growth. Gel extensions may need fills, while gel polish is usually removed and reapplied. Ask your tech which service your set needs.
Frequently Asked Questions
How Long Do Dark Celestial Nails Last?
Dark celestial nails in gel polish typically last two to three weeks with proper care. Regular polish lasts about a week. Dark colors show tip wear sooner, so seal the free edge well.
Can I Do Celestial Nail Art At Home?
Yes. Start your dark celestial nails with decals, star stickers, or a stamping plate. Sponged galaxy blends are forgiving for beginners. Fine constellation lines are best left to a salon until your brush control improves.
What Base Colors Work Best For Dark Celestial Nails?
True black, midnight navy, deep plum, and charcoal all work. Black gives the strongest contrast for gold and silver art. Navy feels softer and suits more skin tones.
Do Celestial Designs Suit Short Nails?
Absolutely. Single moons, sparse stars, and small decals make dark starry nails work on short nails. Skip full constellations and detailed scenes, which need more surface area to read clearly.
How Much Does Salon Celestial Nail Art Cost?
As of fall 2026, dark celestial nails in gel run roughly $45 to $115, as a rough US guide. Simple decals cost less. 3D charms and chrome add more. Prices vary by city and salon, so ask first.
How Do I Remove Glitter Or Chrome Celestial Nails?
Removal depends on the product beneath the artwork. For soak-off gel polish, follow the maker’s acetone removal instructions and protect the surrounding skin. Gently wipe away softened polish without scraping, peeling, or prying. Hard gel, extensions, and attached charms may need professional removal. See the AAD’s gel-polish removal guide for more detail.
Final Thoughts
Dark celestial nails work because the formula is simple: a deep base, a little light, and restraint everywhere else. Pick one design that fits your week, book the extra appointment time, and bring a reference photo. Your tech will thank you, and your nails will carry a small piece of the night sky wherever you go. Save this list of dark celestial nails and try a new constellation next time.