How To Remove Acrylic Nails: A Careful Soak-Off Guide
Wondering how to remove acrylic nails without peeling away layers of your natural nails? Start by identifying the enhancement and checking whether its removal instructions allow an acetone soak-off. The aim is to soften the product until it releases easily, rather than pulling it off to finish faster.
Lifting edges can make removal look tempting, especially when a salon appointment does not fit your week. A loose corner does not mean the rest of the acrylic is ready to come away. Pain, damaged skin, or an unfamiliar nail product changes the plan before you open the remover.
This guide explains the supplies, a careful wrap sequence, and the signs that mean you should stop. You will also find realistic aftercare advice and answers about acetone-free options, leftover product, and planning another set. There is no guaranteed thirty-minute finish or promise that an already damaged nail will recover within two weeks.
Check Your Nails Before Starting Removal
The first decision is whether home removal suits the product and the condition of your nails. If either is uncertain, ask the salon or technician before filing or soaking.
Identify Acrylic Rather Than Guessing From Appearance
Acrylic enhancements, glued press-ons, soak-off gel, and hard gel do not all use the same removal process. Ask what was applied and whether any overlay or top coat needs a different approach. A product that remains hard may need identification rather than another round of solvent. Avoid trying to file unfamiliar enhancements completely off yourself.
Separate Cosmetic Removal From Medical Concerns
Painful nails, open skin, marked swelling, pus, or an unexplained color change deserve healthcare advice. A removal appointment does not replace assessment of a suspected infection or reaction. Tell the clinician which nail products were used if you know. Do not cover a concerning change with a fresh enhancement.
What You Need To Remove Acrylic Nails
Set out your supplies before soaking so you can keep the process controlled. Choose a remover intended for acrylic enhancements and follow its directions and warnings.
- An acetone-based remover labeled for acrylic removal; 100% acetone is a common option.
- Cotton pads or balls sized to cover the nail surface.
- Aluminum foil or compatible removal wraps.
- A suitable hand file and clippers for excess enhancement length, if trimming is appropriate.
- A wooden manicure stick for checking softened product without levering it away.
- Petroleum jelly for surrounding skin and a familiar moisturizer for aftercare.
- A clean towel, disposable surface protection, and a timer.
Do not substitute an unlabeled solvent, household cleaner, or remover intended only for ordinary nail polish. Keep products in their original containers so directions remain available. You can ask your technician for a suitable removal kit if you are unsure what to buy.
Prepare A Ventilated Workspace Away From Heat
Use acetone in a well-ventilated area and keep it away from flames, cigarettes, sparks, and hot surfaces. Do not heat it in a microwave or place it beside a heater. Keep the bottle closed when it is not being used. Store it out of reach of children and pets.
Poison Control’s remover guidance explains the risks of skin irritation and exposure to acetone. Follow the label for handling, storage, and disposal. Protect your work surface with material suitable for the product, since acetone can damage some finishes and plastics.
How To Remove Acrylic Nails With Acetone Wraps
Use the remover’s directions and the enhancement manufacturer’s instructions to guide the process. The sequence below explains the purpose of each stage without making soak time a deadline.
Step 1: Reduce Excess Length Carefully
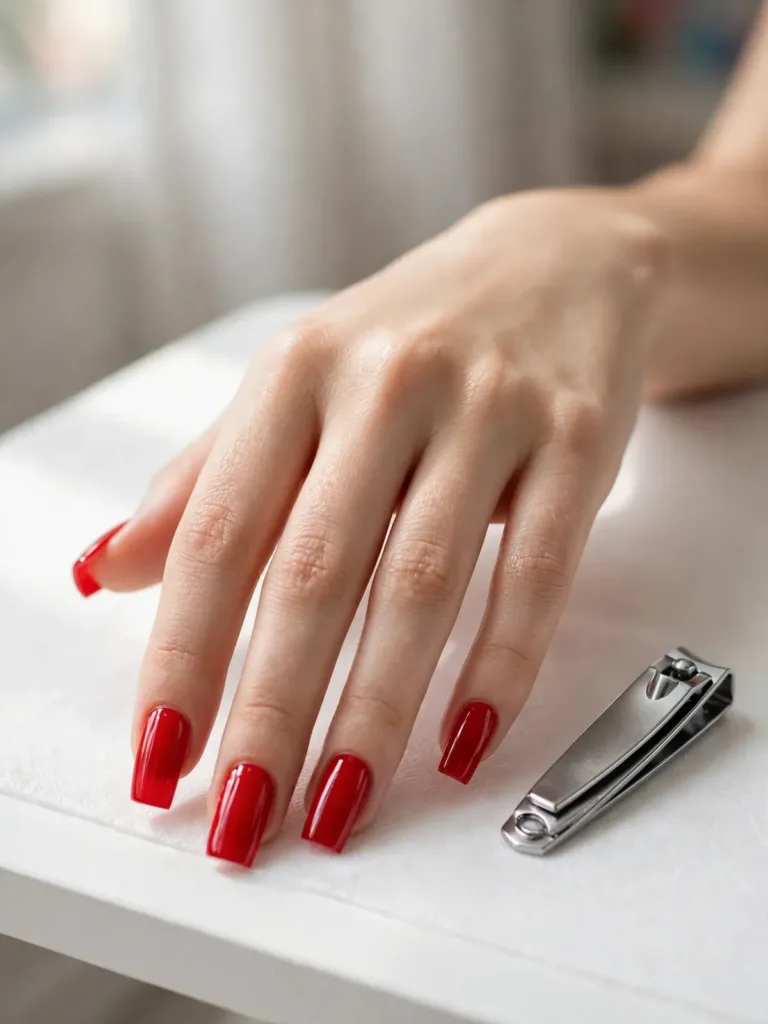
If trimming is appropriate, shorten only excess enhancement length beyond your natural free edge. Avoid clipping into attached natural nail or forcing clippers through a thick, resistant enhancement. Stop if trimming bends the nail, creates cracks, or causes discomfort. A technician can reduce bulky product more precisely when you cannot do so comfortably.
Step 2: Prepare The Surface Without Overfiling

Follow the product instructions for reducing the top coat or enhancement surface before soaking. Use a hand file with controlled, light strokes and keep it on the product. Do not chase a perfectly smooth surface or file until your natural nail is exposed. Color alone is not a dependable guide to the remaining thickness.
Stop if filing causes heat, pain, or uncertainty about where the natural nail begins. Removing more material is not worth losing nail layers. Avoid using an electric file without the training needed for that enhancement system. Ask for professional removal when the product is too thick to prepare confidently.
Step 3: Protect The Surrounding Skin

Apply a thin layer of petroleum jelly to the skin around the nail, keeping the enhancement surface clear. It can help limit contact with remover, but it does not guarantee freedom from irritation. Do not continue over broken or reacting skin. Previous significant reactions are a reason to seek advice before another exposure.
Step 4: Place Remover-Soaked Cotton And Wrap

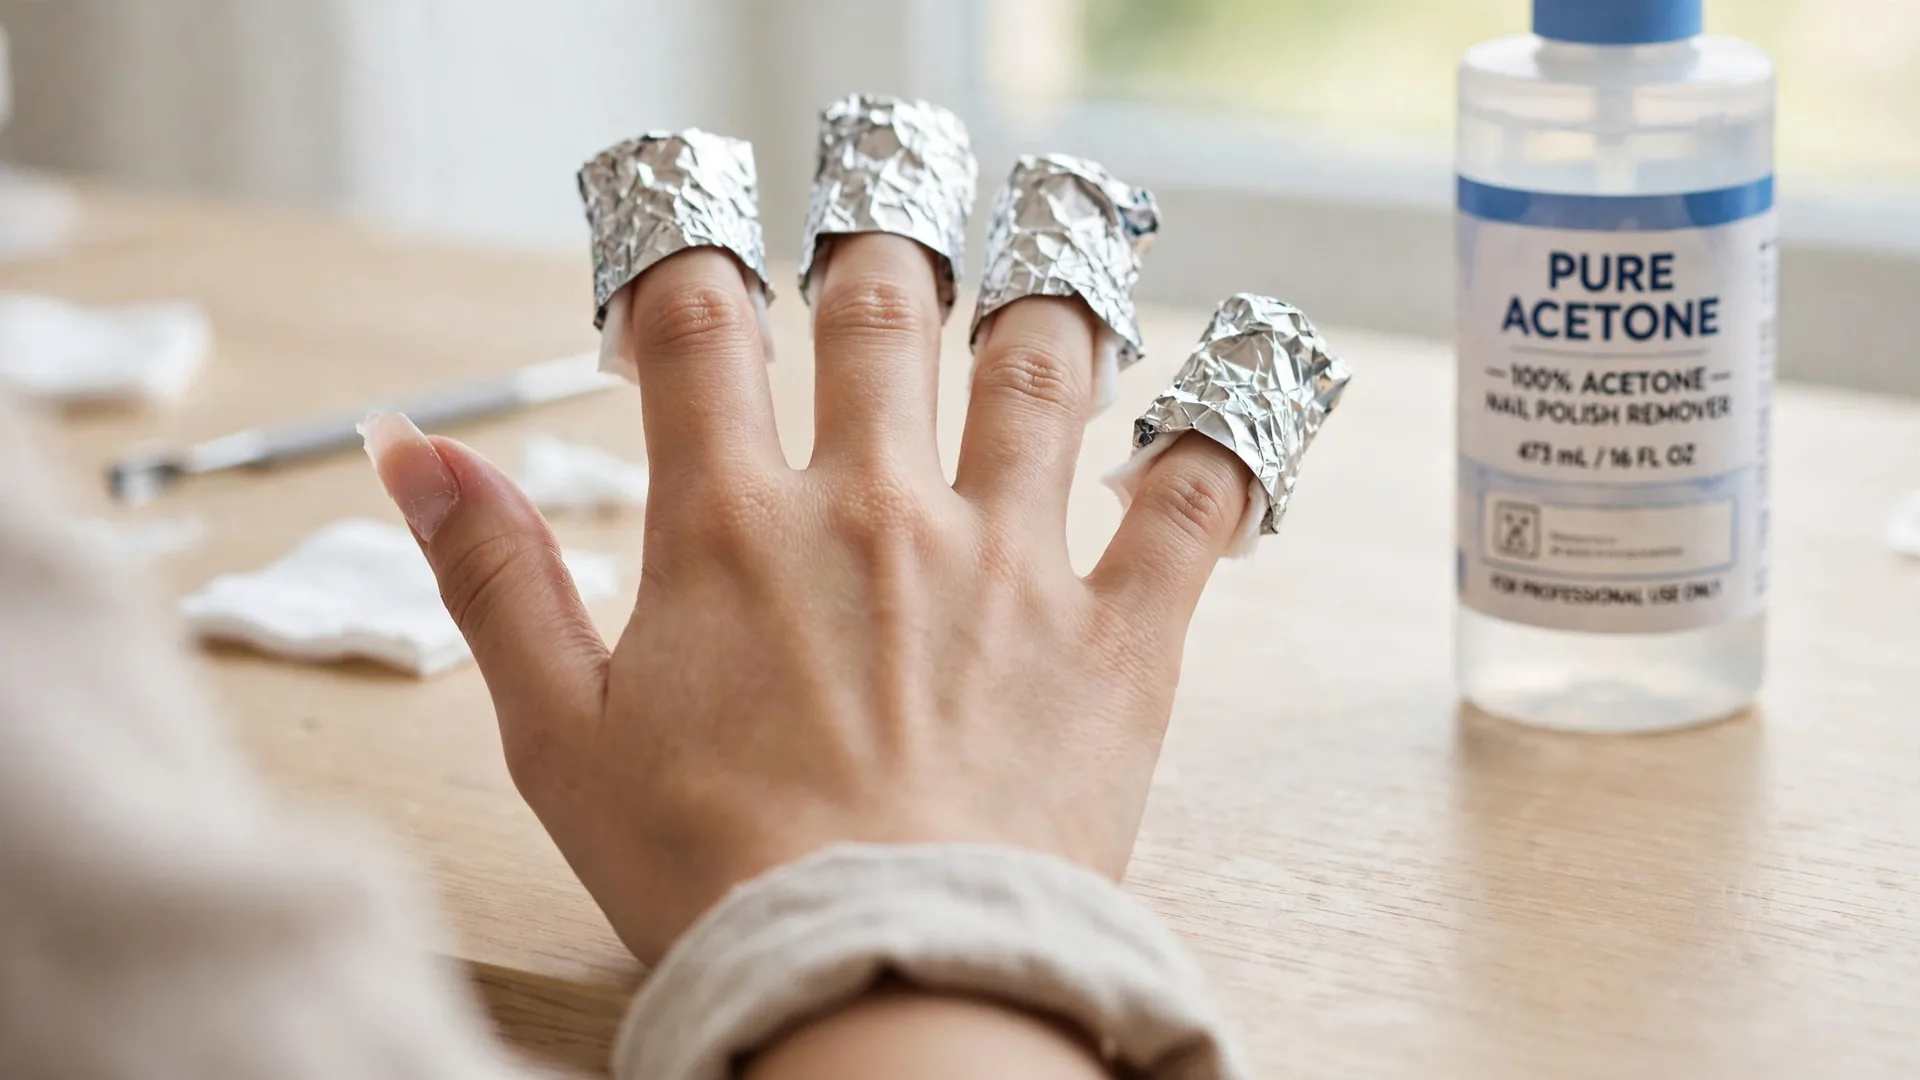
Wet the cotton with your acrylic remover as directed and place it against the enhancement surface. Wrap it with foil or the compatible removal wrap to keep the cotton in contact. The wrap should hold without squeezing the finger uncomfortably. Avoid spilling remover over the surrounding skin.
OPI’s acrylic-removal guide describes acetone-based remover with cotton and foil. Its timing is guidance for that method, rather than proof that every enhancement behaves identically. Follow your own product’s instructions instead of adding heat to speed things up.
Step 5: Allow The Product Time To Soften

Set a timer according to the removal instructions rather than checking every minute. OPI’s example method allows at least twenty to twenty-five minutes before the first check. Thickness, layers, and formulation can change the time needed. Opening every wrap early can interrupt contact and let the remover evaporate.
A tingling or burning sensation is not a sign that removal is working well. Stop exposure if a reaction or discomfort develops, following the product’s directions. If fumes cause headache or dizziness, stop and move to fresh air. Seek appropriate medical or poison-service advice for significant or persistent symptoms.
Step 6: Check One Nail Without Prying
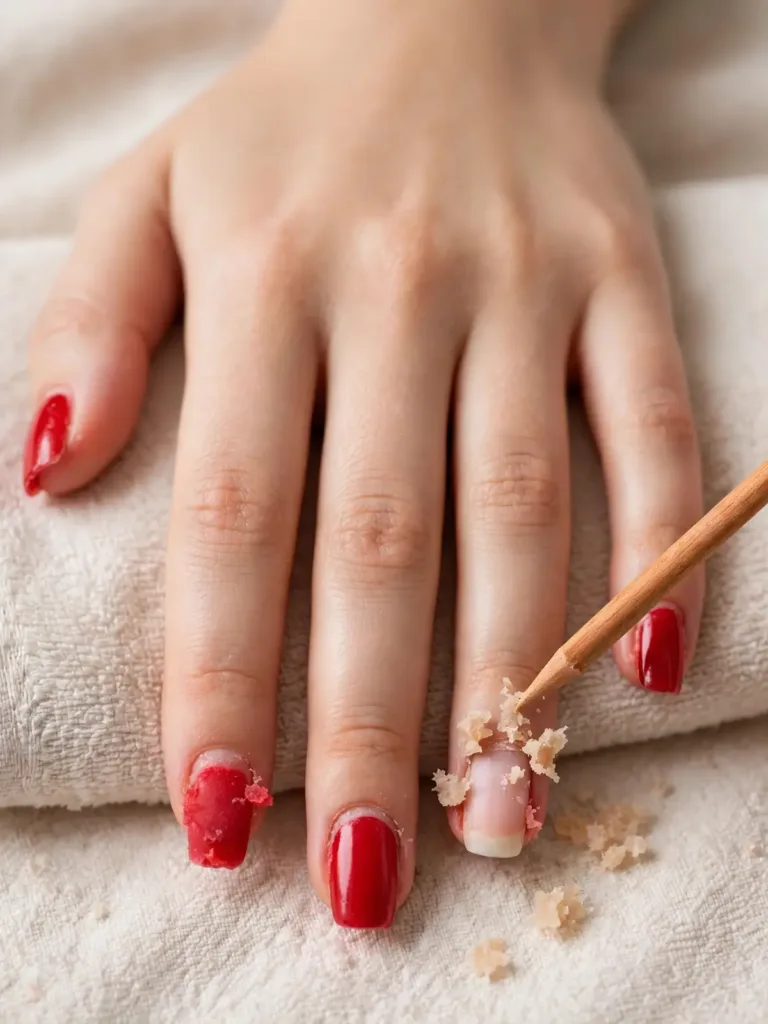
Open one wrap and check whether the enhancement has softened into removable residue. Gently wipe away material that releases easily. If using a wooden stick, keep pressure minimal and avoid pushing underneath attached product. The aim is to remove softened material, rather than lift a rigid shell away from the nail.
If product stays firm, follow any further soaking instructions within the remover’s directions. Stop if repeated attempts are not producing softening or you are unsure what remains. A technician can identify the enhancement and choose an appropriate method. Ask for guidance when the product remains resistant rather than continuing the same unsuccessful process.
Step 7: Cleanse And Moisturize Gently

After removal, follow the remover’s cleanup instructions and wash your hands gently. Pat dry and apply a familiar moisturizer to nails, fingertips, and surrounding skin. Cuticle oil is optional if you tolerate it. Avoid compulsory buffing of already thin or sensitive nails just to improve their immediate appearance.
Can You Remove Acrylic Nails Without Acetone?
This question needs a product-specific answer rather than a list of household shortcuts. If acetone is unsuitable for you, ask a qualified technician about removal options for your actual enhancement.
Do Not Treat Water And Oil As An Acrylic Solvent
Warm soapy water is not a reliable substitute for removing a salon acrylic enhancement. Advice for loosening some glued press-ons does not automatically apply to acrylic. Avoid wiggling or lifting the product to make a home mixture appear effective. Resistance means stop rather than pull harder.
Check What An Acetone-Free Remover Is Designed For
A bottle intended to remove ordinary polish may leave the acrylic enhancement intact. Only consider an alternative remover specifically intended for that product and follow its instructions. Acetone-free does not automatically mean non-irritating. A previous reaction needs advice about suitable options rather than a longer trial with another solvent.
Leave Dental Floss Out Of The Removal Process
Do not slide dental floss, cards, or tools under attached enhancement and saw or lever it away. Even a lifting edge can remain firmly attached elsewhere. Pulling the product can remove natural nail layers or worsen separation. Book appropriate removal rather than treating a loose corner as permission to peel.
Aftercare Without A Fixed Recovery Promise
Knowing how to remove acrylic nails also means recognizing that aftercare cannot reverse every kind of damage immediately. Dryness may improve with moisturizing, while damaged areas may need to grow out.
Keep Nails Comfortable And Protected
Apply moisturizer regularly, including after handwashing, and keep nails at a manageable length. Wear suitable gloves for cleaning and prolonged wet work. Avoid picking, repeated solvent exposure, and filing to make every ridge disappear. These habits reduce further stress while damaged areas grow out.
Do Not Dismiss Pain Or New Changes
Thin, sore, or splitting nails should not be treated as an inevitable healthy result of removal. Pain can have several causes, and a photograph cannot settle the explanation. Seek assessment for ongoing tenderness, swelling, separation, or unexplained discoloration. New or spreading changes deserve attention rather than another layer of polish.
Choose Another Set According To Nail Condition
There is no universal two- or three-week interval that makes every nail ready for acrylics again. Avoid covering damaged nails to hide the problem. Discuss their condition with a qualified technician, and seek medical advice when symptoms suggest more than a cosmetic issue. A strengthener is also optional rather than a required repair treatment.
Our guide to supporting stronger natural nails at home covers everyday protective habits. A simple nail care routine can help organize maintenance between enhancements. Use either alongside appropriate professional advice when pain or unexplained nail changes persist.
When To Stop DIY Removal
Deciding how to remove acrylic nails includes deciding when a home attempt should end. Distinguish a product-removal problem from symptoms that require healthcare assessment.
Ask A Technician About Resistant Or Unknown Product
Book professional removal if you cannot identify the enhancement, prepare it comfortably, or get it to soften as directed. Explain what remover you used and how long you tried it. Avoid repeated filing and soaking simply to reach a promised finish time. A salon appointment can address the cosmetic product without diagnosing nail disease.
Seek Healthcare Advice For Concerning Symptoms
Contact a healthcare professional for pus, marked redness or swelling, worsening pain, or an unexplained color change. Tell them about lifting, separation, and any recent chemical exposure. Do not ask a salon to cover these findings with another set. Significant exposure symptoms also warrant medical or poison-service guidance.
Acrylic Nail Removal FAQs
These answers clarify common decisions about how to remove acrylic nails and care for the natural nail afterward. Product instructions and your nail condition matter more than a fixed timer.
How Long Does It Take To Remove Acrylic Nails?
Timing varies with the product, thickness, preparation, and removal method. Allow enough time to follow instructions without rushing. If it does not soften as directed, seek help rather than treating thirty minutes as a deadline.
Can I Use Warm Water Instead Of Acetone?
Do not rely on warm water and oil to dissolve salon acrylics. Different press-on adhesives may have different instructions. Identify your enhancement and use a removal method intended for it.
Can I Remove An Acrylic That Is Already Lifting?
A lifting edge does not show how firmly the rest remains attached. Avoid peeling, flossing, or levering it off. Seek advice if lifting comes with pain, discoloration, or nail separation.
What If The Acrylic Stays Hard After Soaking?
Check that the remover and instructions suit the enhancement. If it remains resistant, stop forcing it and ask a technician about appropriate removal. More scraping is not a substitute for softening.
Should I Buff My Natural Nails After Removal?
Buffing is not compulsory, especially when nails feel thin or tender. Avoid trying to erase every surface change. Ask for advice if you cannot distinguish product residue from the natural nail.
Why Do My Nails Hurt After Acrylic Removal?
Filing, pulling, irritation, and other nail problems can cause discomfort. Do not assume oil and a short break will resolve every cause. Persistent or worsening pain needs assessment.
When Can I Get Another Acrylic Set?
Base that decision on the nail’s condition rather than an automatic two-week wait. Avoid covering painful, damaged, or unexplained nail changes. Ask a clinician about symptoms and a technician about suitable cosmetic options.
Can I Paint My Nails Immediately After Removal?
Consider their condition and whether further products would irritate them. Painful or damaged nails deserve attention before another manicure. Do not use polish to conceal a change that needs assessment.
Final Thoughts
Learning how to remove acrylic nails starts with choosing a method that suits the enhancement and your nail condition. Product softening, gentle handling, and realistic aftercare matter more than completing every step quickly. A resistant nail is a reason to pause, while pain or unexplained changes deserve proper assessment. Before starting your next removal, confirm which enhancement you have and read the matching remover instructions.