Simplistic Hairstyle Ideas for Curly Hair: 8 Easy Looks
You watched the tutorial. You followed every step. But your curls had other plans.
That’s the real problem with most curly hair advice. It treats all curls the same. A style that looks effortless on 3A ringlets can fall completely flat on 3C coils. A technique that defines a 2B wave does nothing for 4A hair. The style isn’t wrong – it just wasn’t made for your curl.
These 9 simplistic hairstyle ideas for curly hair are built differently. Every single style comes with a curl type callout so you know immediately whether it fits your hair. Most need zero heat. All of them take under 10 minutes. Pick the one that matches your pattern and start there.
What Makes a Style Actually Simple for Curly Hair
Simple styling for straight hair means grabbing a brush. For curly hair, it means something entirely different. The fewer steps a style requires, the less you disturb the curl pattern your hair spent the night forming. Less touching means more definition. That’s the core principle here.
The right style also depends completely on your curl type. That’s the piece most guides skip entirely.
Why Curl Type Changes Everything
Curl type runs on a scale from 2A to 4C. Type 2 is wavy, ranging from soft, barely-there waves (2A) to defined, bouncy waves with some curl (2C). Type 3 is a ringlet pattern – loose and large (3A), medium spirals (3B), or tight, spring-like coils (3C). Type 4 is coily, from soft S-shaped coils (4A) to dense, tightly packed zigzag patterns (4C).
Why does this matter? Because shrinkage alone changes everything. A style that sits at shoulder length on 3B curls can shrink several inches on 4C coils with the same technique. Hair density and porosity also shift how products absorb and how long a style holds. Knowing your type removes the guesswork from every styling decision.
Fewer Steps Mean Better Curl Results
There is a principle most curl stylists agree on: hands in hair equals frizz.
Every time you touch your curls after they have started drying, you break apart the curl clumping process. That is how defined spirals become a frizzy, undefined cloud. The best curly hairstyles work because they limit manipulation after products go in.
Scrunching once, letting hair air dry, then stepping away produces better results than adjusting every few minutes. For curly hair, doing less is the technique. Set it. Leave it. Let your natural texture do the rest.
Simple Everyday Hairstyles for Curly Hair
These five styles work on freshly washed or refreshed second-day curls. They are built for real mornings – not just tutorial videos with perfect lighting and four assistants. Each style includes a curl type fit, an occasion label, numbered steps, and the products it actually needs.
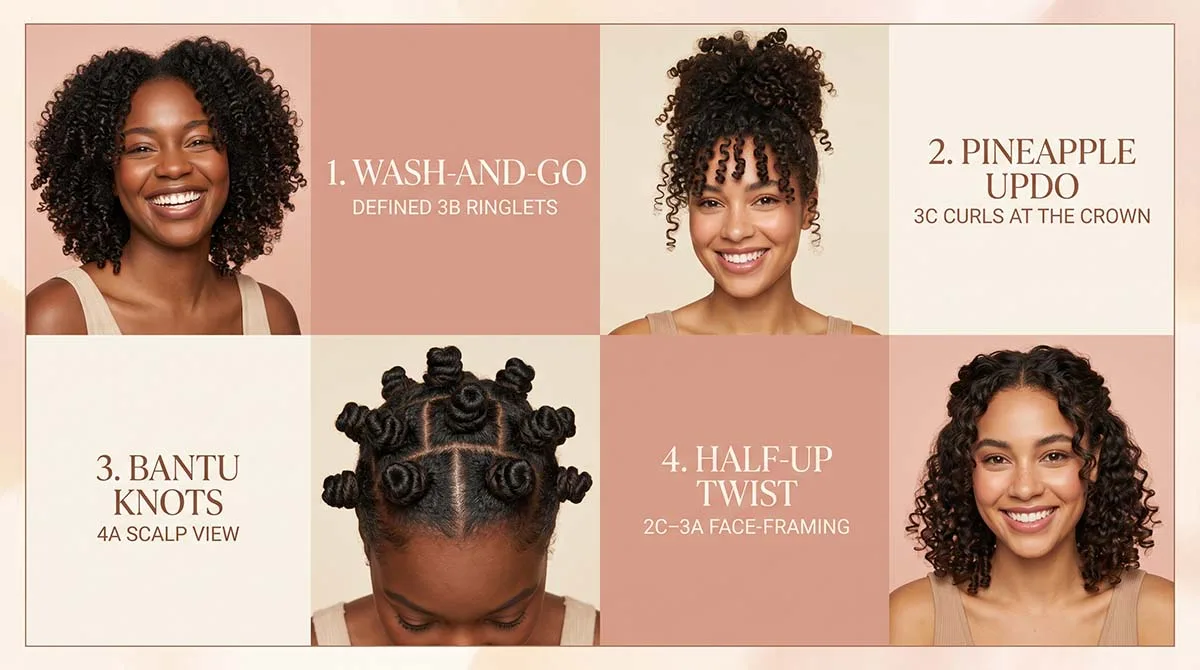
1. Wash-and-Go (Best for 2B to 3C Curls)
Best For: 2B, 2C, 3A, 3B, 3C
Occasion Fit: Casual, Weekend, Gym
The wash-and-go is the most natural curly hairstyle you can do. It works entirely with what your hair does after washing — no heat, no complex tools, just curl definition built from the right product layering.
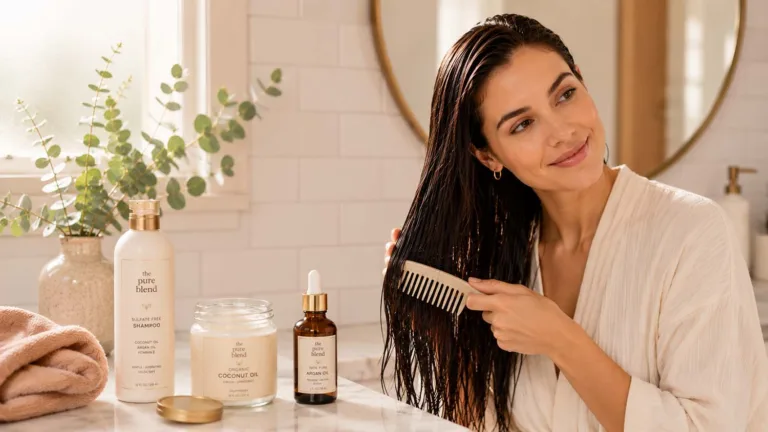
- Wash with a sulfate-free shampoo or co-wash to preserve natural oils
- Apply leave-in conditioner to soaking-wet hair, working section by section from roots to ends
- Layer curl gel or custard on top using the praying hands method – smooth the product over each section by pressing your palms together around the hair, moving from root to tip without disturbing the curl
- Scrunch upward firmly from ends to roots to encourage curl clumping
- Plop your hair into a microfiber towel, folding the towel over the top of your head for 20–30 minutes to absorb excess water
- Diffuse on low heat and low speed, cupping curls upward into the diffuser bowl, or air dry completely
- Once fully dry, scrunch out the cast with clean, dry hands to reveal soft, defined curls

The single rule that removes most frizz: do not touch your curls while they are still wet or damp. One scrunch, then hands off.
Products Needed: Leave-in conditioner + curl gel or custard
2. Pineapple Updo (Best for 3A to 4C Curls)
Best For: 3A, 3B, 3C, 4A, 4B, 4C
Occasion Fit: Casual, Quick Morning, Overnight Curl Protection
The pineapple updo is a two-in-one style. It looks casual and effortless during the day, and it protects your curl pattern while you sleep. No other style does both at once.
- Flip all your hair forward, bending at the waist
- Gather curls loosely at the very top of the crown – not at the back of the head
- Secure with a satin scrunchie only – rubber bands cause breakage at the hairline over time
- Stand upright and let the curls cascade naturally forward over the front
- Adjust the scrunchie position to raise or lower the height, which controls how much root lift you get
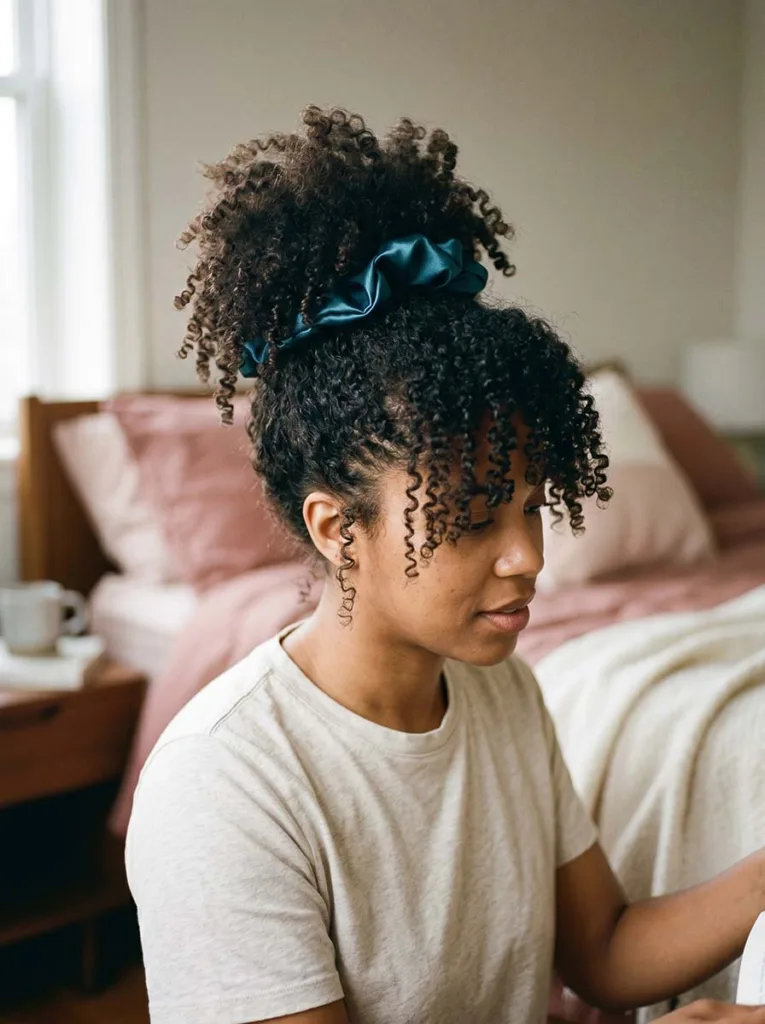
The higher the pineapple sits, the more volume falls at the front. Women with type 3C through 4C curls especially rely on this style overnight. You wake up with preserved curl definition instead of flat, squashed roots.
Products Needed: Satin scrunchie only
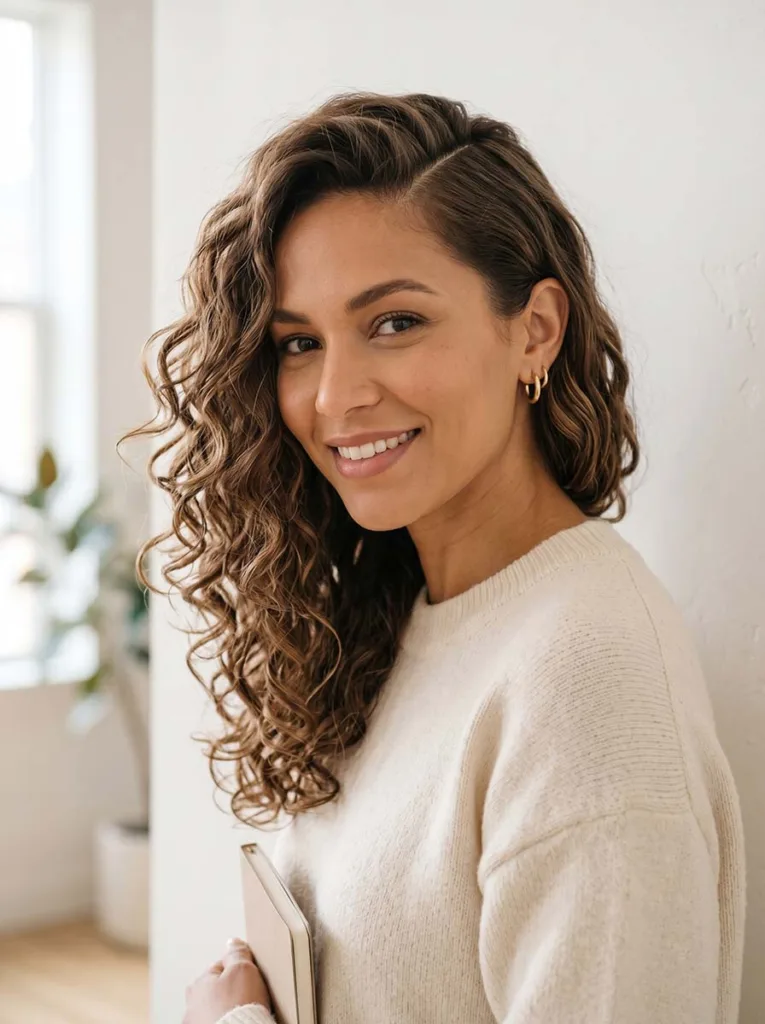
3. Curly Half-Up Twist (Best for 2B to 3B Curls)
Best For: 2B, 2C, 3A, 3B
Occasion Fit: Work, Casual, Date Night
The curly half-up twist looks more polished than the effort it takes. It keeps your face clear without flattening your curls. On good curl days it takes under two minutes.
- Start with defined, dry or mostly dry curls
- Take a 1–2 inch section from each side of the front hairline
- Twist each section gently backward toward the center of the crown
- Secure both twists together with a small clip or bobby pin
- Let the remaining curls fall freely behind
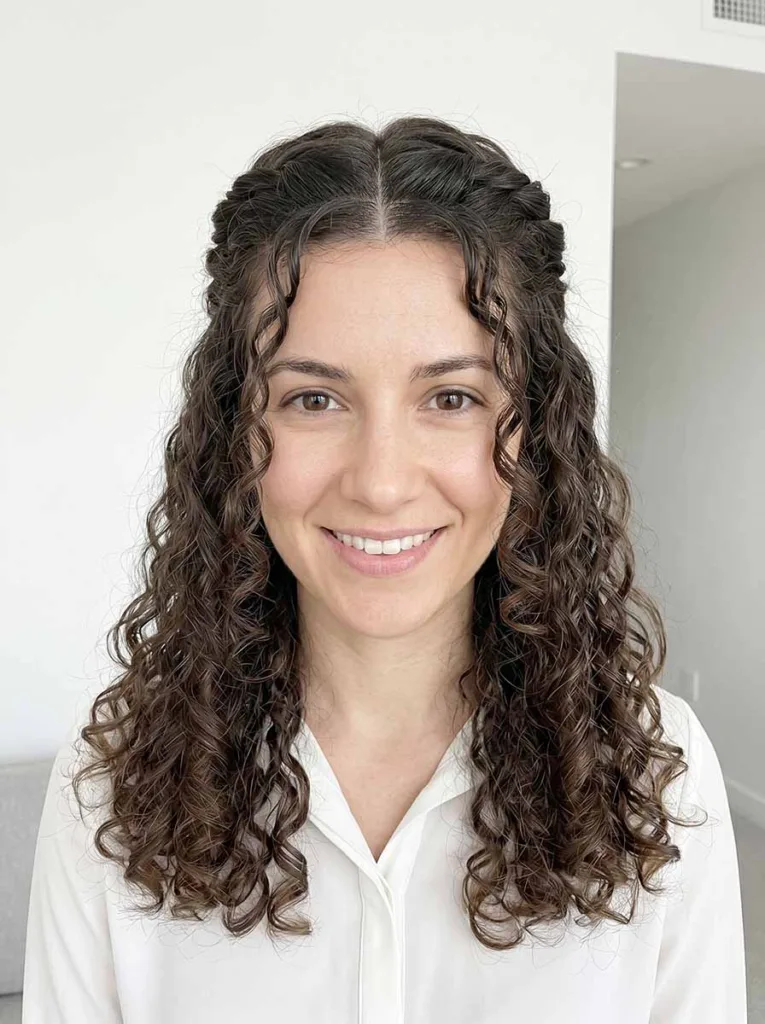
For extra hold on the twisted sections, apply a small amount of curl cream before twisting. This controls frizz at the part line – the most visible area when you are face-to-face with someone.
This style works best on 2B to 3B patterns because those curl types have enough definition to hold the twist shape without pins pulling too tight.
Products Needed: Light curl cream (optional)
4. Defined Side Part with Volume (Best for 2A to 3A Curls)
Best For: 2A, 2B, 2C, 3A
Occasion Fit: Work, Semi-formal, Everyday
A single change to your part line can completely change how curly hair looks. A deep side part shifts volume to one side and frames the face in a way a center part never does. It is one of the fastest volume upgrades for wavy and loose curly hair.
- Start with damp, detangled hair
- Apply curl-defining cream from mid-length to ends, distributing evenly
- Use a wide-tooth comb to create a deep side part while hair is still damp
- Let curls fall naturally to each side of the part – do not rearrange them
- Diffuse on low speed, low heat, lifting at the roots with the diffuser cup to build upward volume
This style suits 2A to 3A curl types specifically because those patterns tend to fall flat at the root. The side part creates natural-looking volume without adding product weight or relying on heat.
Products Needed: Curl-defining cream
5. Loose Curly Ponytail with Volume (Best for 2B to 3C Curls)
Best For: 2B, 2C, 3A, 3B, 3C
Occasion Fit: Gym, Casual, Errands
A curly ponytail that looks good requires one technique most people skip: the flip. Without it, the ponytail sits flat and loses all its natural volume before you even leave the house.
- Apply a light-hold mousse to damp hair before curls dry, scrunching it in evenly
- Once curls are completely dry, flip your hair forward and upside down
- Gather all curls at mid-height – not at the very top of the head, and not low at the nape
- Secure very loosely with a soft elastic or satin scrunchie
- Flip back upright and use your fingers to gently pull sections apart for fullness
- Release 2–3 face-framing strands at the front for a softer, less severe look
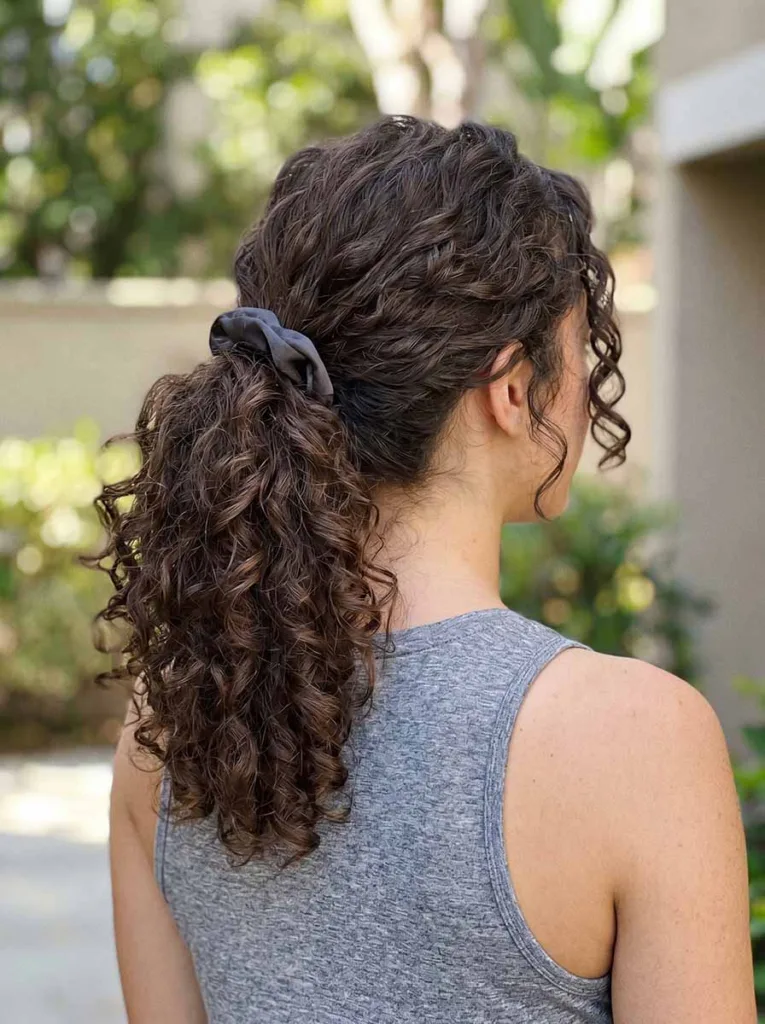
Never secure a curly ponytail tightly. Tight elastics crush the curl at the base, flatten the roots, and cause breakage along the hairline over time.
Products Needed: Light-hold mousse
Simple Protective Styles for Curly Hair
A protective style keeps your ends tucked away and limits daily contact with clothing, pillows, and environmental friction. For type 3 and type 4 curly hair, this directly reduces breakage and supports moisture retention over time. The American Academy of Dermatology notes that protective styling is one of the most effective methods for reducing mechanical hair damage, especially for tightly coiled and highly textured hair.
These three styles also double as setting methods. Apply them on wet hair, and you wake up with a defined result ready to wear.
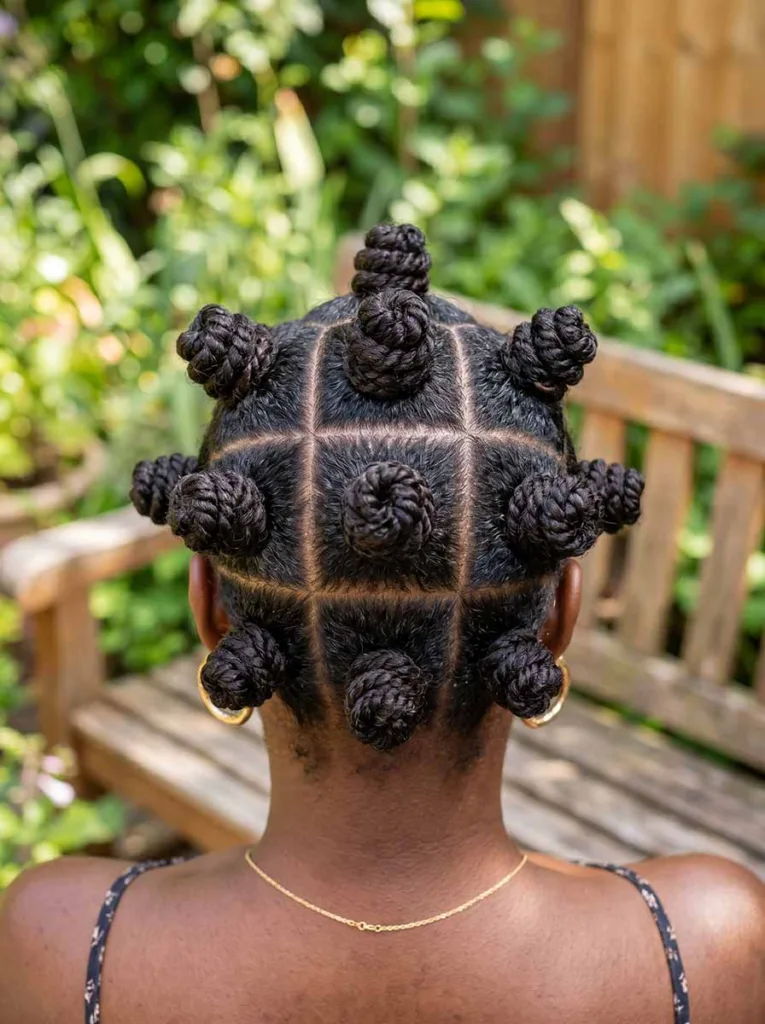
6. Bantu Knots (Best for 3C to 4C Curls)
Best For: 3C, 4A, 4B, 4C
Occasion Fit: Protective Style, Casual, Bantu Knot-Out Prep
Bantu knots are a traditional African hairstyle with a practical double function: they protect your ends while setting your curl pattern for the next day. When you unravel them after 8–12 hours, the result is a defined twist-out with natural volume.
- Section damp hair into equal parts – 8 to 12 sections depending on your hair density. Smaller sections create tighter definition; larger sections give softer waves.
- Apply curl cream generously to each section from root to tip
- Twist each section tightly from root to tip, holding tension as you go
- Coil the twist around its own base in a circular motion
- Tuck the end underneath the base to secure it – for 4A to 4C curl types, the coil holds without pins
- Sleep with a satin bonnet or satin scarf over the knots overnight
Unravel the knots the next morning by loosening each one from the base first. Pull the coil apart slowly and separate with fingers, not a comb, for soft and defined curls.
Products Needed: Curl cream + satin bonnet or scarf
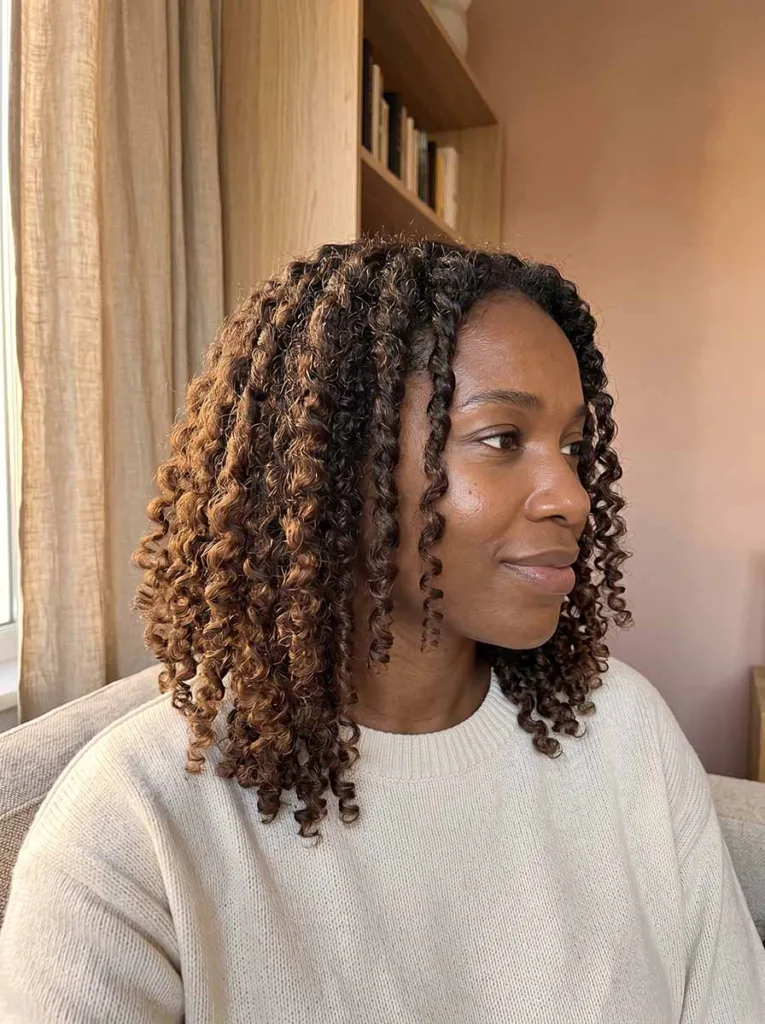
7. Loose Two-Strand Twists (Best for 3A to 4B Curls)
Best For: 3A, 3B, 3C, 4A, 4B
Occasion Fit: Protective Overnight, Length Retention, Twist-Out Prep
Two-strand twists are one of the gentlest styles you can do on curly hair. They stretch the curl slightly, reduce visible shrinkage, and set the hair overnight for a defined twist-out in the morning.
- Start with freshly washed, conditioned hair while still damp
- Divide hair into sections – smaller for tighter definition, larger for soft, elongated waves
- Apply leave-in conditioner to each section thoroughly
- Seal with a few drops of lightweight oil such as argan or jojoba
- Divide each section into two equal strands
- Wrap one strand over the other in a continuous downward motion from root to tip
- Leave in for 8–12 hours minimum – overnight gives the most defined result
To unravel, start at the bottom of each twist and pull gently outward. Run a drop of oil along your fingers before separating sections to prevent frizz during the unraveling process.
Products Needed: Leave-in conditioner + lightweight oil
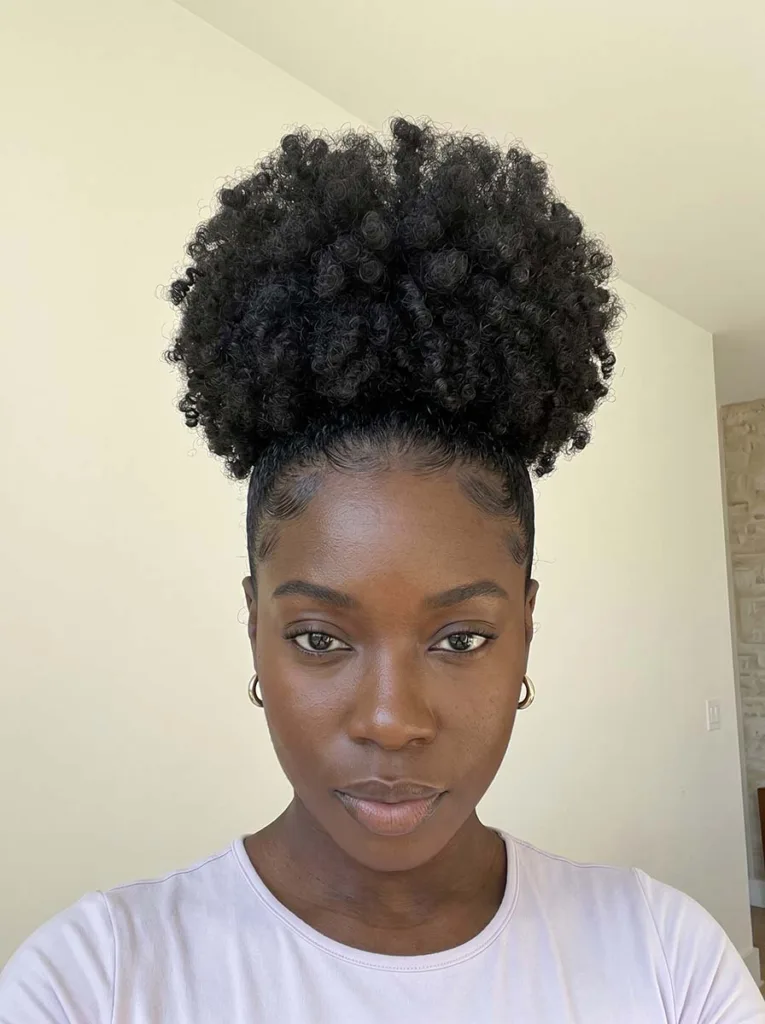
8. High Puff (Best for 4A to 4C Curls)
Best For: 4A, 4B, 4C
Occasion Fit: Casual, Everyday, 5-Minute Quick Style
The high puff is the fastest protective style for coily hair. It protects your ends by keeping them gathered at the crown rather than rubbing against clothing or getting dried out during the day. Done correctly, it takes under five minutes.
- Lightly dampen the edges and the perimeter of your hair with water
- Apply edge control or a light gel around the entire hairline
- Smooth your edges using a soft-bristle edge brush or a clean toothbrush
- Gather all hair to the crown, keeping the puff round and even
- Secure with a soft elastic – firm enough to hold but loose enough not to leave a dent
- Fluff the puff from the inside with your fingers, pushing upward to create a full, rounded shape
The difference between a limp puff and a full one comes down to one step: moisture at the roots before gathering. Dry roots will not puff – they flatten. Always dampen first.
Products Needed: Edge control + soft elastic
How to Refresh Day 2 Curls in 5 Minutes
Most curly hair guides focus entirely on wash day. That’s the easier part. The real challenge is the morning after, when your curls look flat, separated, and dry. Washing every single day strips the moisture retention your hair builds during a proper wash day and damages the hair cuticle through repeated cleansing.
The solution is a targeted refresh. Done right, it takes five minutes and brings second-day curls back close to wash-day definition without rewashing.
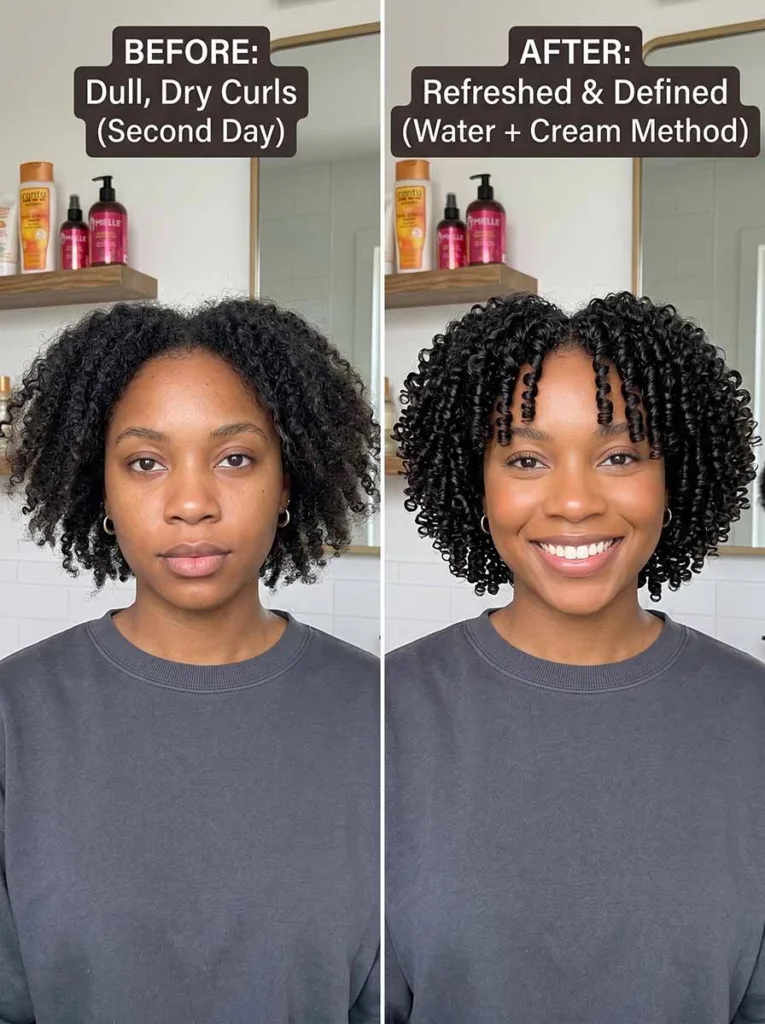
The Water-and-Cream Refresh Method
This is the most effective refresh technique across all curl types.
- Fill a spray bottle with plain water. Add 5–10 drops of leave-in conditioner to the bottle for extra moisture
- Mist the sections that have lost definition – focus on flat or separated areas rather than the whole head
- Apply 1 pump of curl cream to each misted section while the hair is still damp
- Use the praying hands method to smooth the product gently over each section
- Scrunch upward firmly to reactivate the curl clumping
- Air dry, or use a diffuser on low heat for 3–5 minutes if you are short on time
The most common mistake in a refresh is over-misting. Hair that is too wet takes much longer to dry and loses definition during the process. Aim for damp, not dripping. The water resets the curl – the cream locks the shape back in.
Diffusing vs. Air Drying for Refresh
Both methods produce good results. Choosing the right one depends on your hair porosity and your morning timeline.
Diffuse When:
- You have high porosity hair that absorbs moisture fast and can handle gentle heat
- Humidity outside is high and you want frizz sealed before you leave
- You have under 10 minutes and need a set result
Air Dry When:
- You have low porosity hair that takes longer to absorb moisture and can develop buildup with repeated heat
- Your environment is cool and dry
- You want the most definition possible without any heat exposure
For most curl types from 3A to 4A, low-heat diffusing gives the most consistent Day 2 result. Hold the diffuser cup beneath the curls, pressing gently upward. Keep it still – moving it around creates frizz.
Products These Styles Actually Need
Most of the styles in this guide need one or two products. Not a full shelf. The key is matching what you use to what the style actually requires – hold, moisture, or frizz control. More products do not mean better curls. Too many layers create product buildup that makes curls heavy and undefined over time.
Hair porosity matters here too. High porosity hair benefits from richer creams and sealants that lock moisture in because the cuticle is more open and loses hydration faster. Low porosity hair does better with lightweight, water-based products that do not sit on a closed cuticle.
For Definition: Curl Creams and Gels
Curl cream and hair gel do different jobs, even though both are styling products.
Curl cream provides moisture and a soft, flexible hold. It gives curls a natural, touchable finish without stiffness. It is the right choice for the half-up twist, side part, ponytail, and protective styles where you want movement and softness throughout the day.
Curl gel creates a firmer hold and produces a gel cast – a light, crunchy coating that seals each curl as it dries. Once the hair is completely dry, scrunching out the cast with dry hands breaks that coating and reveals soft, defined curls with lasting shape. Gel is the right choice for the wash-and-go, where definition needs to hold from morning to night.
Using both together – curl cream first, gel on top – is a well-established layering technique for 3A to 3C curl types that want both moisture and hold.
For Frizz Control: Leave-Ins and Serums
A leave-in conditioner belongs in every curly hair routine, regardless of style or curl type. Applied to soaking-wet hair right after washing, it builds the moisture foundation that every other product layers on top of. Skipping leave-in and going straight to styling products is the most common cause of dry, crunchy-looking curls.
Frizz serums and anti-humidity products go on last, after all styling products are applied and before drying begins. They smooth the outer cuticle layer and create a barrier against environmental humidity – the main driver of frizz for every curl type.
Lightweight argan oil or jojoba oil works as a sealant for high porosity hair after leave-in application. Use 2–3 drops maximum. Too much oil weighs down the curl pattern and causes buildup that flattens definition within hours.
Mistakes That Ruin Curly Hairstyles
Technique matters as much as style choice. Three specific mistakes appear in nearly every curly hair routine that is not producing the results the person wants. Each one damages curls in a different way, and each one has a straightforward fix.
Brushing Dry Curls
Brushing dry curly hair separates each curl clump into individual strands. The result is a frizzy, expanded cloud rather than the defined ringlets or coils the hair naturally forms.
Always detangle on damp hair, not dry. Use a wide-tooth comb or your fingers while conditioner is still in the hair during washing. Work from the ends upward in small sections, removing knots before they become tangles. This approach preserves the curl pattern that determines the shape and definition of the finished style.
Using a Regular Cotton Towel
A standard cotton towel creates significant friction against the hair cuticle from the first moment you start drying. That friction roughens the cuticle surface and causes frizz before a single styling product has been applied.
Switch to a microfiber towel or a soft cotton T-shirt. Both materials have far less surface friction. Use a gentle plopping motion rather than rubbing: lower the towel over the hair and allow the curls to fold upward inside it. Press and release. Never rub.
Applying Products to Dry Hair
All curl styling products are built to activate on wet hair. Applied to dry hair, they coat the surface without absorbing, create product buildup, and do nothing for definition or hold.
The correct application window is immediately after washing, while hair is completely saturated. Apply leave-in conditioner first, then your styling product, while the hair is still dripping wet. The water already in the hair carries the product through the curl pattern and makes it work.
Frequently Asked Questions
1. What is the easiest hairstyle for curly hair?
The pineapple updo is the easiest hairstyle for curly hair. It takes under a minute and needs only a satin scrunchie. Gather your curls loosely at the crown and let them fall forward naturally. It works across curl types 3A through 4C and doubles as an overnight style.
2. How do you do a wash-and-go for curly hair?
Apply leave-in conditioner to soaking-wet hair, layer curl gel using the praying hands method, and scrunch upward. Plop with a microfiber towel for 20–30 minutes, then diffuse on low heat or air dry. Do not touch your curls while they are still wet.
3. What curl type is the pineapple updo best for?
The pineapple updo works best on curl types 3A through 4C – any pattern with enough length to gather at the crown. It is equally effective as a daytime casual style and as an overnight curl preservation technique.
4. How do you refresh curly hair the next day?
Mist each flat section lightly with water, apply 1 pump of curl cream per section, and scrunch upward to reactivate the curl pattern. Diffuse briefly or air dry. The water is what reactivates the curl – applying product to completely dry hair will not give the same result.
5. What is the difference between 3A and 4C curl types?
3A curls are large, loose ringlets with a clearly visible spiral. 4C curls are very tight, densely packed coils with significant shrinkage – often shrinking more than 75% of the actual hair length. They require different products, hydration levels, and styling techniques.
6. Are protective styles good for curly hair?
Yes. Protective styles such as bantu knots, two-strand twists, and the high puff reduce daily manipulation and shield the ends from friction and dryness. The American Academy of Dermatology confirms that protective styling reduces mechanical damage and breakage, which supports length retention over time.
7. How do you style curly hair without heat?
The wash-and-go, pineapple updo, half-up twist, bantu knots, and two-strand twists all require zero heat. Apply styling products to wet hair, allow curls to air dry fully, and preserve definition overnight with a satin scrunchie or bonnet.
8. What products do you actually need for curly hairstyles?
Most curly hairstyles need only two products: a leave-in conditioner for moisture and a curl cream or gel for hold and definition. Frizz-prone hair benefits from adding a frizz serum as the final step. More than three products at once typically causes product buildup that weighs down and flattens the curl pattern.
Conclusion
The best style for curly hair is the one that matches your curl type and requires the fewest steps to look good. You do not need a complex technique or a shelf full of products. You need styles that cooperate with your natural curl pattern instead of overriding it.
Pick one style from this list that fits your curl type. Test it on your next wash day. Notice how your curls respond when you stop fighting them and start working with them. That shift is where good hair days actually begin.
Save this post for your next wash day and start with the style that fits your pattern.