15 Ponytail Bridesmaid Hairstyles to Try Right Now
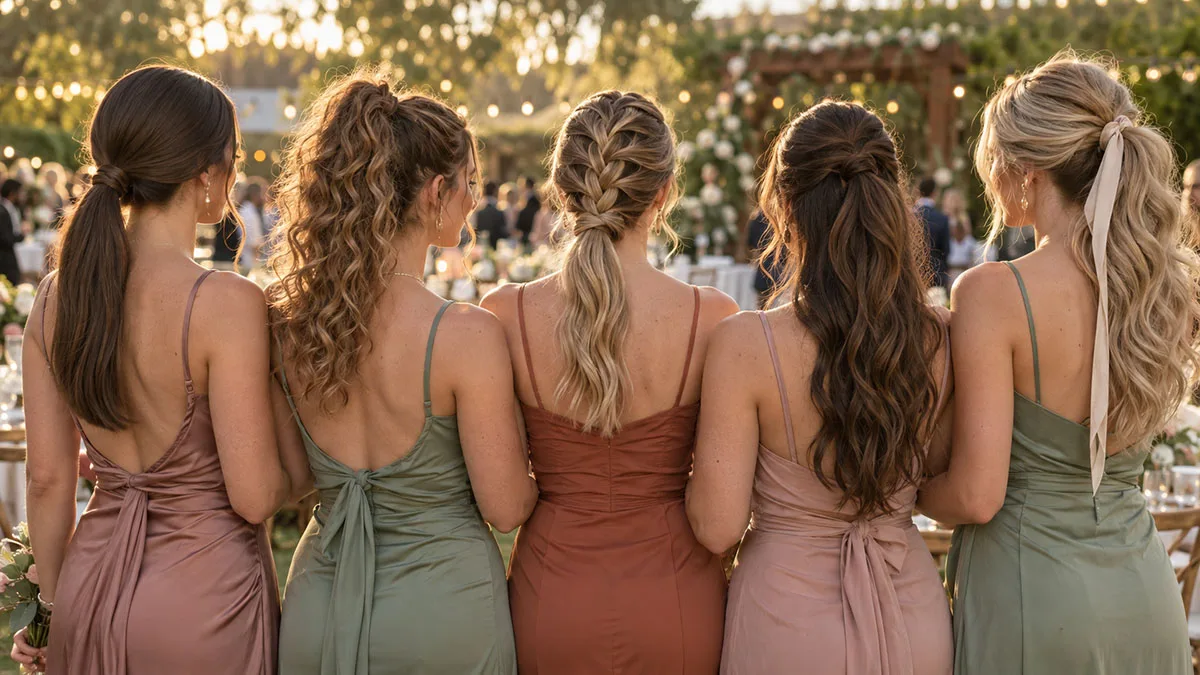
Will your bridesmaid’s ponytail survive six hours of dancing, hugging, and humidity, or will it go flat before the reception even starts? Most brides start hair and makeup three or more hours before the ceremony, so that ponytail has to survive a full day, not just a few photos. Most guides skip that part. They show a pretty photo and leave you guessing how it holds up once the music starts.
This guide answers it straight. You’ll find 15 ponytail bridesmaid hairstyles built for real wedding days, not staged photos, plus the exact prep steps that keep them locked in through the ceremony, the photos, and the last song of the night.
Every hair length, texture, and wedding style gets a match here, from a sleek black-tie low pony to a boho braid for a beach ceremony. Pick one, save it, and skip the guesswork. Planning your own ponytail as the bride? Our wedding ponytail hairstyles guide covers that side of it.
Why Ponytail Bridesmaid Hairstyles Work So Well
A ponytail pulls hair off your face and neck, which matters most at summer or outdoor weddings. It photographs cleanly next to the bride’s own updo or loose waves too, so nothing clashes. Stylists love ponytails for wedding parties because one base style flexes into a dozen finishes, depending on curl, height, and the accessories you choose. And unlike a full updo, a ponytail barely needs training. Bridesmaids can style each other’s hair the morning of the wedding if a pro isn’t booked for the whole group. If some of your bridesmaids want an updo instead, our bridesmaid updo hairstyles guide covers those options too.
- A ponytail takes under 15 minutes once you know the base technique.
- It works great on second-day hair, since fresh-washed strands hold curl and texture less well.
- It suits every dress neckline, from strapless to a high collar.
- It travels well too, staying neat through the car ride, the receiving line, and the reception.
Choosing a Style by Face Shape and Hair Texture
A round face looks longer with a high ponytail, since it adds vertical lift, which is exactly what styles 4, 5, and 6 are built around. A square jaw softens next to loose face-framing pieces around a low pony, like style 2. Fine hair does best with a little backcombing at the crown before the base goes in, the same technique behind style 14.
Thick or curly hair usually needs less product, just more patience while you section it, which makes style 5 a natural fit. Season plays a role too. A slicked-back ponytail, like style 1 or style 4, resists wind and pairs well with a coat at a winter wedding, while summer calls for a lighter product, the kind used in style 2, so hair doesn’t weigh down in the heat.
Ponytails for Short or Layered Hair
Not every bridesmaid has waist-length hair, and a short bob still works fine, especially with style 11’s classic half-up base, which needs less length to look finished. A low, textured half-ponytail secures the ends without needing extra length. Want a fuller high or low ponytail instead? A clip-in ponytail extension matched to hair color adds length and volume in minutes. Just test the extension at the trial run first so the color and texture blend in seamlessly on the actual day. If your bridesmaids do have long hair, our bridesmaid hairstyles for long hair guide has more than just ponytails to choose from.
Low Ponytail Styles for a Timeless Look
A low ponytail sits at the nape and reads formal without trying too hard. As a low ponytail bridesmaid pick, it pairs beautifully with a fitted gown and pearl jewelry. These three versions give you room to match whatever tone the wedding is going for.
1. Sleek Low Ponytail for Black-Tie Weddings
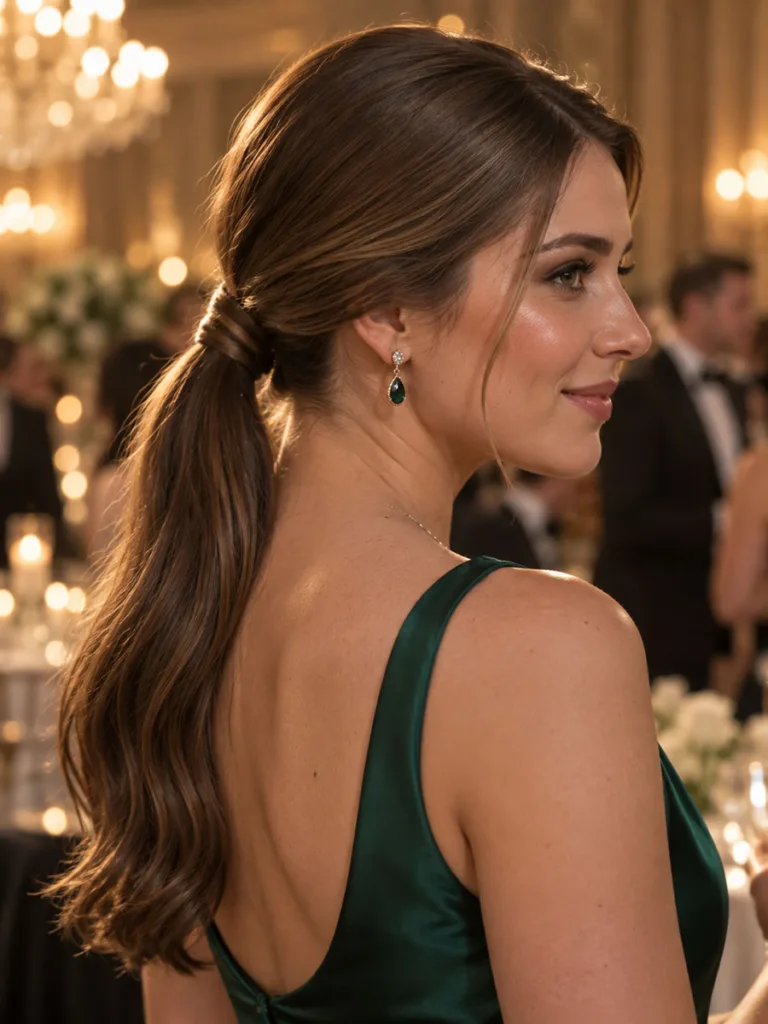
A sleek ponytail for bridesmaids needs just a boar-bristle brush, a light gel, and a steady hand. Smooth every strand back, then secure it low at the nape and wrap a small section of hair around the elastic to hide it completely. Under bright reception lighting, this finish reads polished from every angle. A dab of edge control along the hairline stops flyaways from showing up in close-up shots.
2. Low Ponytail With Soft Waves for Round Faces
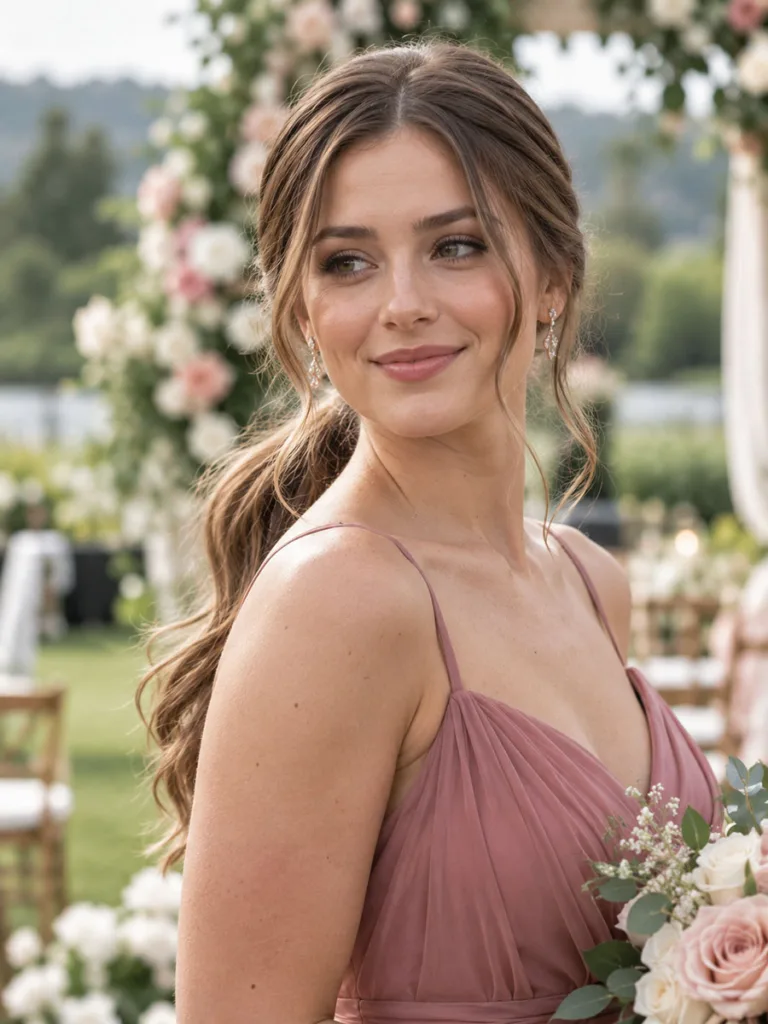
Curl the length in loose sections with a 1-inch barrel curling iron, holding each section for about 8 seconds, before pulling hair back into the base. Leave two pieces loose around the face to soften the line. Skip the heavy gel here. A lighter cream product keeps the waves bouncy instead of pasted flat by the time photos start. Curl those face-framing pieces away from the cheeks, not toward them, so they open up the face instead of hiding it.
3. Low Bubble Ponytail for a Long Night of Dancing
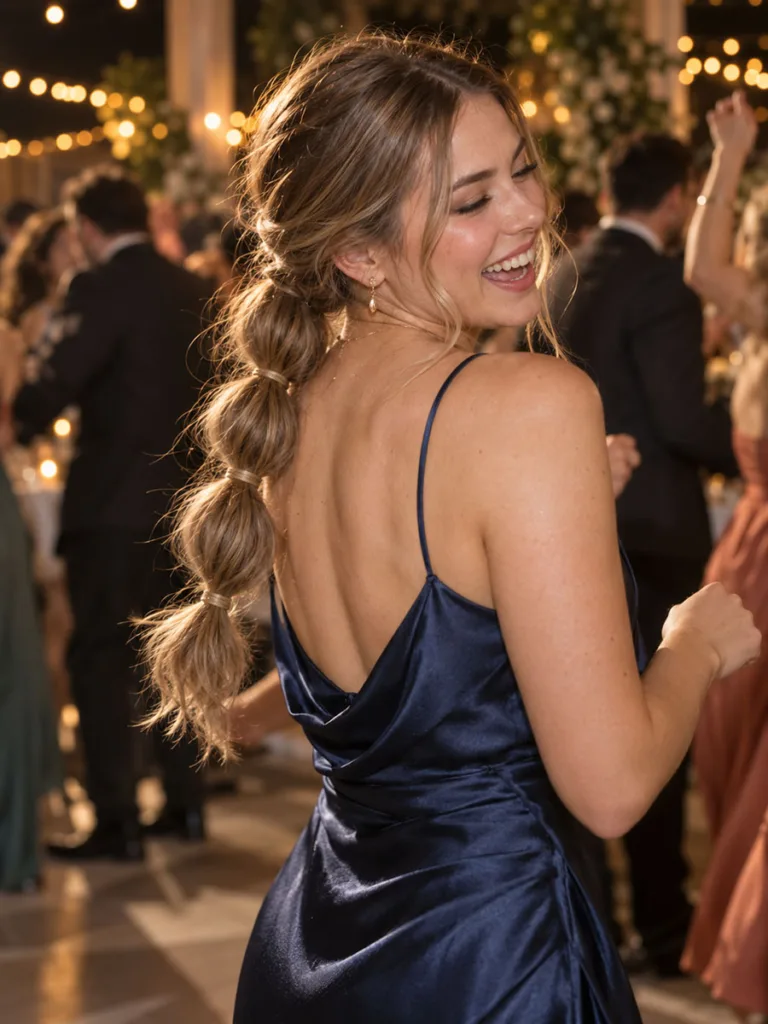
Add small elastics every three inches down the length, then gently pull each section outward to puff it into a bubble. It looks intricate, but ten minutes of practice is all it takes. Once it’s set, this one barely moves, even after hours on the dance floor. A light mist of hairspray between each bubble keeps the sections from collapsing into one another by the reception.
High Ponytail Styles for a Modern Bride Squad
A high ponytail lifts the whole face and suits daytime or beach weddings especially well. It also holds up longer once the dancing starts, since gravity works with the style instead of against it.
4. Sleek High Ponytail for Modern Venues
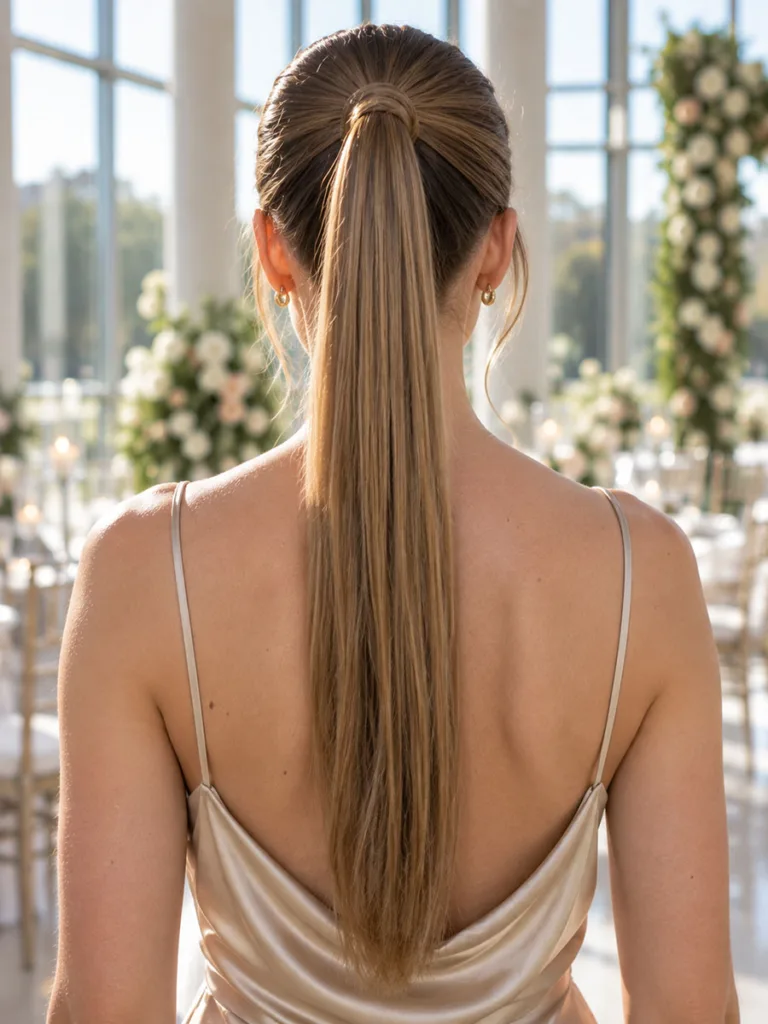
Gel the hairline flat, then pull hair into a high pony and smooth it with a fine-tooth comb. A shine spray over the top gives it that glass-like finish photographers love. Keep the part dead straight down the back for the cleanest possible line. An old toothbrush dipped in gel smooths any last flyaways along the hairline without adding extra product to the length.
5. Curly High Ponytail for Natural Texture
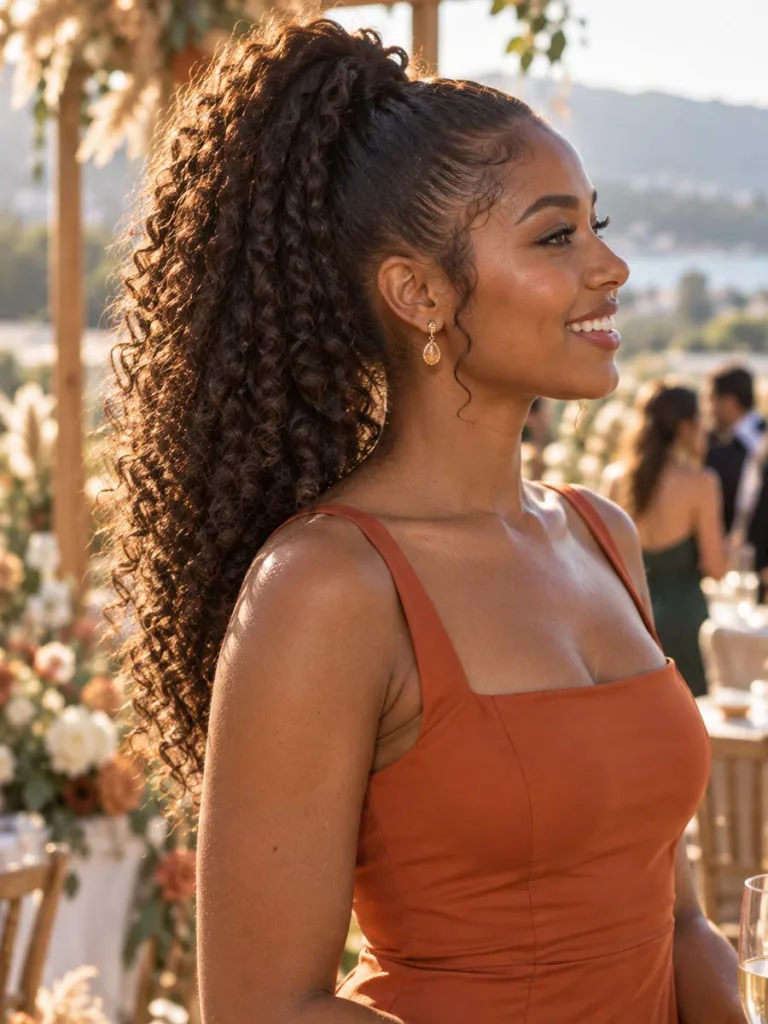
Secure the base first, then curl the length section by section with a 3/4 to 1-inch barrel, working close to the scalp for even texture. Skip the flat iron entirely here. Curly and coily hair actually holds this shape longer than straight hair does, since the natural texture grips the elastic instead of sliding against it. A curl-defining cream applied to damp hair before securing the base keeps the curl pattern intact through the whole reception.
6. High Ponytail With a Braided Wrap for Rustic Venues
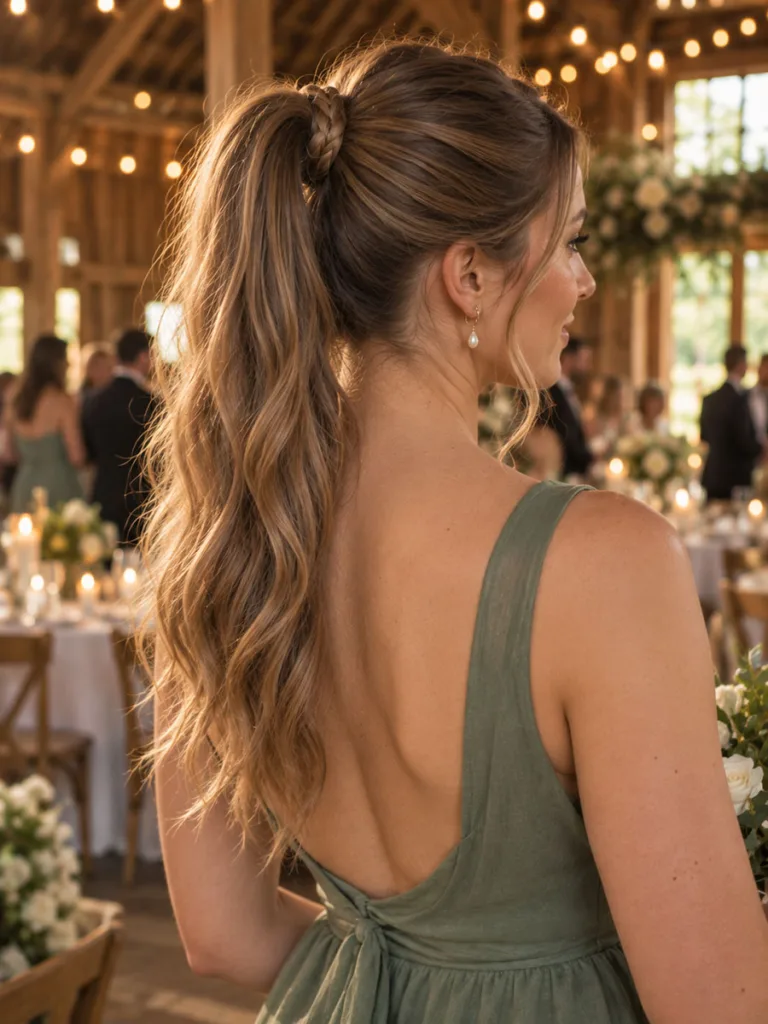
Braid a small section from underneath the ponytail, then wrap it around the elastic instead of a hair tie. It hides the base completely. Barn weddings and rustic outdoor venues are where this one really shines, and it holds up through a full night of dancing. Tuck the end of the wrapped braid under itself and pin it flat so nothing pokes out once you start moving.
Braided Ponytail Styles for Texture and Detail
A braided ponytail wedding look adds texture and visual interest without turning the whole thing into a full updo. Braids also help fine hair look fuller, and they hold styles longer through humidity, which matters most at spring and summer ceremonies.
7. French Braid Into Ponytail for Large Bridal Parties
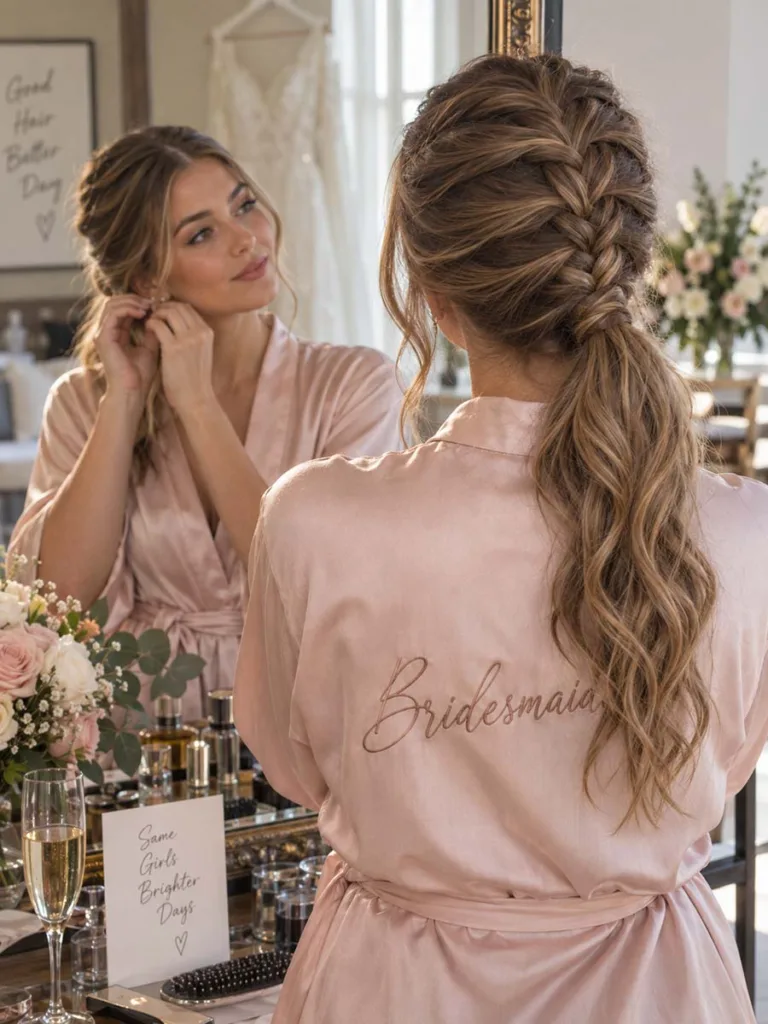
Start a French braid at the crown, weaving in new sections as you go, then let it flow into a loose ponytail about halfway down. It adds real dimension for very little extra effort. Each bridesmaid takes under 20 minutes, which matters when you’re styling a whole group before noon. Keep the sections wide rather than tight, since a looser braid photographs better than a tight, uniform one.
8. Dutch Braid Ponytail for an Edgier Look
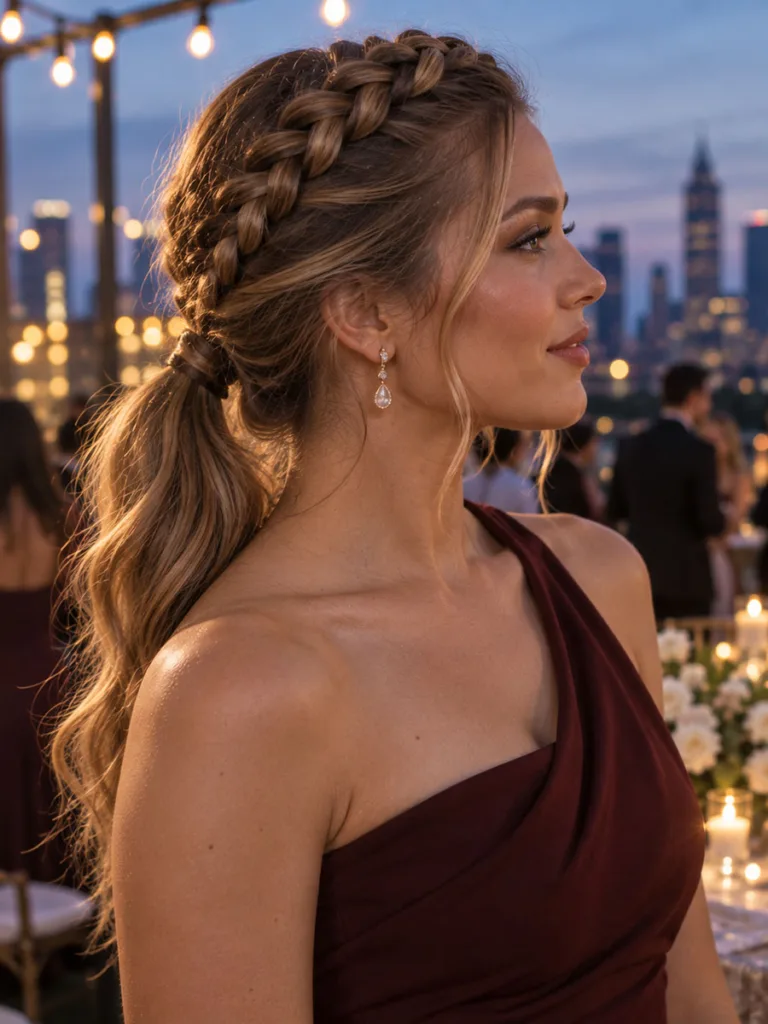
A Dutch braid sits on top of the hair instead of underneath, so the pattern actually stands out in photos rather than disappearing into it. Pair it with a low base for something quieter or a high one for more drama. Either way, it reads tougher than a classic braid. Gently tug each woven section afterward to widen the braid and add a little extra volume before securing the ponytail.
9. Fishtail Braided Ponytail for Garden Weddings
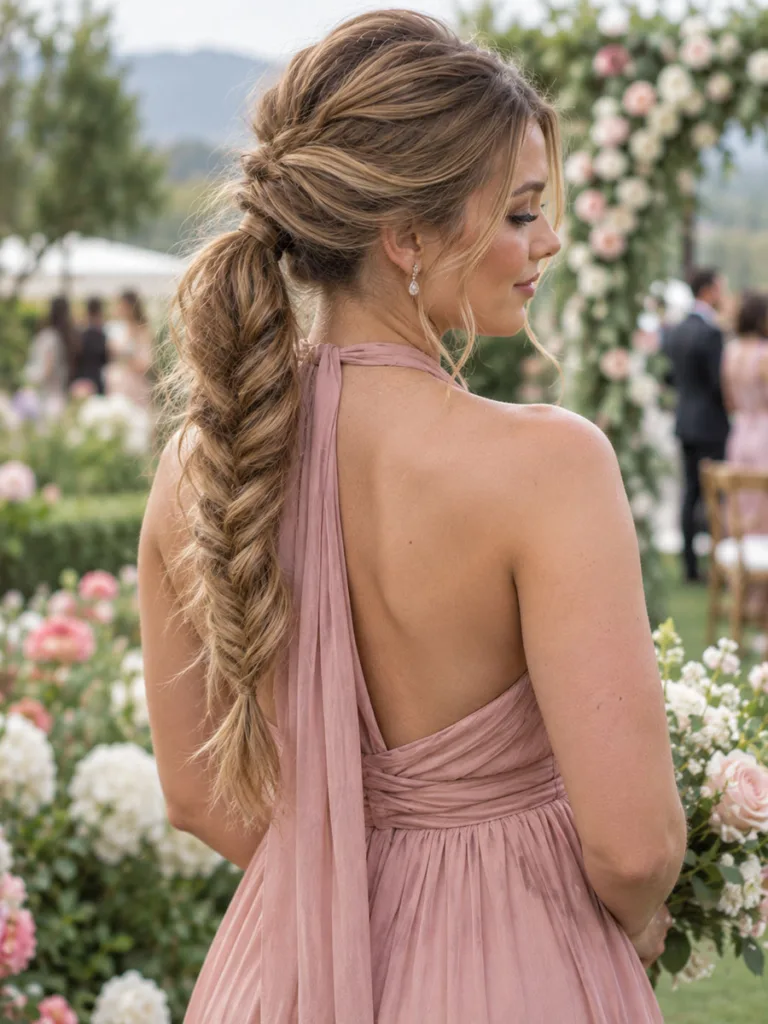
Wrap the ponytail itself in a loose fishtail braid, then pull a few small pieces free at the end for texture. Soft natural light flatters this style best. It holds up through an entire afternoon of photos, so there’s no need to touch it up before the reception starts. Pancake the braid gently with your fingers once it’s done to widen it for that undone, romantic look.
10. Braided Halo Ponytail for Flower Crowns
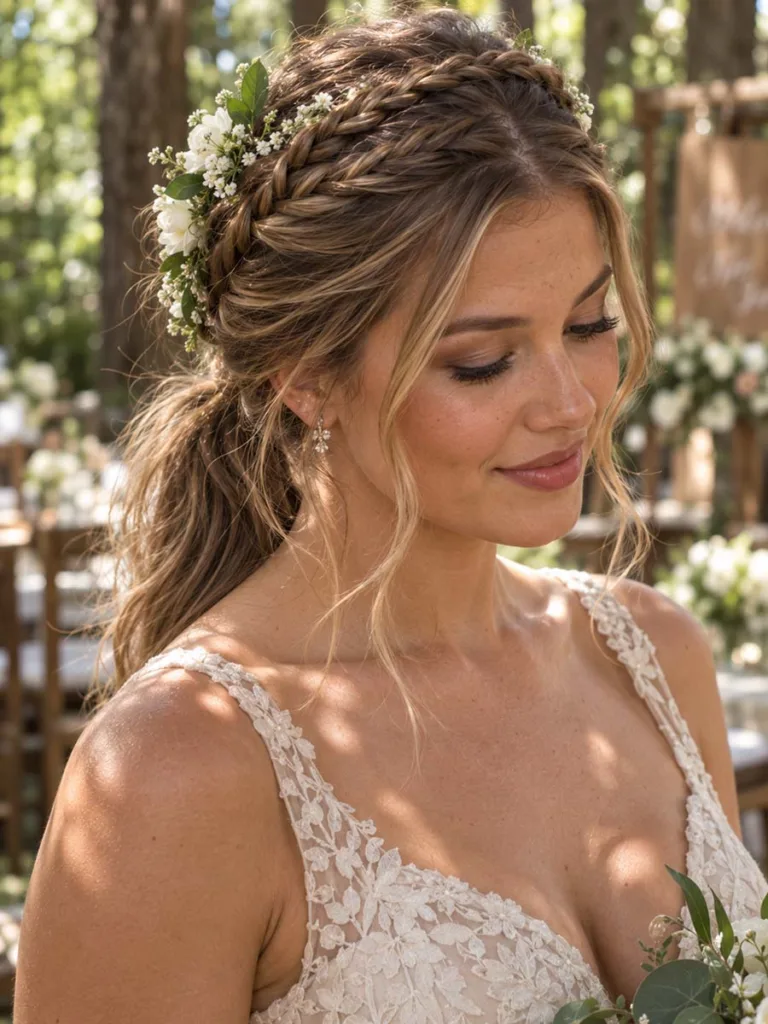
Braid two small sections from each temple, then pin them across the crown before gathering the rest into a ponytail. Flower crowns and simple pins both work beautifully on top of this base. It takes a bit longer than the others, so build extra minutes into the morning schedule. Cross the bobby pins in an X shape at each end of the braid, since that grips far better than a single straight pin.
Half-Up Ponytail Styles for Versatility
A half-up ponytail suits brides who want bridesmaids’ hair down but still tidy. It transitions well from ceremony to reception too, without needing a touch-up in between. For more options beyond the ponytail, our half-up half-down bridesmaid hairstyles guide covers braids, curls, and twists.
11. Classic Half-Up Ponytail for Tight Schedules
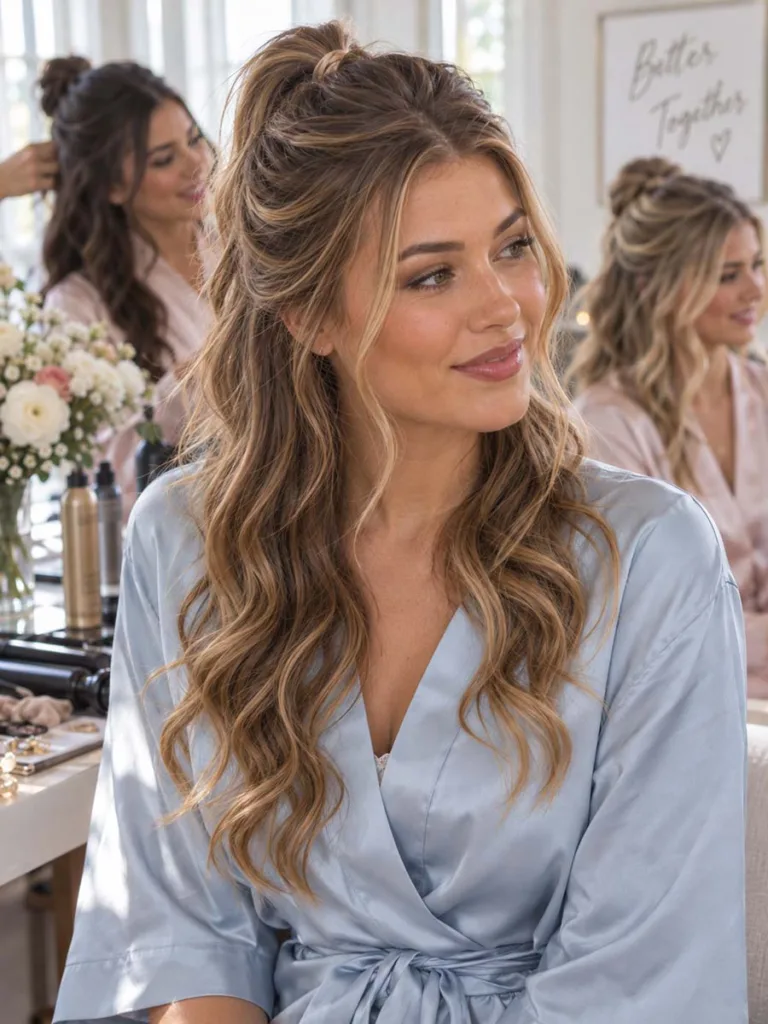
Section off the crown hair, secure it with a small elastic, then curl the rest with a 1 to 1.25-inch curling wand, holding each section for about 8 seconds. At under 10 minutes per person, this is the fastest style in the whole list, which matters most when a large wedding party is sharing one mirror and one curling iron. A quick backcomb at the crown before securing the elastic keeps this style from looking flat by the time the ceremony starts.
12. Half-Up Bubble Ponytail for Garden or Vineyard Weddings
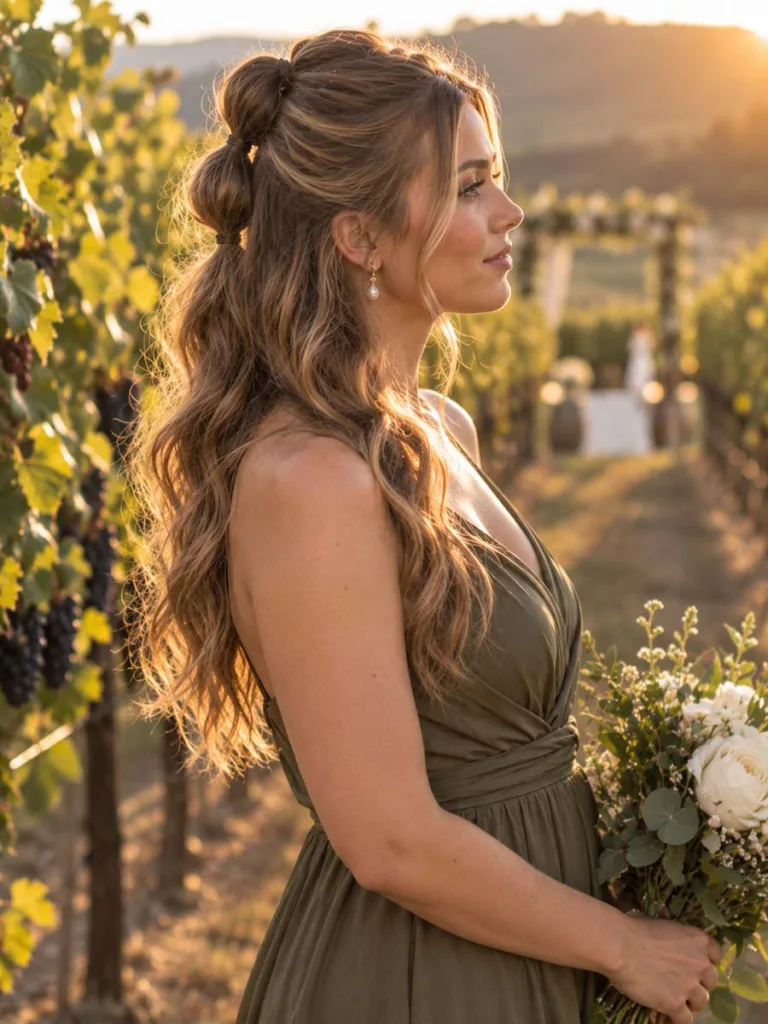
Apply the bubble technique from style three, but only to the top section, leaving the rest loose and wavy underneath. The result balances structure with softness, somewhere between polished and undone. It fits a relaxed dress code better than a fully sleek style would. Curl the loose bottom section in large, soft waves so the whole look stays cohesive instead of feeling like two separate styles.
13. Half-Up Ponytail With Twists for DIY Styling
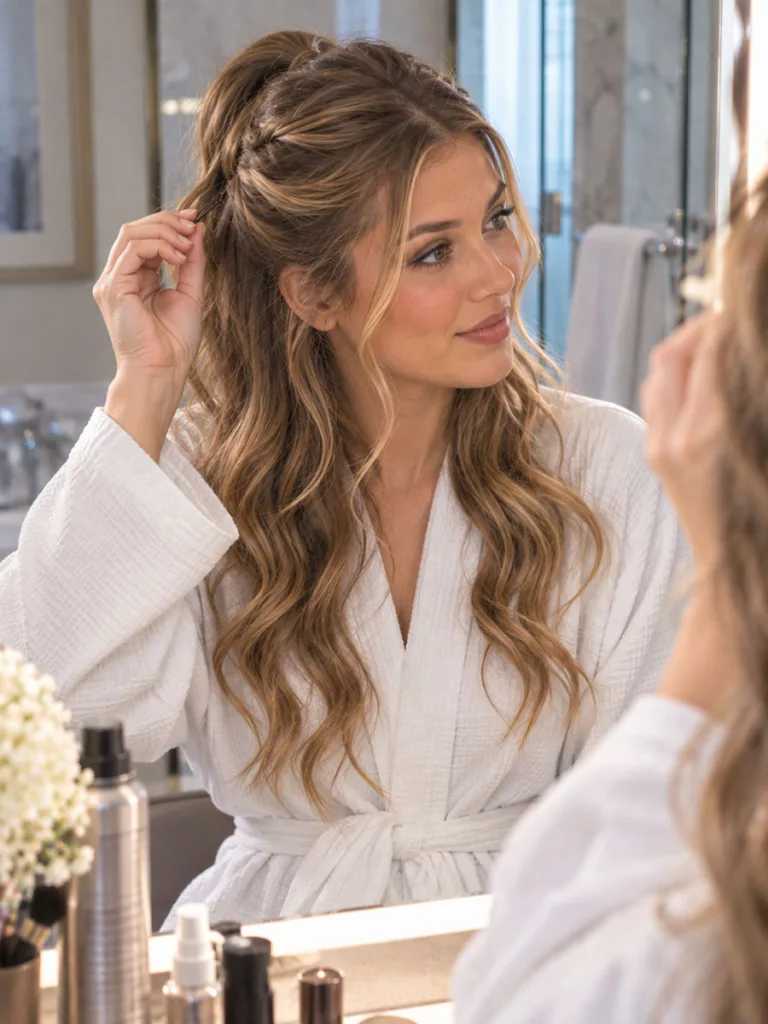
Twist two small sections from the front, then pin them into the base of a half ponytail. No braiding skill required, just bobby pins and a little patience. It’s realistic for a bridesmaid to do on herself in a hotel bathroom mirror the morning of the wedding. Twist each section away from the face, then pin it snugly but not too tight, so it doesn’t unravel by lunch.
Textured and Statement Ponytails
These final styles suit bridesmaids who want something a little different from a standard smooth tail.
14. Voluminous Teased Ponytail for Fine Hair
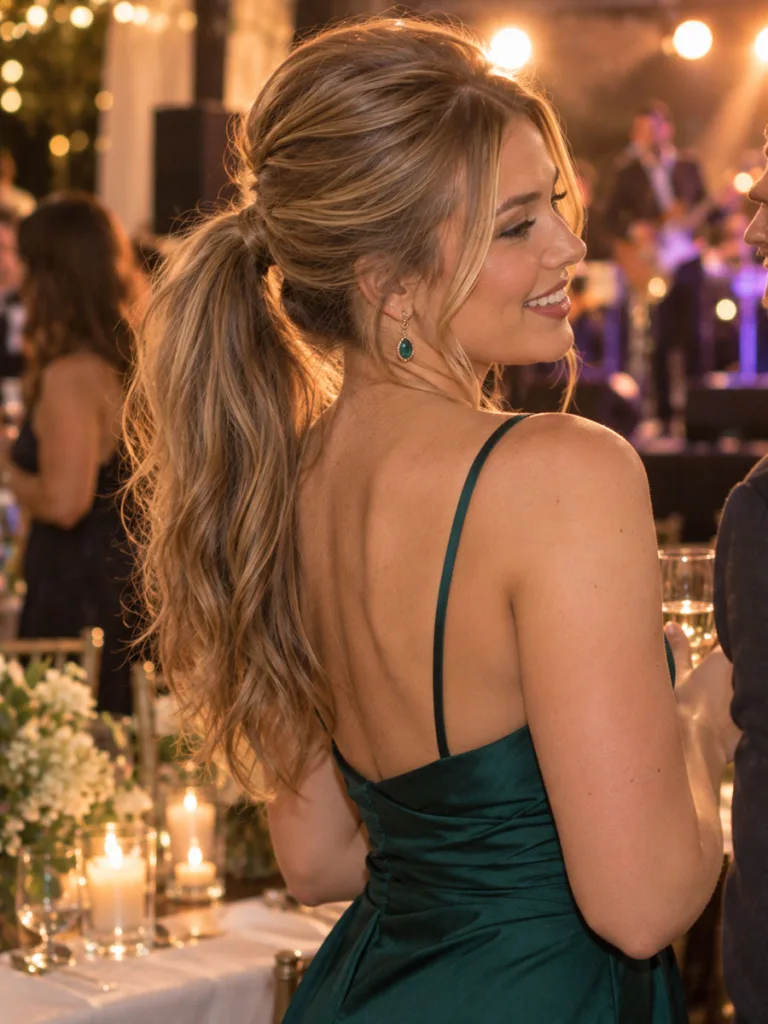
Backcomb the crown before securing the base, focusing on the roots for lift. Fine or thin hair needs this extra body to read on camera under flash and stage lighting. Finish with a light-hold spray, applied only at the roots, so the volume lasts past the first dance. Smooth just the top layer of hair over the teased section afterward so the lift stays hidden and the finish looks neat.
15. Wrapped Ribbon Ponytail for Color Coordination
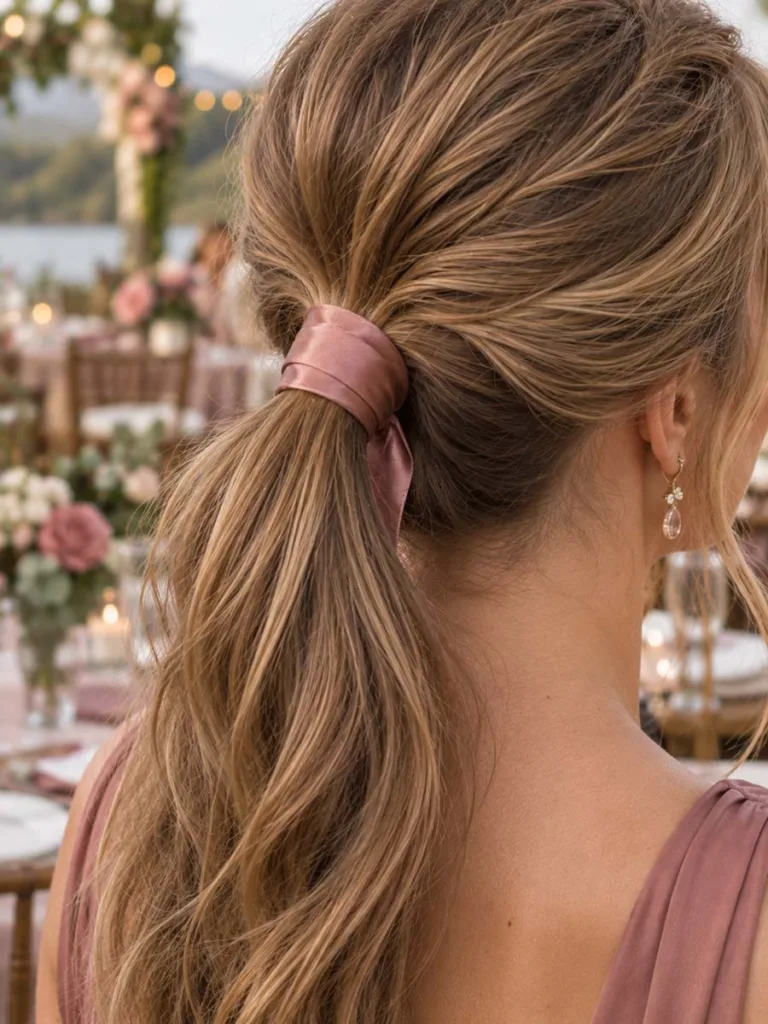
Wrap a thin satin ribbon around the elastic in one of the wedding colors. It ties every bridesmaid’s hair to the same palette, even when their base styles differ. Try it on the sleek low pony from style one or the messy bubble pony from style three. Secure the ribbon’s tail with a small clear elastic or a bobby pin underneath so it doesn’t work loose while dancing.
How to Make Any Ponytail Last All Day
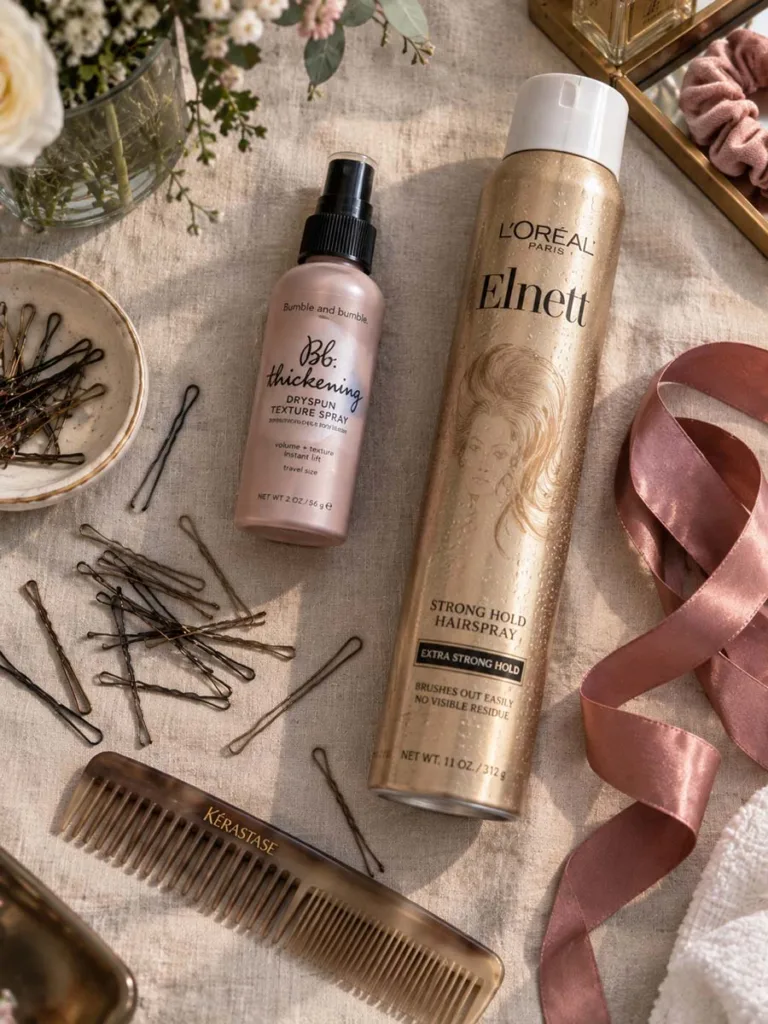
The style matters less than the prep work behind it. Follow these steps so hair survives dancing, hugging, and outdoor heat without needing a mid-reception fix.
Prep Hair Before You Style
Wash hair the night before the wedding. Fresh-washed hair is too slippery to hold a tight base. Use a texturizing spray at the roots before pulling hair back, since it gives the elastic something to grip onto.
Set the Base So It Won’t Slip
Backcomb the crown slightly, even under a sleek style, to stop the classic flat, thin look by hour three. Set the elastic with a bobby pin through the base for extra insurance against slipping. Finish with a strong-hold hairspray, focused on the hairline and the wrap section. Pack a small touch-up kit with pins, spray, and a fine comb for each bridesmaid too.
A 2023 survey by The Knot found that 78% of wedding parties get ready three or more hours before the ceremony, which means hair often needs to survive eight or more hours total. Building in hold from the start matters more than any touch-up later, especially outdoors, where wind and humidity work against every style.
Coordinating Ponytails Across the Bridal Party
Matching every bridesmaid’s hair exactly rarely looks as good as brides expect it to.
Pick One Base Style, Not One Identical Look
Agree on a single base style, like a low sleek ponytail, and let each bridesmaid adjust it for her own hair length and texture. This keeps photos cohesive without forcing curly hair to look perfectly straight or thin hair to fake volume it doesn’t have. Small accessories, like matching ribbons, pins, or fresh flowers near the base, tie the group together visually even when the technique underneath differs slightly. Keep any hairpieces below the crown so they don’t compete with the bride’s veil in group photos.
Test the Style Before the Real Day
Ask each bridesmaid to bring reference photos to a trial run at least three weeks before the wedding. This avoids surprises later and gives the stylist time to see what actually holds on each texture. If the wedding spans different climates, like a destination wedding somewhere humid, test the style outdoors at the trial instead of in a dry salon. Humidity behaves differently on fine hair than on thick or coily hair, and a style that holds indoors can fall apart within an hour outside.
Common Mistakes to Avoid
Even simple ponytails go wrong in predictable ways.
Skipping the Strand Test
Hair that looks fine and loose can slip once it’s pulled tight. Test the exact style on each bridesmaid a few days early. The morning of the wedding is too late to discover it slips.
Overloading Fine Hair With Product
Heavy product weighs down volume instead of adding it. Use a light hand on fine hair, and save the strong-hold spray for the very end.
Picking a Style From a Single Photo
One reference photo rarely accounts for everyone’s actual hair length. Check the chosen style against each bridesmaid’s hair before the trial run, so nobody needs a last-minute change.
Frequently Asked Questions
1. What is the easiest ponytail style for a large bridal party?
A classic half-up ponytail is the fastest option, taking under 10 minutes per person. It works on nearly every hair length, and it doesn’t require any braiding skill.
2. How do you keep a bridesmaid ponytail from going flat?
Backcomb the crown before you secure the base, then set it with a strong-hold hairspray. If it’s already flat by the reception, touch up with dry shampoo at the roots.
3. Do ponytails work for curly or coily hair?
Yes, and a high curly ponytail actually holds its shape longer than straight hair does. The natural texture grips the elastic more securely.
4. Should bridesmaid ponytails match the bride’s hairstyle?
They should complement the bride’s look, not copy it exactly. A shared base style with individual texture usually works better than an identical match.
5. How much does a professional bridesmaid ponytail styling cost?
Prices vary by region, but most salons charge between $50 and $120 per person for wedding-day styling. That usually includes prep and touch-up spray.
Conclusion
Ponytail bridesmaid hairstyles give every bridesmaid a polished look that survives a full wedding day without constant touch-ups. The best pick fits each bridesmaid’s own hair length and texture, more than it fits a single group theme. Ribbons, pins, or fresh flowers tie the look together without forcing an identical style on curly, straight, and fine hair alike. A small touch-up kit for every bridesmaid earns its keep, since dancing and hugging test even the strongest hold. Pick one base style from this list, book a trial run three weeks out, and let your stylist adjust it for each person’s hair type.